The amazing creations in Minecraft warrant amazing photos to be taken of them to be shared on the internet. You don't have to be a world-renowned photographer to take breathtaking photos in Minecraft, you just need to know a few helpful tips.
This guide will teach players a few simple tips and tricks to take the perfect screenshot. This guide will teach players how to choose the right angle, set the right lighting, and how to use simple shaders.
Defining Your Subject in Minecraft

Before taking the perfect photo, players must find the "perfect" subject to take a photo of. For this tutorial, we will be taking photos of this nice little farmhouse that is part of a naturally generated village. This is the base image so none of the fancy techniques have been applied yet.
Players may benefit from finding various test subjects to practice their photography skills on. While this farmhouse is a very simple build, it is the perfect subject to showcase how a few simple tricks can drastically enhance the way subjects are viewed.
Finding a Better Angle in Minecraft

The first step in taking better screenshots is by finding a better angle. Taking photos straight can make your subject seem boring and can often obscure portions of builds not giving viewers the "full picture".
Compared to the first image, this new image reveals a small pond inside the animal pen as well as decorative hay bales. Finding a different more revealing angle can add character to an image and can make an image more interesting to look at.
A simple way to find a better angle is to take a screenshot from higher up looking down, or from a lower angle looking up. Try to avoid taking a screenshot from the ground level.
Applying Simple Shaders to Minecraft

A great quick way to improve the quality of screenshots is to max out the video setting, but the best way to enhance an image is to apply shaders. Shaders are graphical enhancers downloaded from the 3rd parties on the internet. Mostly they make the lighting in-game look more dynamic and realistic.
Compare the last image to the one above and you will easily see the effect a simple shader can have on images taken in-game. Shaders do take a toll on computers, so if your computer is a "potato" your game may seize up on you when attempting to use shaders.
The shader used in the image above is the Sildurs Vibrant Shader which can easily be found online.
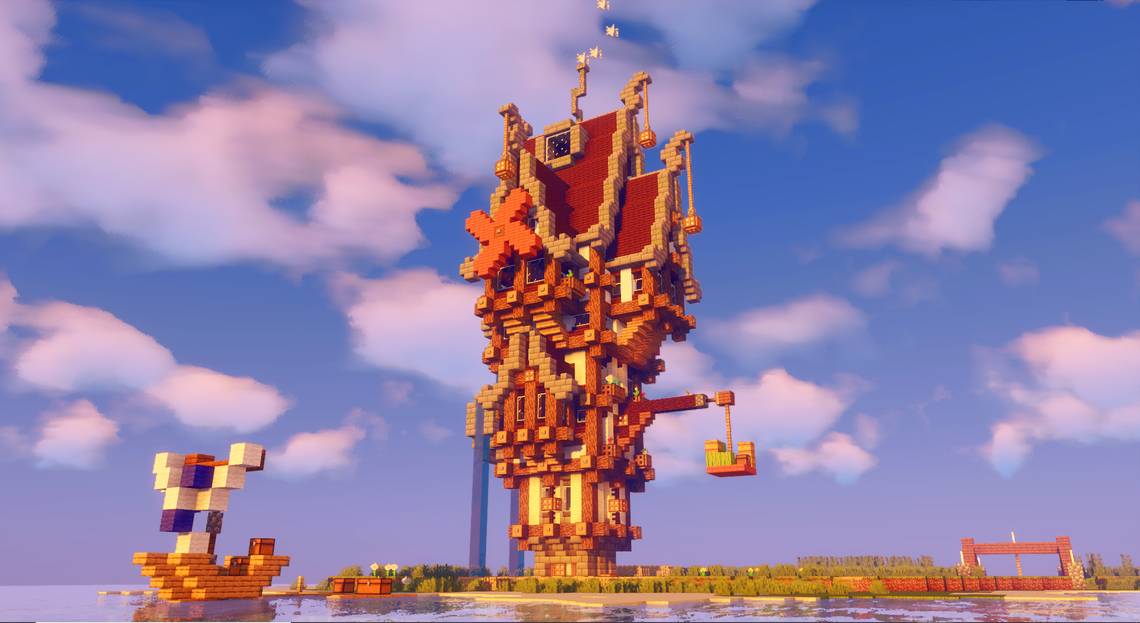
The Perfect Lighting in Minecraft

While shaders are a great way to improve the graphical quality of an image, the perfect lighting can really set the mood for an image and can make the overall image look and feel more interesting. A great way to do this is to set the time of day to Sunrise or Sunset. This will flood the game with beautiful orange and pink colors that make the subjects of the images pop.
If you are in survival mode you will have to wait for these times of the day. But if you are in creative, or have cheats enabled, you can use the "/time set" command to set the time of day. For sunrise use "/time set 0" and for sunset use "/time set 12000". Setting your time around these intervals will give the player enough time to wait for just the right moment to snap the perfect photo.
Changing Your POV in Minecraft

No, the image above is not just a zoomed-in version of the last image. It is a photo taken from the same angle with the Point of View or POV changed. This is a simple yet very effective tip which is the most important tip on this list. Even without shaders or fancy lighting, changing the POV of an image can make the biggest difference while taking screenshots.
A player's POV can be changed via a slider in the video settings. For the best results, a player should set their POV somewhere between 30 and 40.
And that's all there is to it. Look at the first image of the article and compare it to the last. Just a few simple steps can greatly enhance the overall quality of an image, and with a little bit of practice, these steps will become second nature.
Minecraft is available on PC, Mac, PS4, Xbox One, Nintendo Switch, and Mobile Devices.