Like most other mainstream operating systems, macOS also offers a system-wide dark mode that makes it easier to work at night. The feature was first introduced to macOS with 10.10 Yosemite and has been available in all subsequent versions ever since. Users can easily turn it on from the Settings menu on MacBooks and iMacs.
The dark mode setting is also available on Android, iOS, Windows, and many popular Linux Distros. In macOS, it works not only on system windows and settings panels but also across all apps that come bundled with the computer. Third-party apps can also adopt it, although not all apps are compatible. Here's how users can set it up on macOS Monterey, Big Sur, and older versions of the OS.
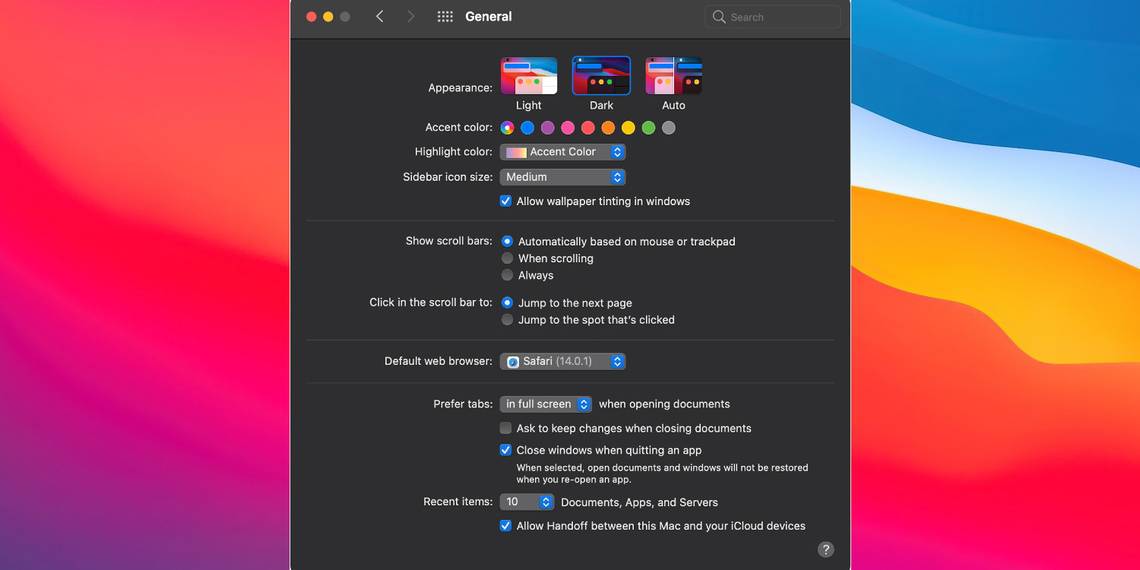
To enable dark mode on macOS Monterey and Big Sur, click on the Apple icon at the top-left corner of the desktop and select 'System Preferences' in the drop-down menu. On the System Preferences page, select 'General' and then select the 'Dark' option in the 'Appearance' section on the next page. This will activate system-wide dark mode on the device immediately. Users can also schedule Dark Mode to activate and deactivate automatically. To do that, select 'Auto' instead of 'Dark.' This will switch on dark mode automatically at sunset and disable it at sunrise the next day.
Switch On Dark Mode Using Siri

Dark Mode can also be switched on using Siri on compatible Macs. To do that, first, click on the 'Siri' button on the Menu Bar (or the Siri button on the Touch Bar in compatible MacBook Pro devices). Now say a command, such as "Hey Siri, turn on dark mode." This should enable dark mode on that device right away. Users can also turn on the dark mode from the Mac Control Center. To do that, click on the 'Control Center' button in the Mac's menu bar and select 'Display' on the drop-down menu. Here, click on the 'Dark Mode' button to activate the feature.
While the process of enabling the dark mode is similar in macOS Mojave and Catalina, it's slightly different in older versions like Yosemite to High Sierra. In these older versions of macOS, open 'System Preference' and go to 'General' as usual, and then check the box next to 'Use dark menu bar and Dock.' This will enable dark mode in these older versions of macOS. To revert to the more traditional light mode, retrace the steps and under 'System Preferences' > 'General,' select 'Light' instead of 'Dark' or 'Auto' under 'Appearance.'
Source: Apple