Quick Links
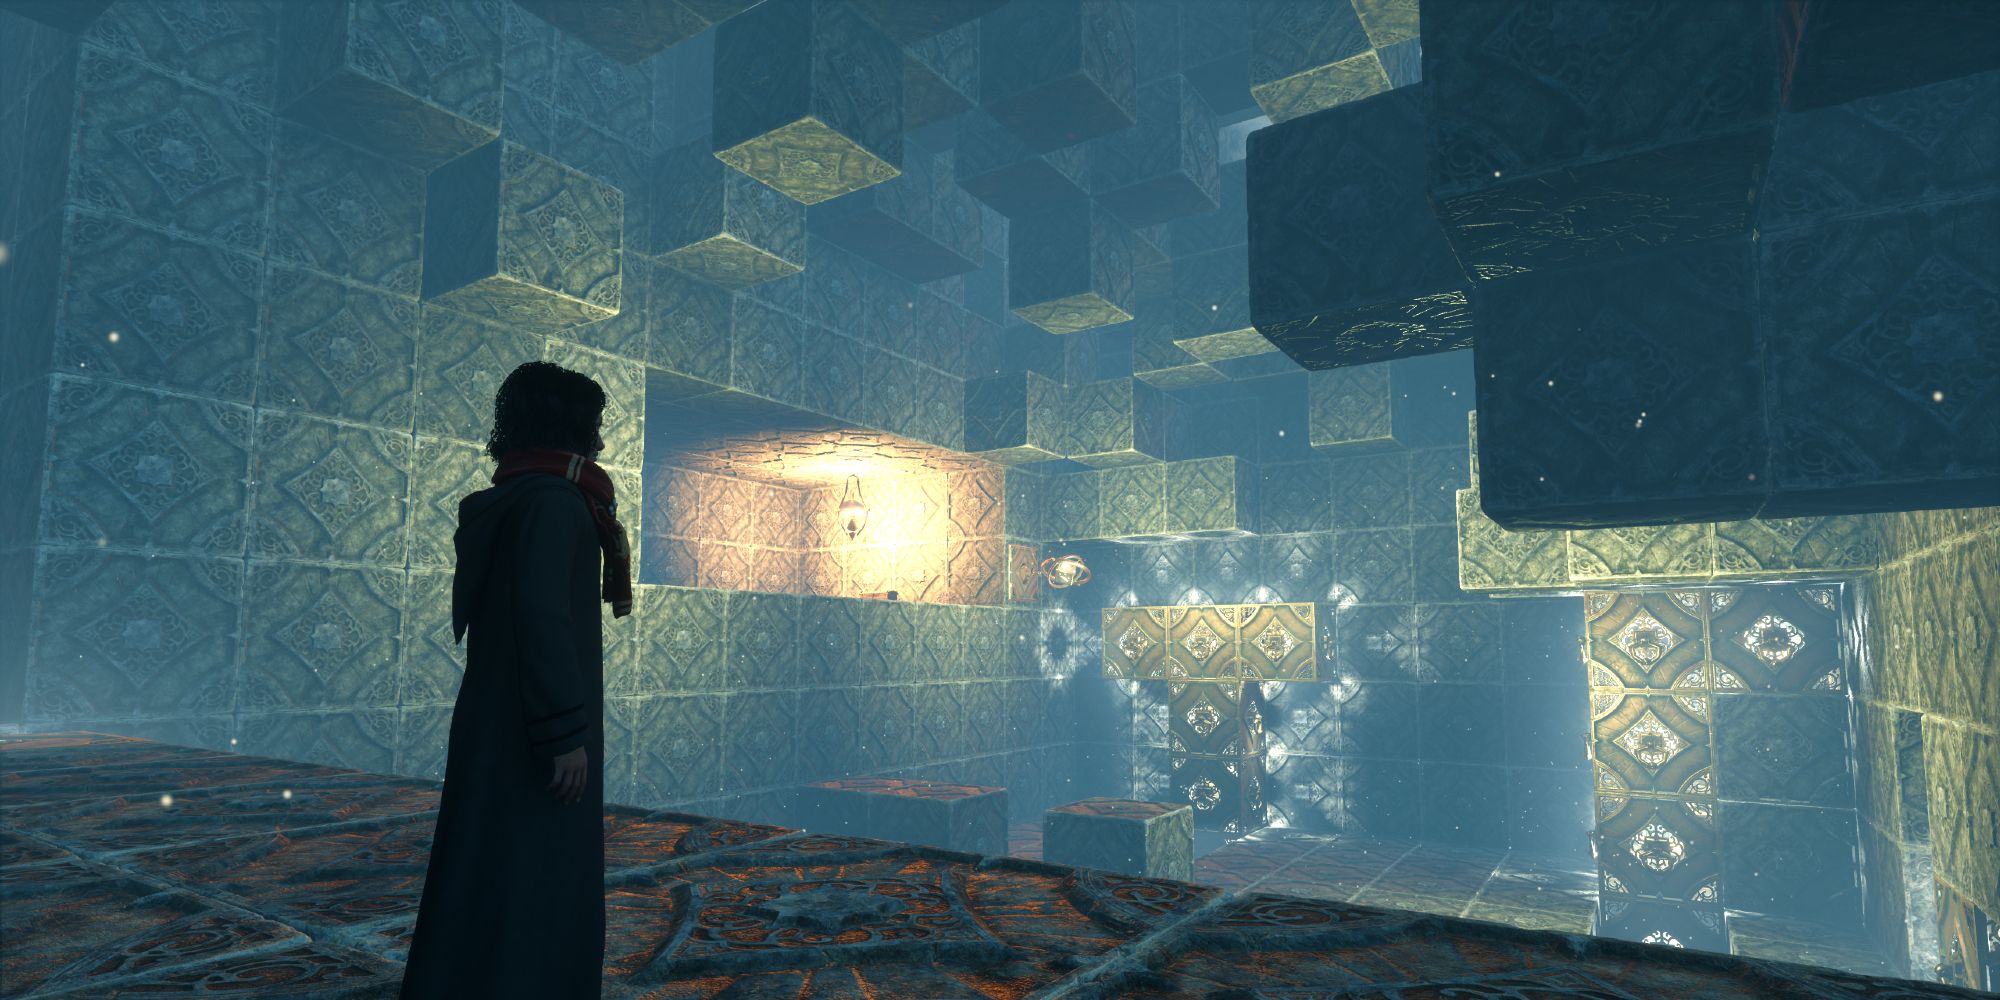
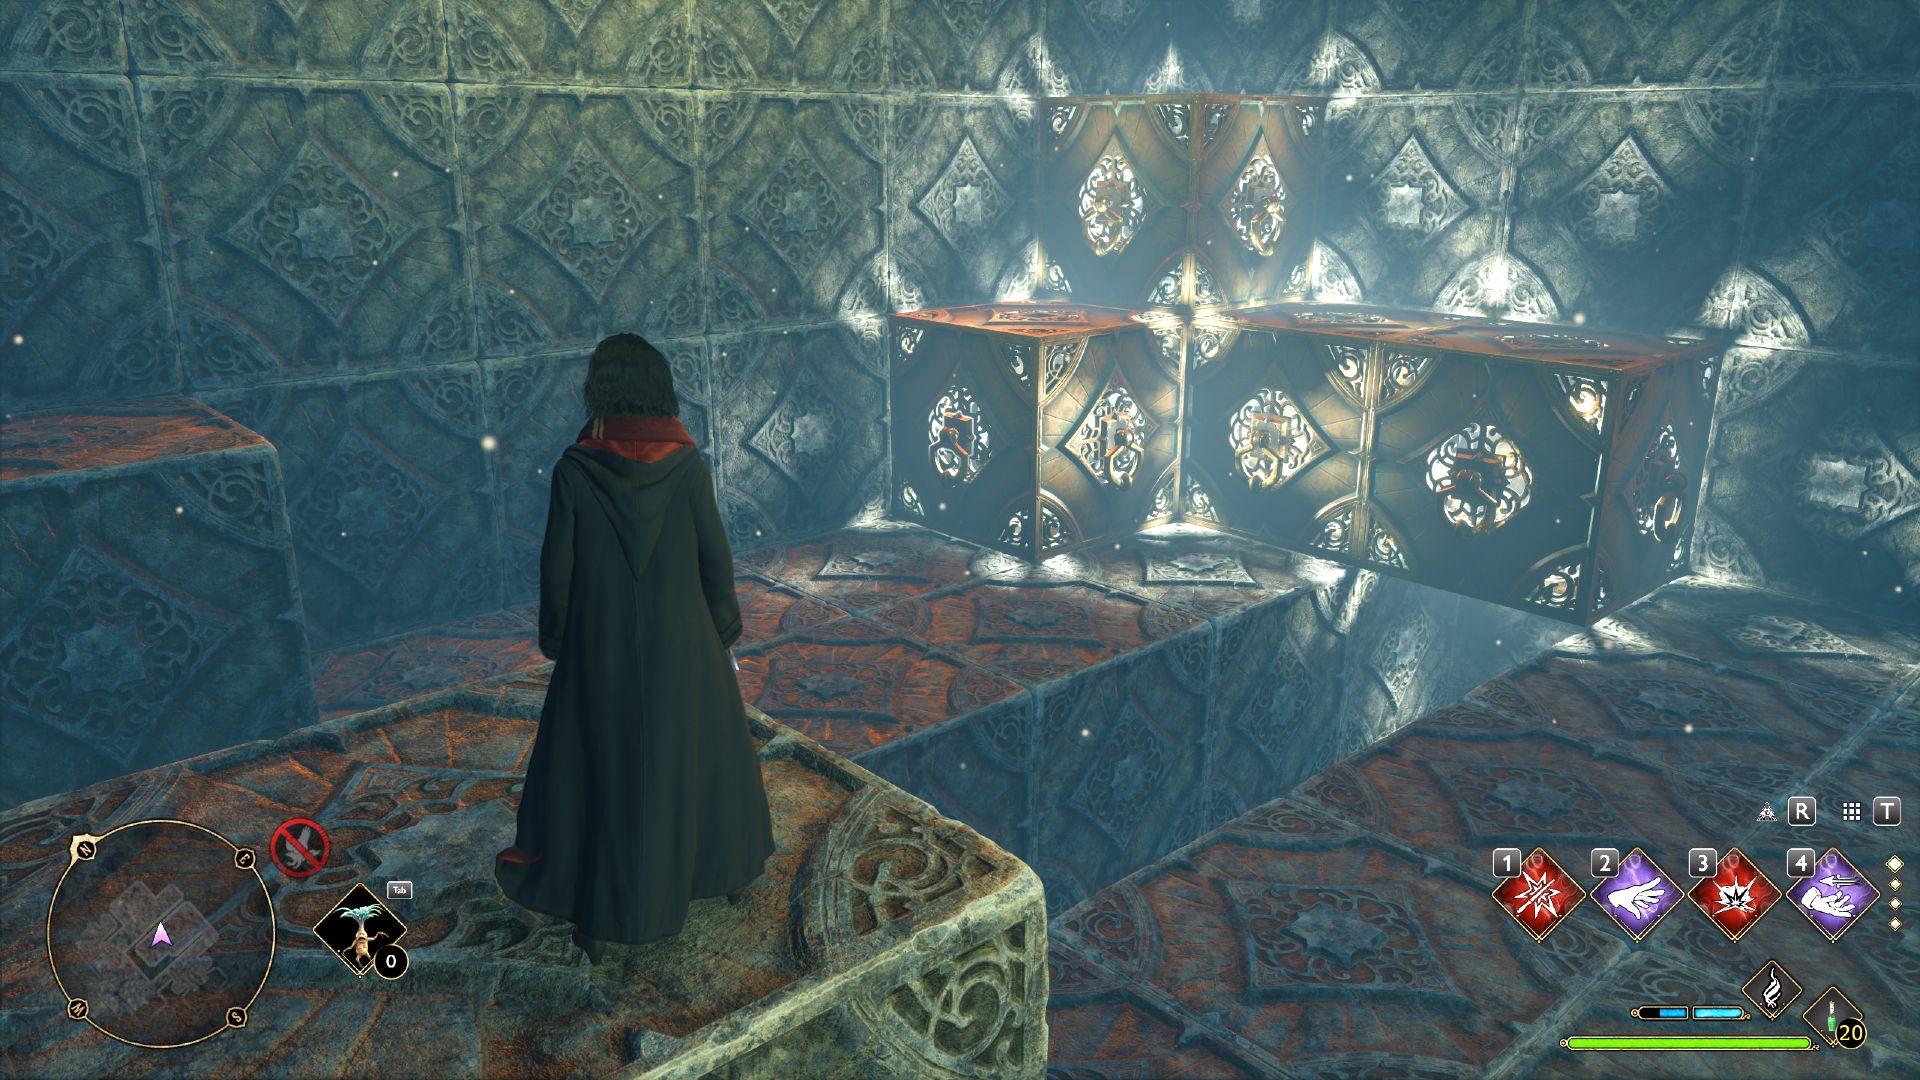
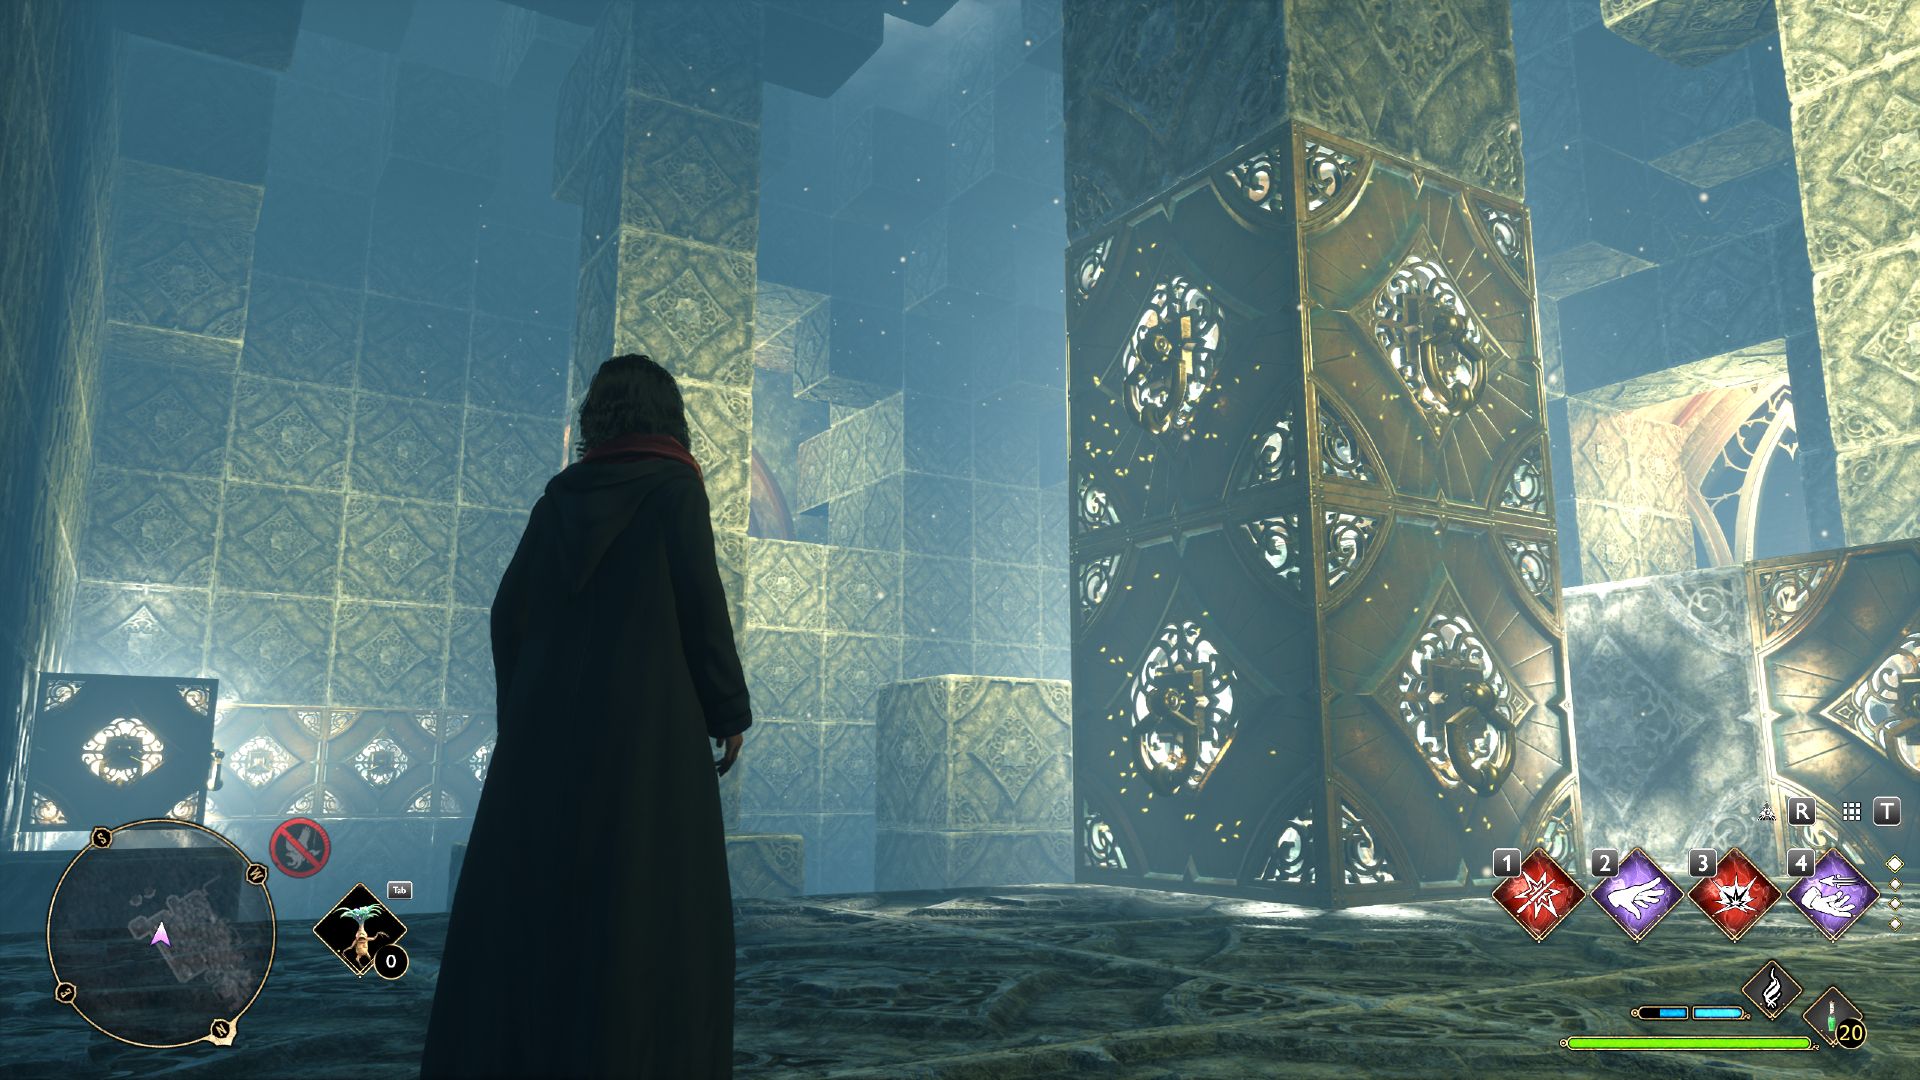
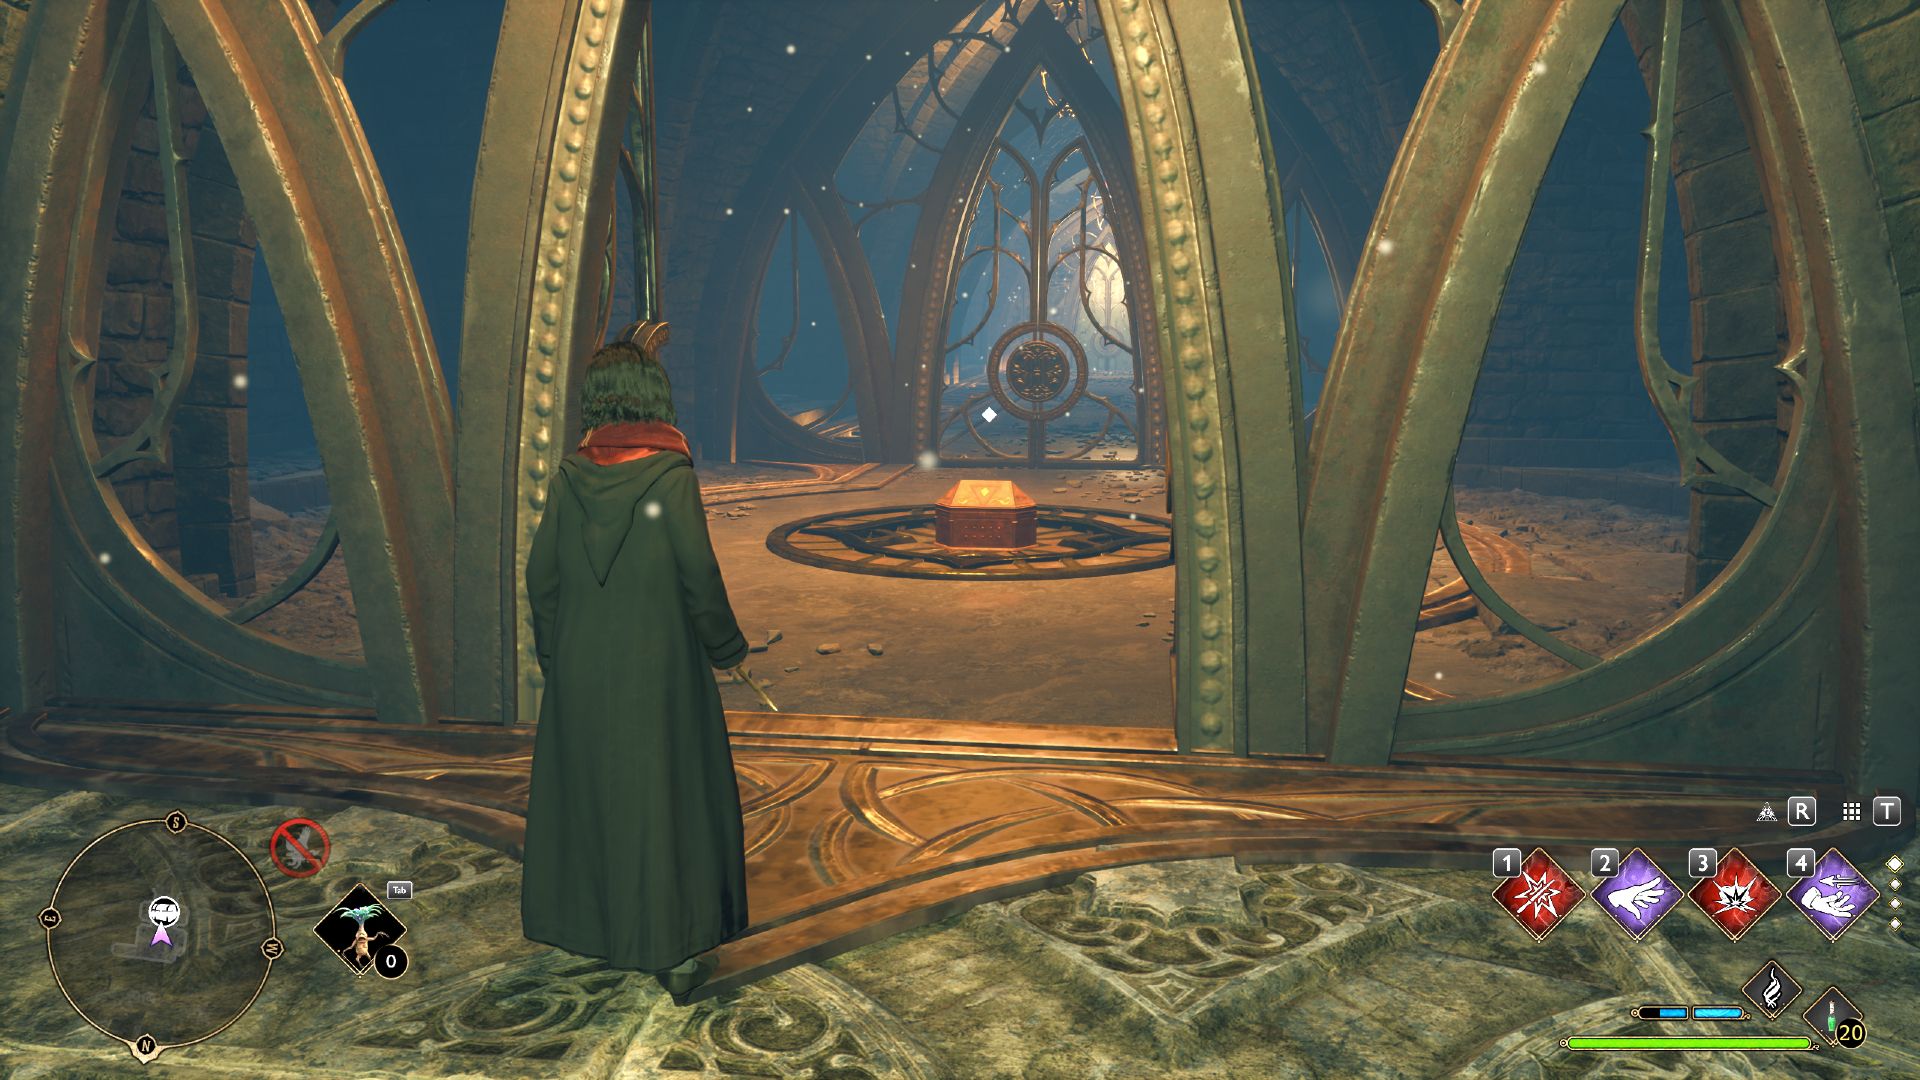
Hogwarts Legacy is filled with challenging puzzles for you to solve, but they aren't more challenging to crack than the Depulso Puzzle Rooms. These two secret rooms are hidden within Hogwarts Castle and feature complex multi-stage puzzles that involve moving metal blocks using Accio and Depulso. To solve these puzzles and claim useful gear and rare rewards, you must combine your wits with skill in the magical arts. However, the complexity of Depulso Puzzle Room 2 may leave some you frustrated and searching for answers.
To find the Depulso Puzzle Rooms, you must first have completed The Helm of Urtkot main quest and Hogwarts Legacy’s Hall of Herodiana side quest. This involves speaking to Ravenclaw student Sophronia Franklin near the Charms Classroom. Sophronia will chat to you about Herodiana Byrne, a legendary witch who mastered Depulso, and ask you to complete a secret puzzle chamber left behind by Herodiana. After completing the Depulso Puzzles in the Hall of Herodiana, you can then search for Depulso Puzzle Rooms 1 and 2.
Where To Find Depulso Puzzle Room 2
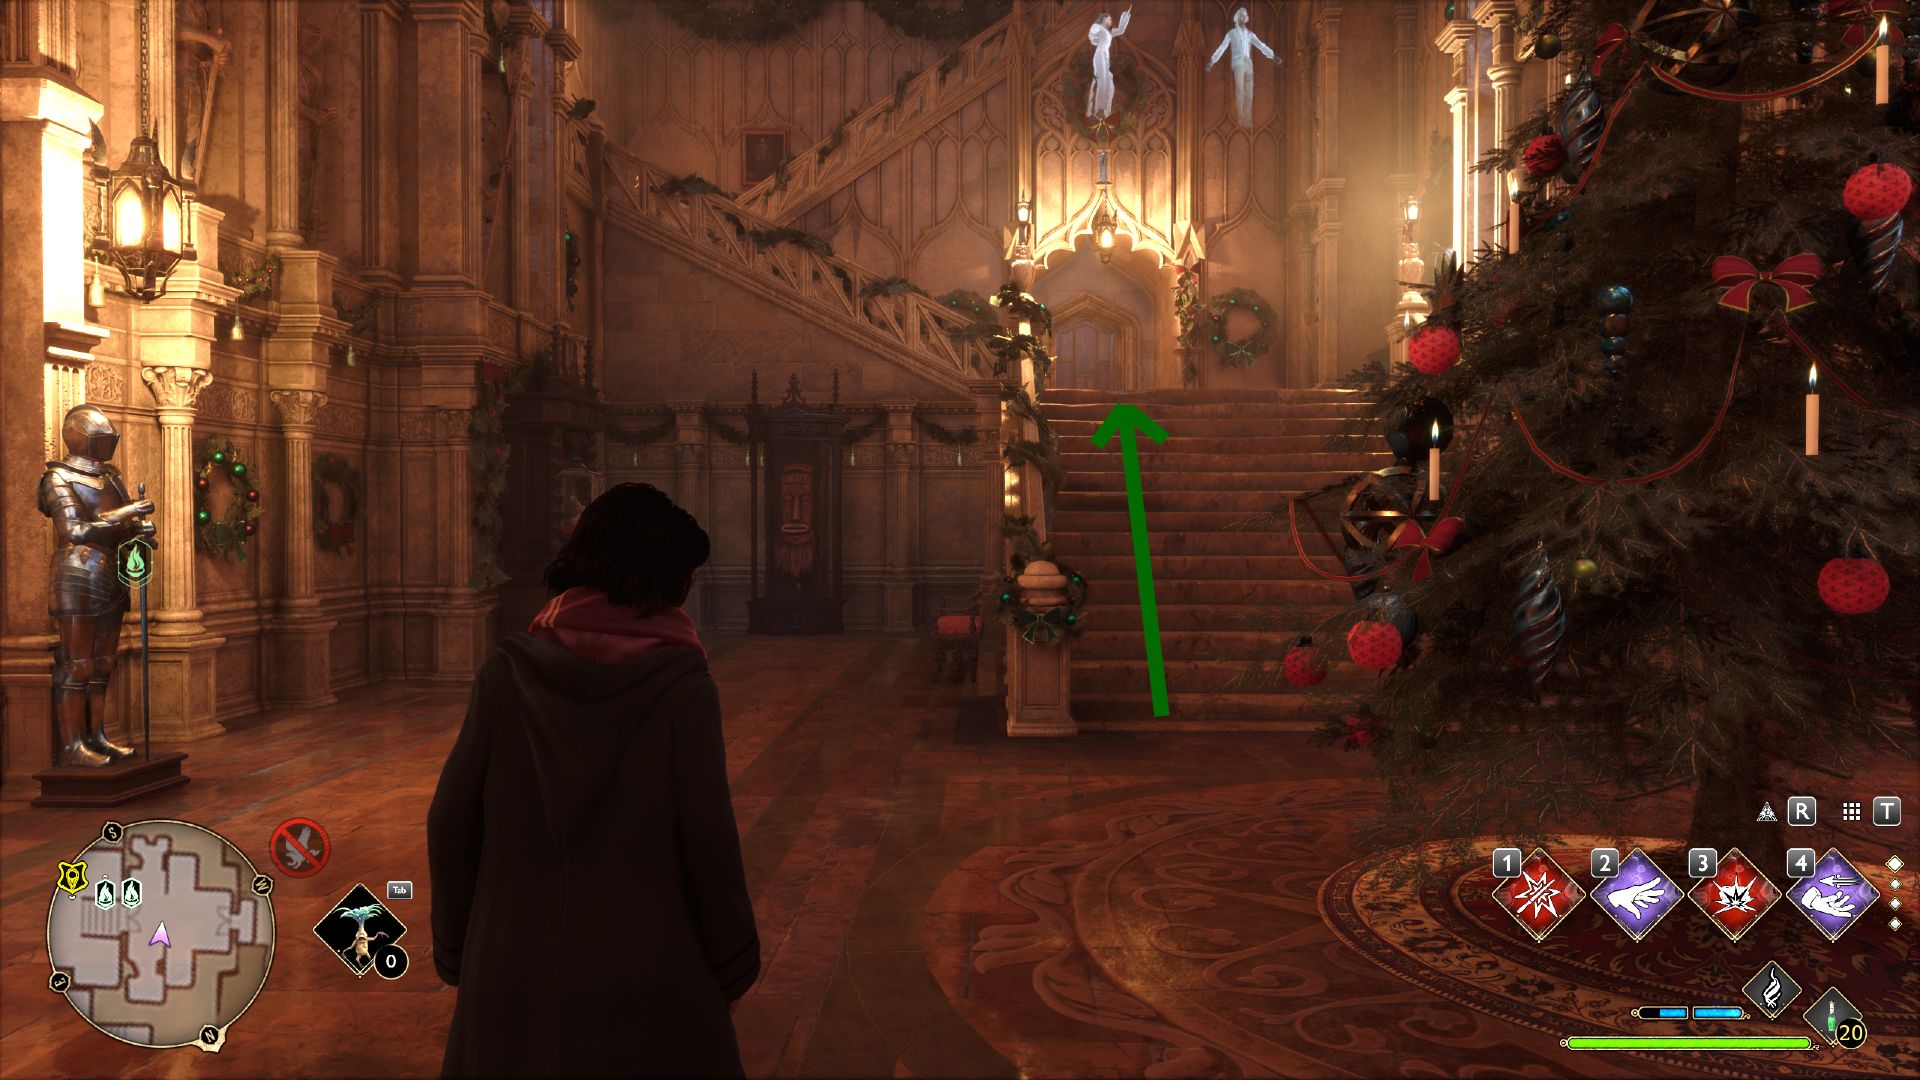
The second Depulso Puzzle Room is located near the Bell Tower Courtyard Floo Flame in the Bell Tower Wing of Hogwarts. You may already be familiar with this area from searching for Hogwarts Legacy’s hidden Field Guide pages and the Bell Tower Wing, which is filled with interesting magical artifacts. After arriving at the Floo Flame, you should turn left, head up one set of stairs, and go through the door ahead.
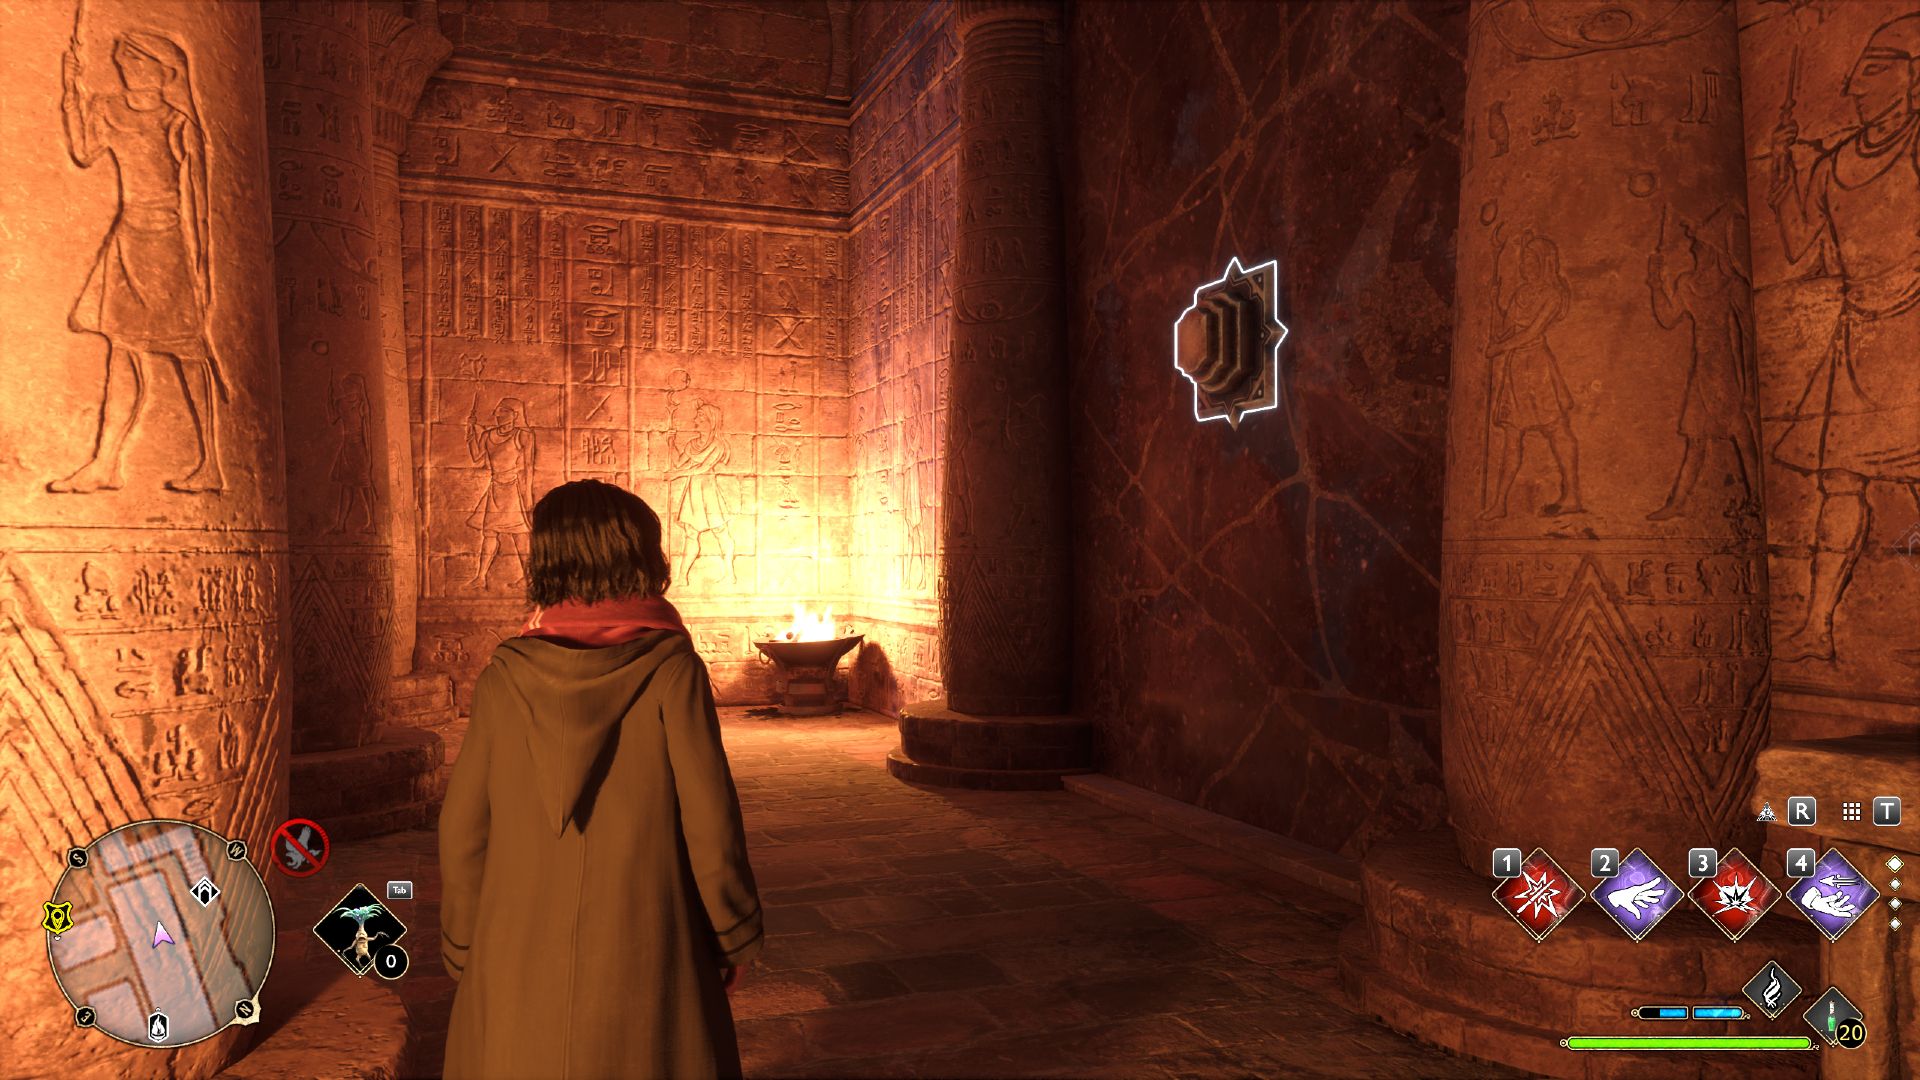
You will reach the History of Magic classroom with a door with a Level I Alohomora Lock. After picking the lock, you can go through the door to an Ancient Egypt-themed room. On one of the walls on the right, there’s a switch that can be triggered with Depulso, opening the door to Depulso Puzzle Room 2.
Depulso Puzzle Room Basics
Getting into Depulso Puzzle Room 2 requires Alohomora, so you need to have helped Hogwarts caretaker Gladwin Moon find hidden Demiguise Statues in Hogwarts, Hogsmeade, and the Highlands. This is part of The Caretaker’s Lunar Lament, a quest that appears after you have completed the first trial. Luckily, you only need the most basic version of the Unlocking Charm.
In Depulso Puzzle Room 2, you should keep two things in mind. First, a switch can be triggered with Basic Cast to send all blocks back to their starting positions. This can be used for a quick reset if players make the wrong move. Second, players should stay clear of moving blocks, as getting hit results in an inconvenient knockout.
How To Complete The First Set Of Puzzles In Depulso Puzzle Room 2
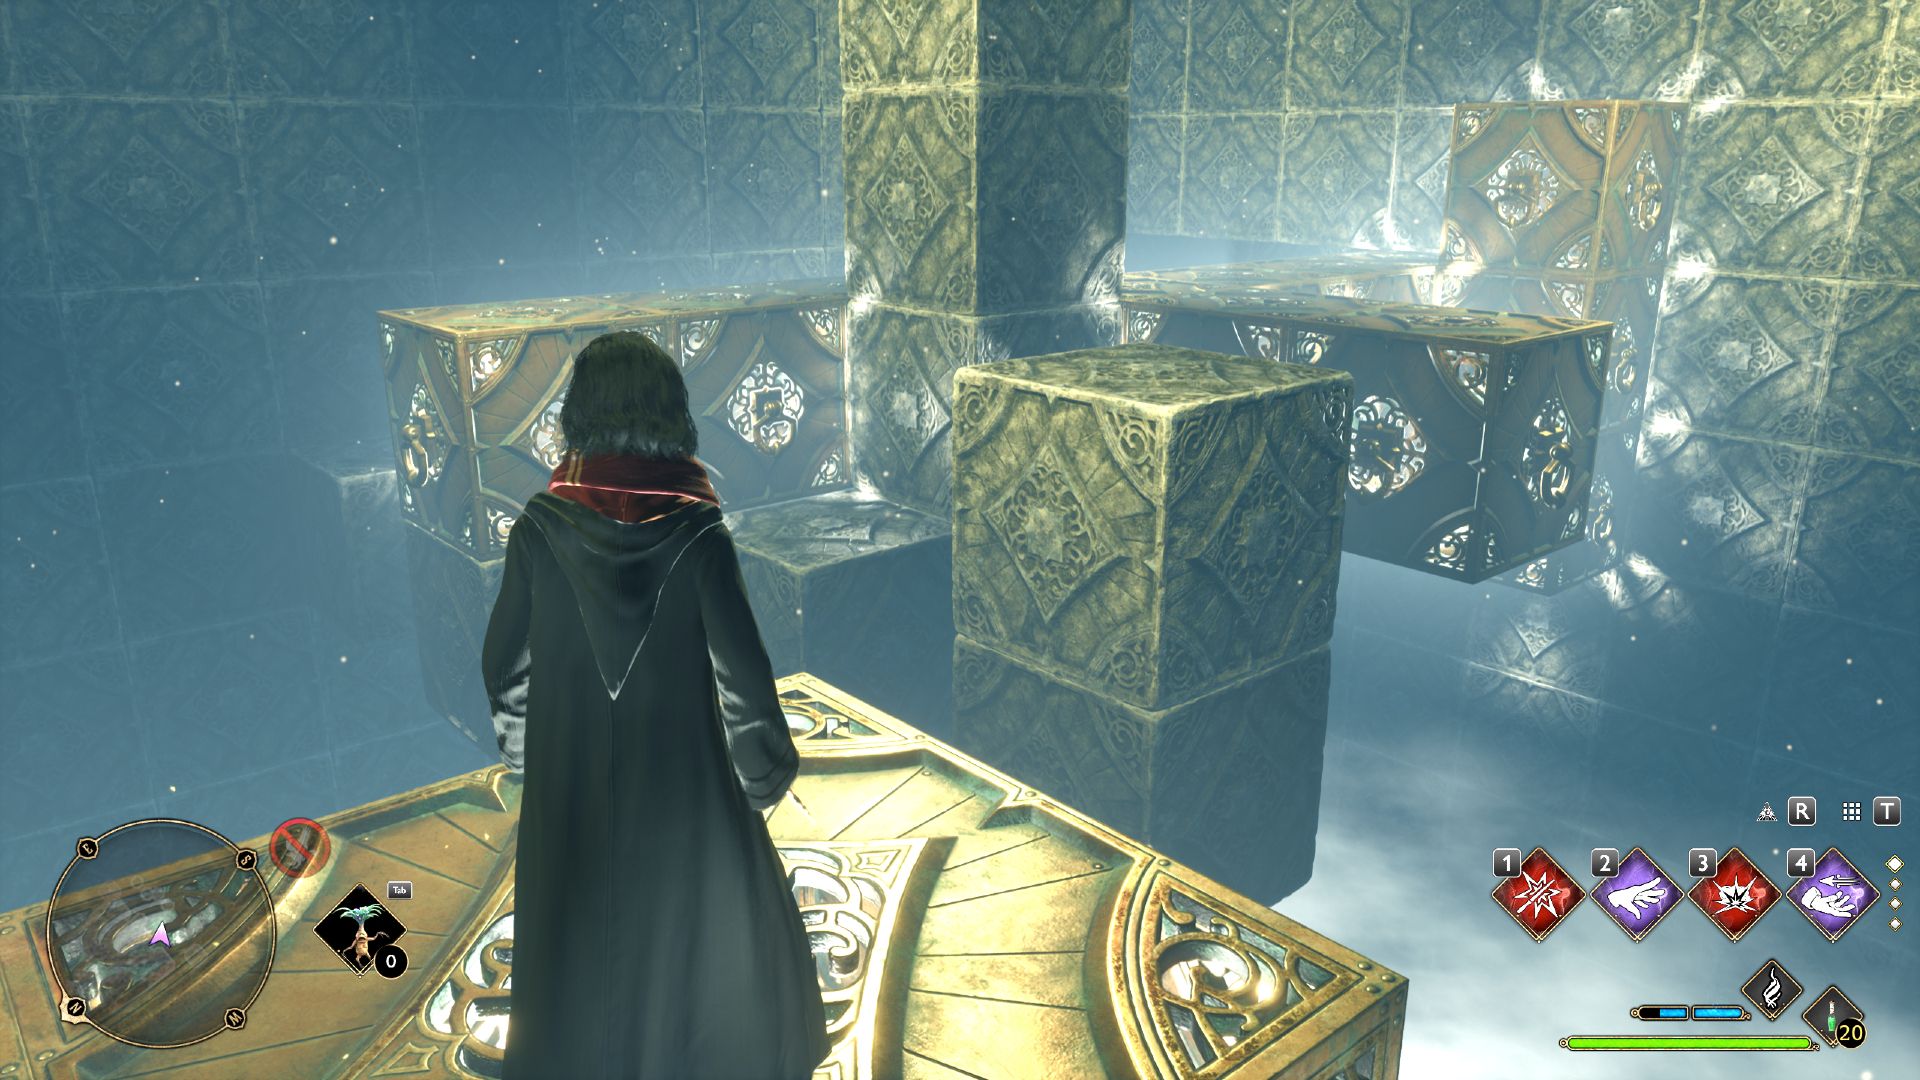
Assuming you have completed or even skipped one of Hogwarts Legacy’s Alohomora locks to access Depulso Puzzle Room 2, you will find that this puzzle chamber has two rooms. The first requires you to open a chest and then find a way across to reach the second room. The second room will require opening three chests and then find a way to reach the exit. Here’s how you can grab the chest and then find a way to the second room:
|
Step |
Description |
Image |
|---|---|---|
|
1 |
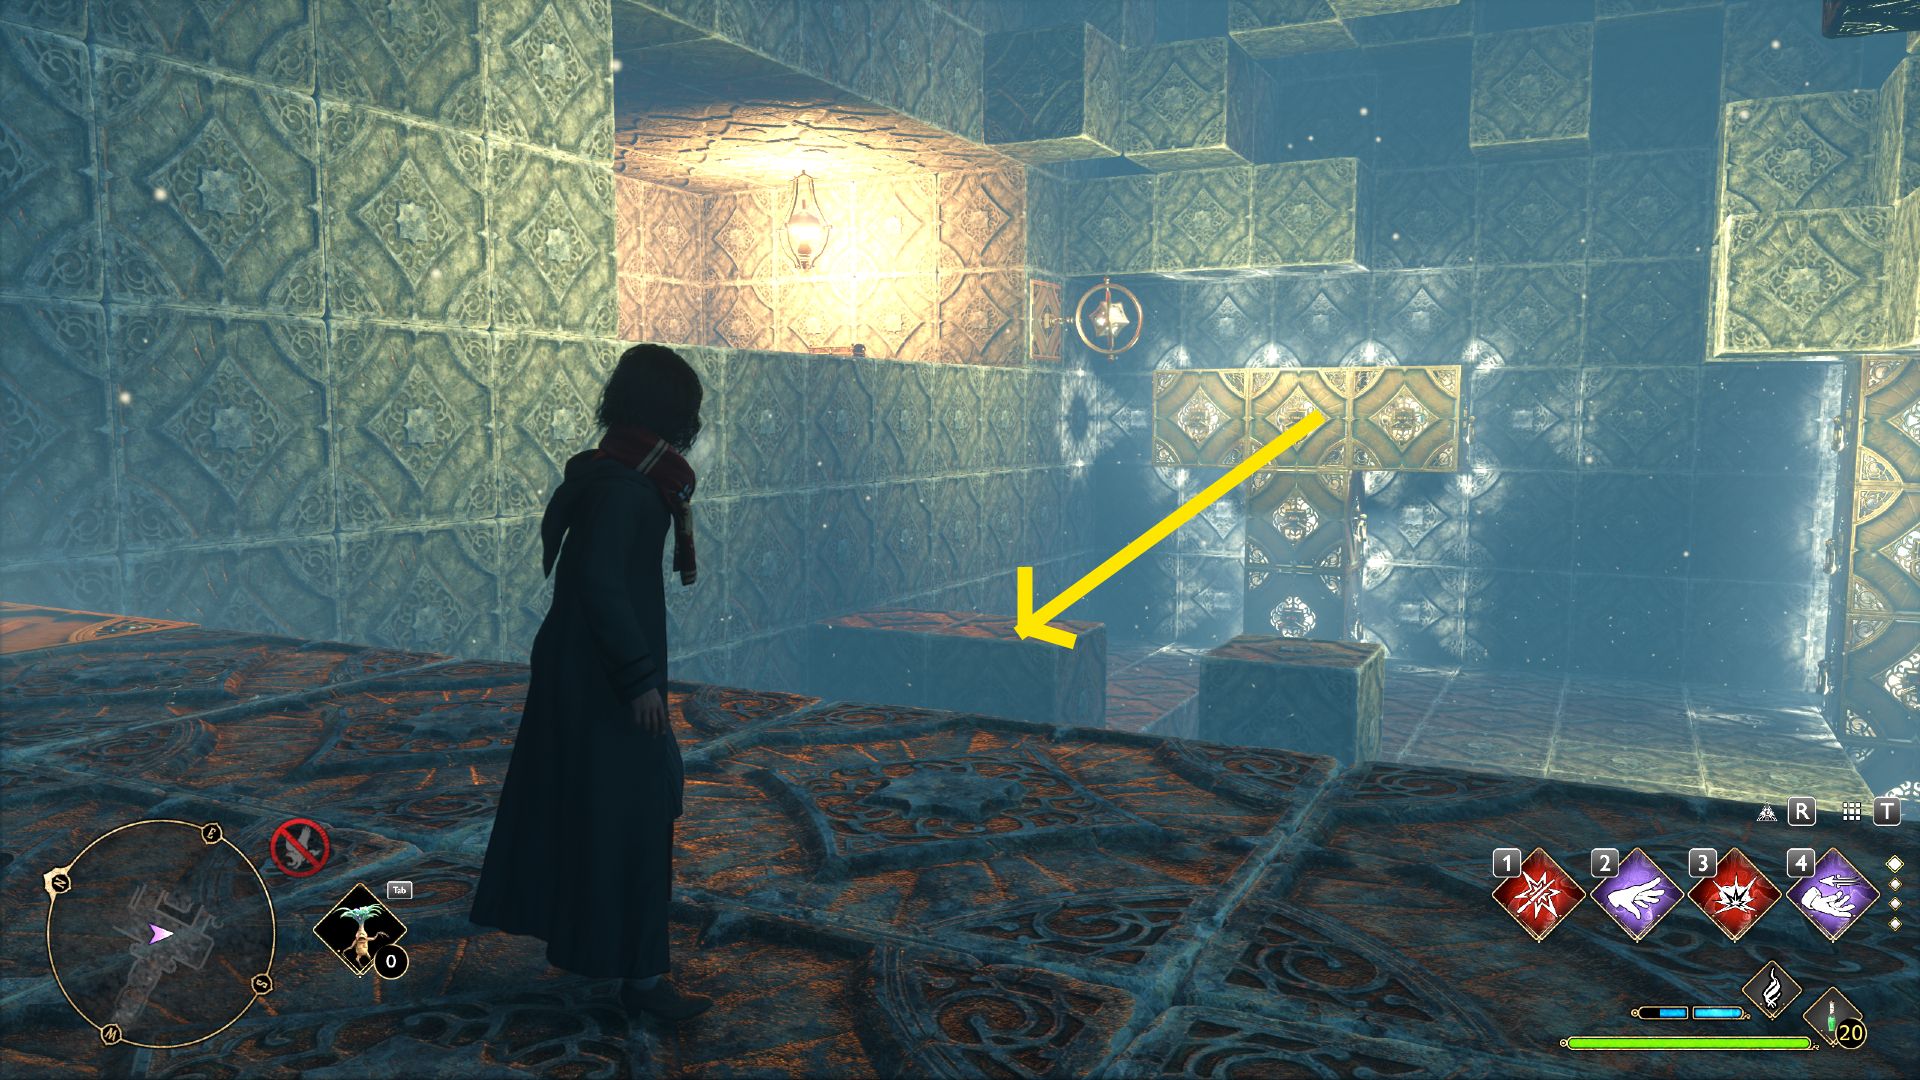
Use Accio to pull the T-shaped stack of blocks towards you. |
|
|
2 |
Drop down to the left. Use Accio on the block near where you dropped it to pull it to the back wall. |
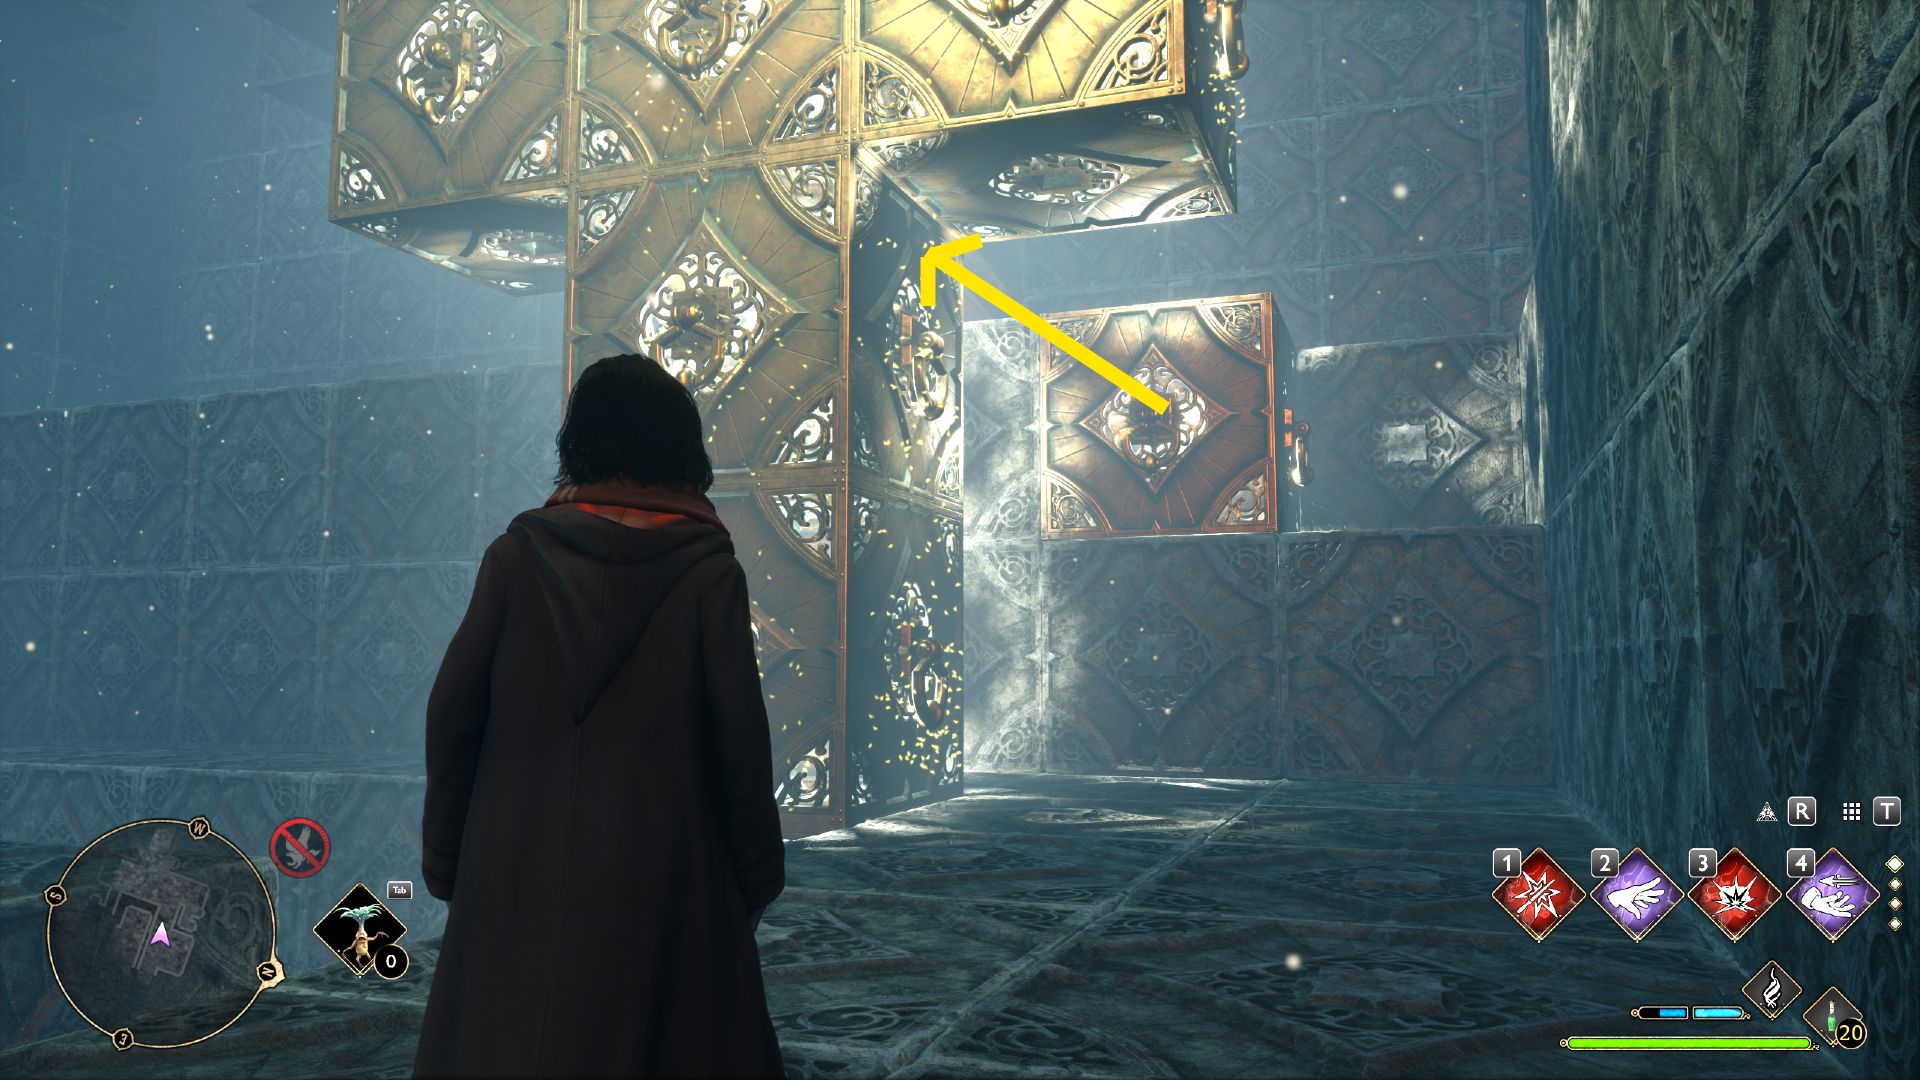
|
|
3 |
Use Accio to pull the block on the right into the middle of the room. |
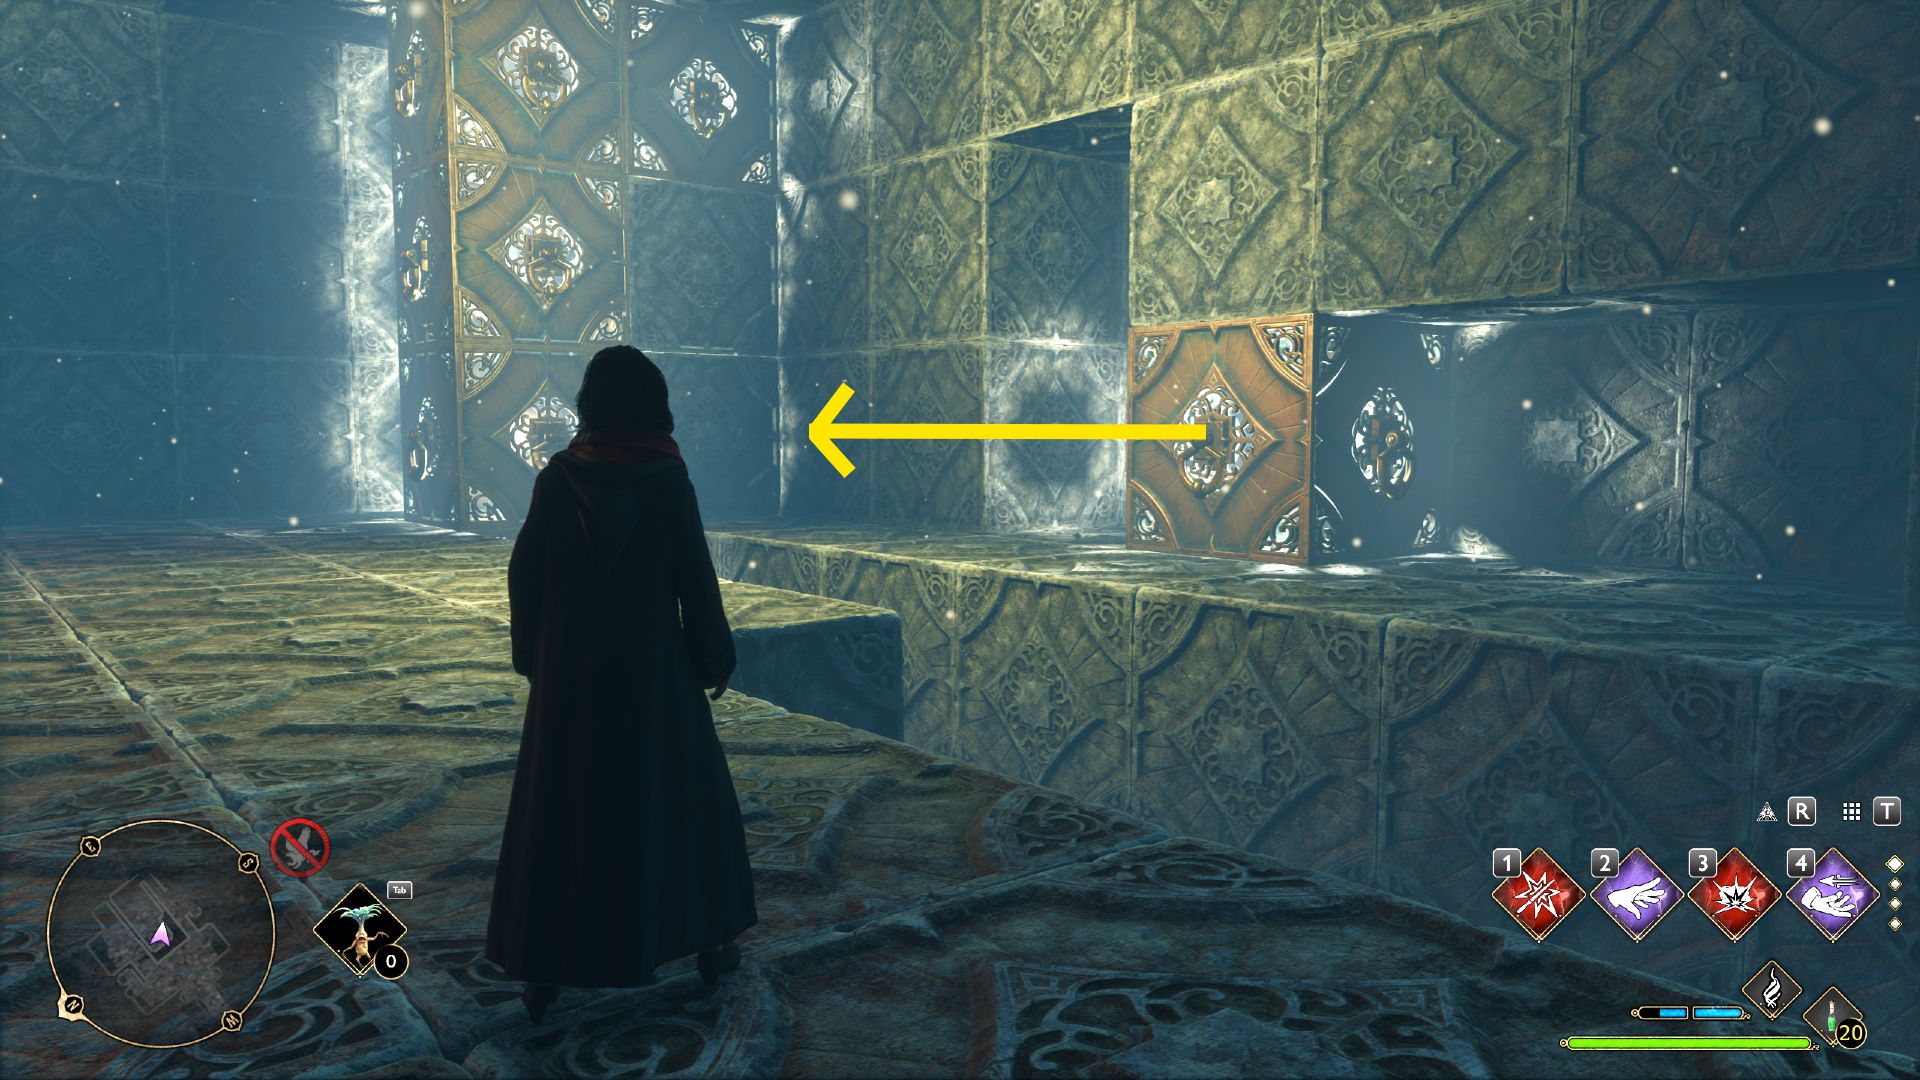
|
|
4 |
Use Depulso to push the two blocks into the back wall. |
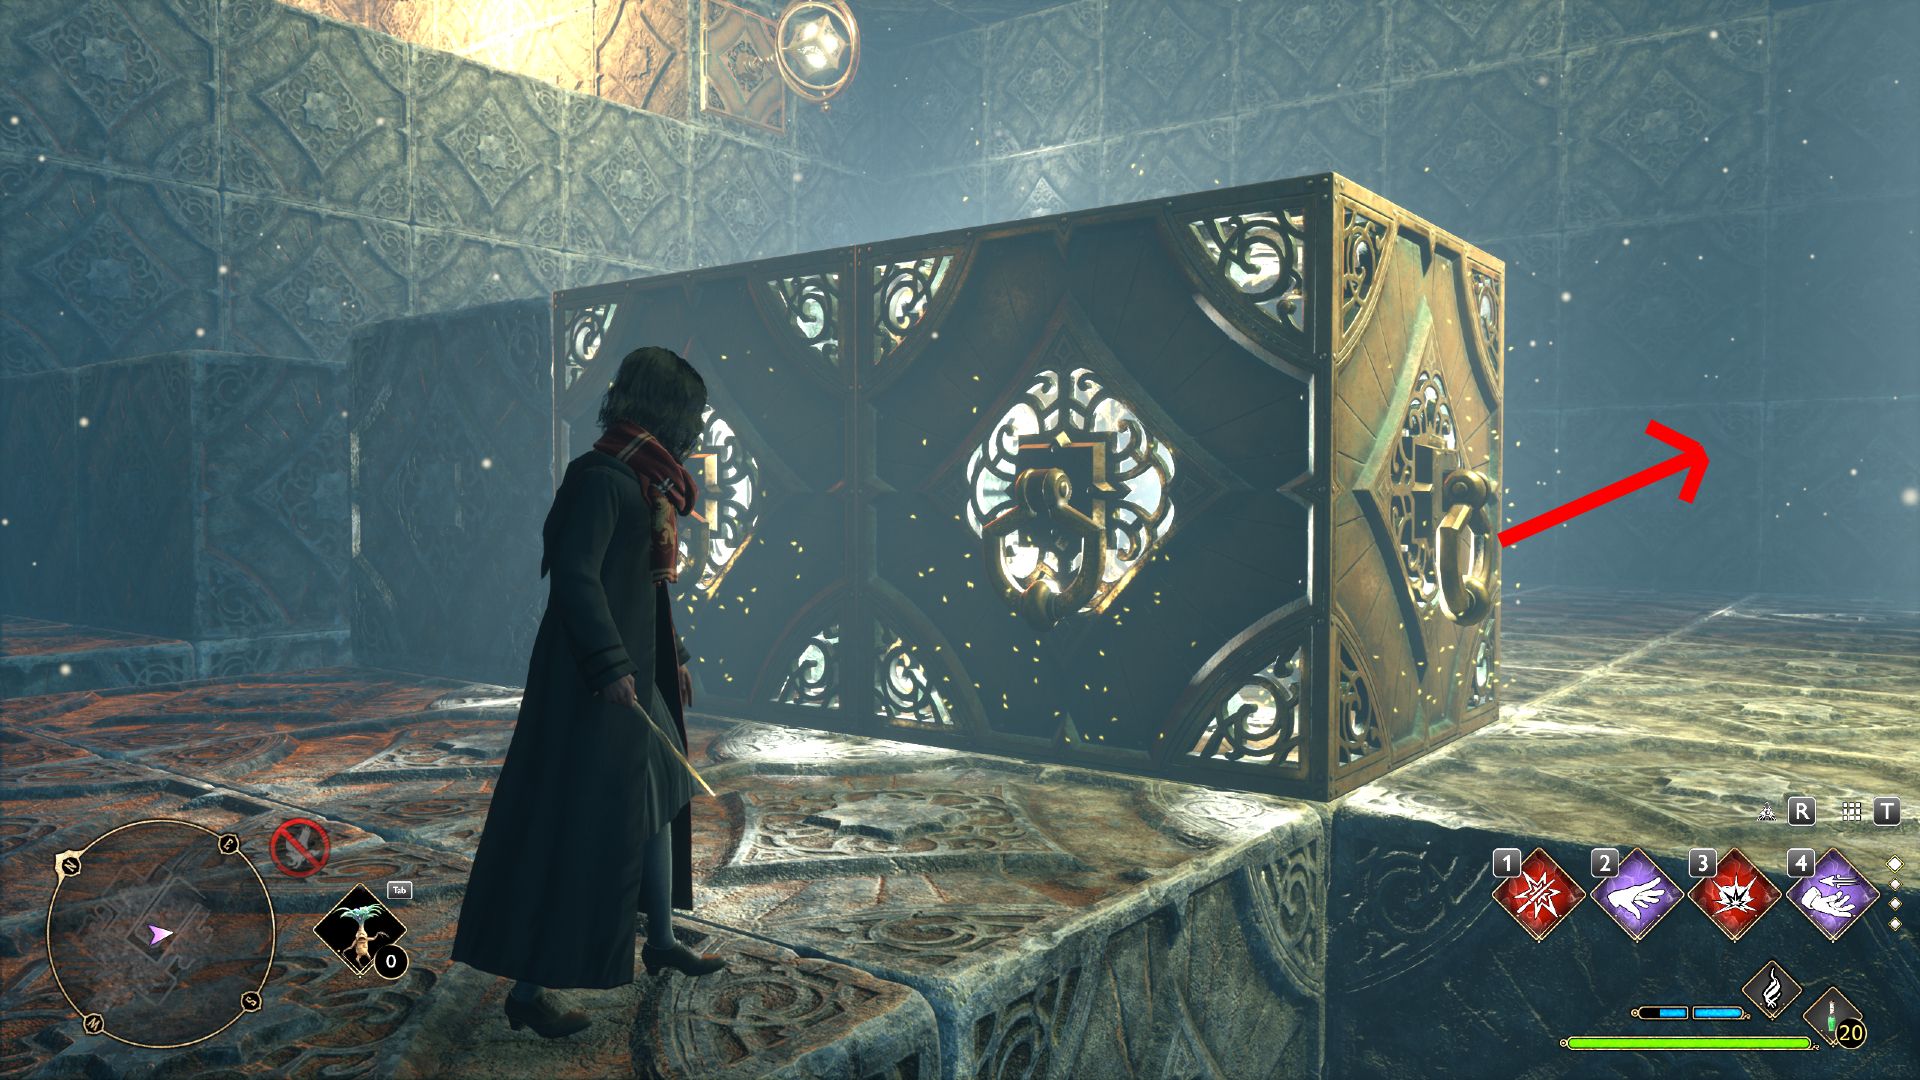
|
|
5 |
Use Depulso to push the two blocks toward the corner. This connects three blocks together. |
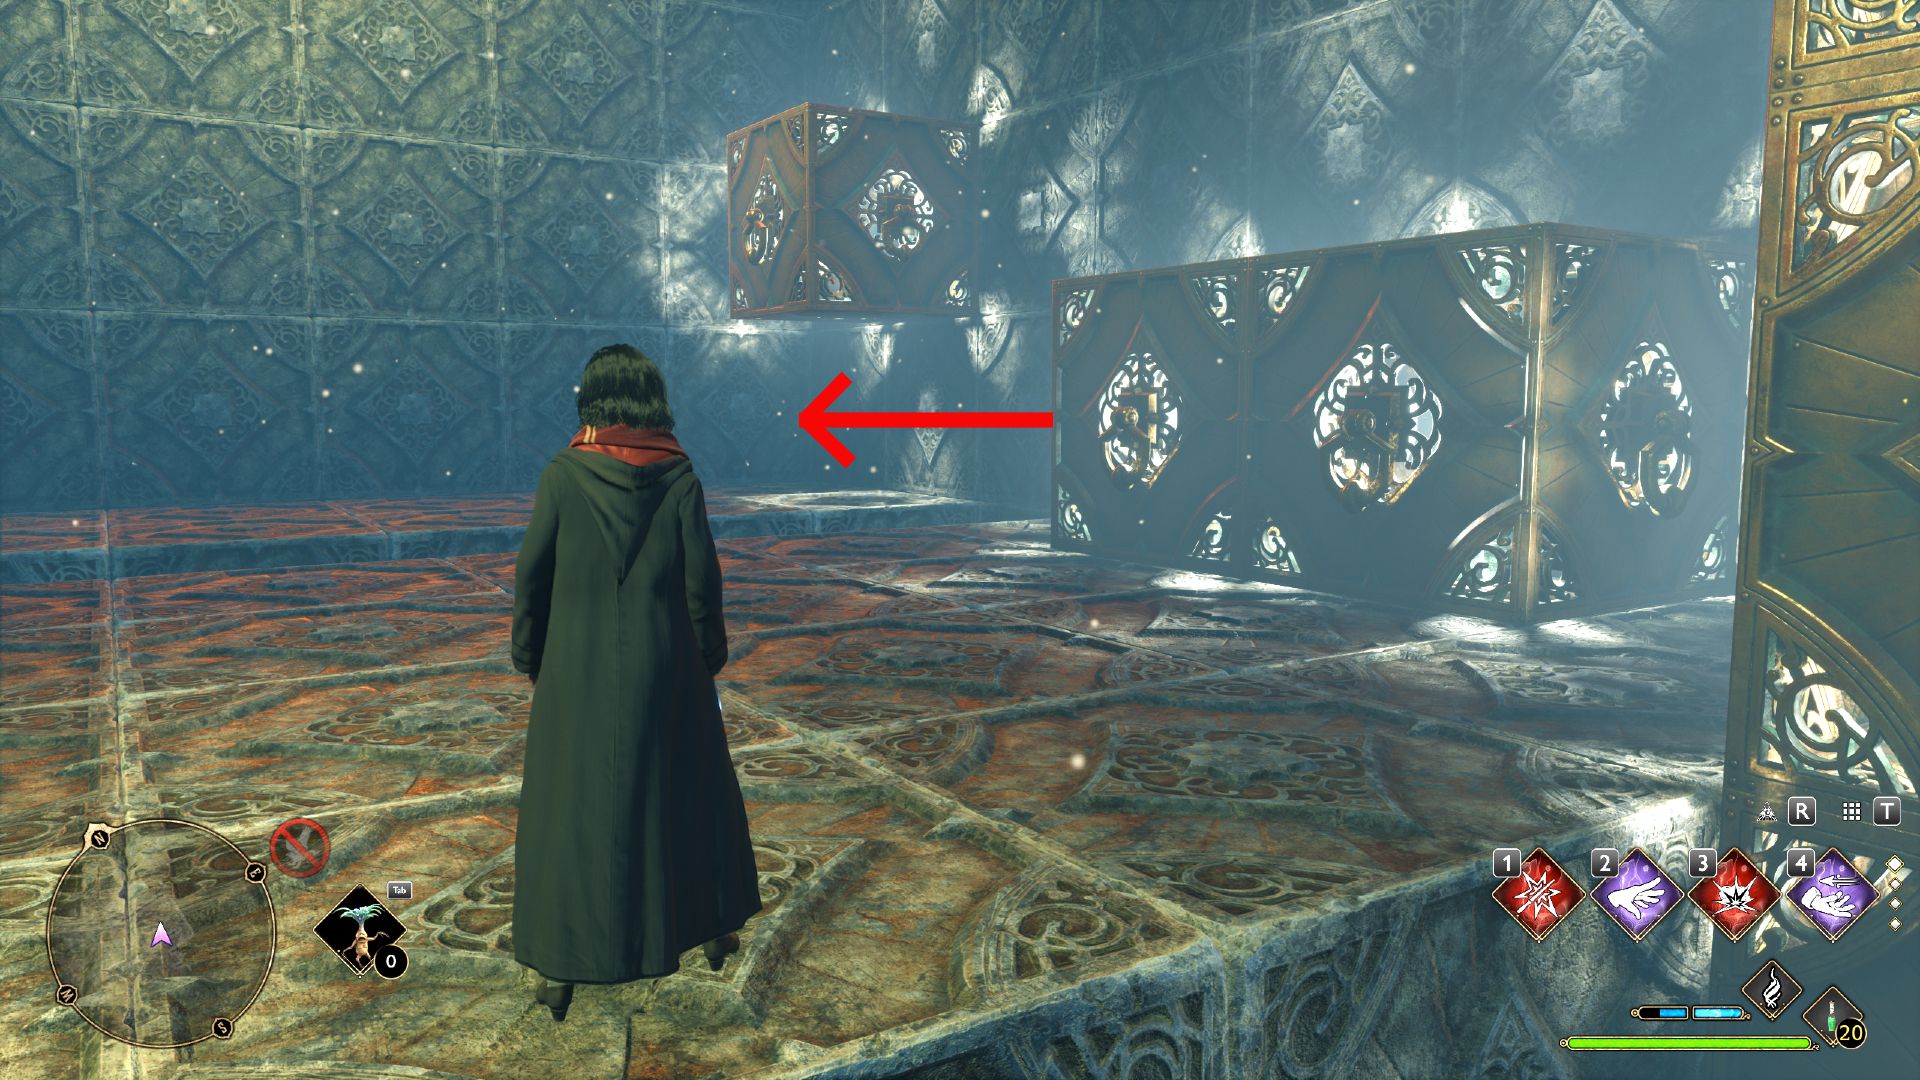
|
|
6 |
Use Accio to pull the three blocks toward the entrance. |
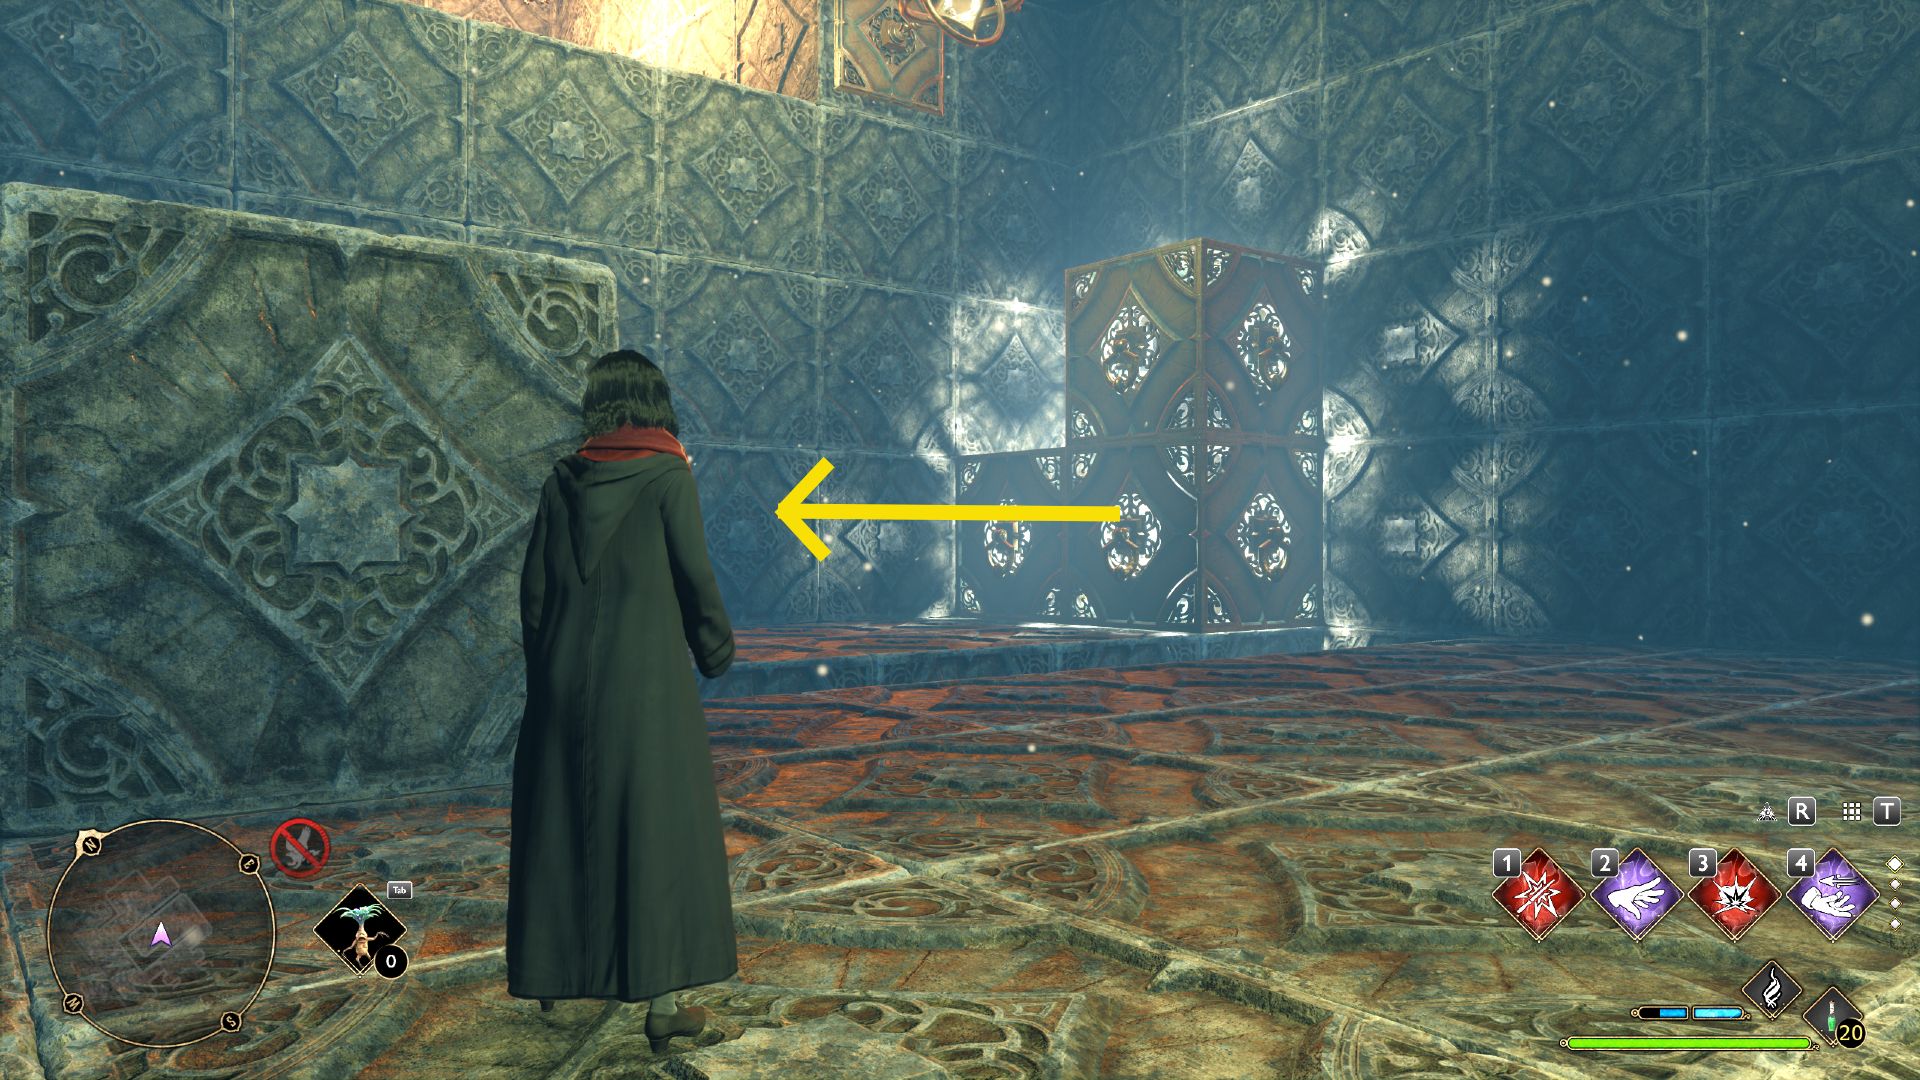
|
|
7 |
Use the three blocks to climb the left wall to reach the chest. |
After you grab the first chest, the room will shift and change. Unfortunately, you can’t get one of Hogwarts Legacy’s broomsticks to fly across to the exit. Instead, you will need to move more blocks.
|
Step |
Description |
Image |
|---|---|---|
|
1 |
Head back to the entrance and use Accio to pull the T-shaped stack of blocks toward yourself. |
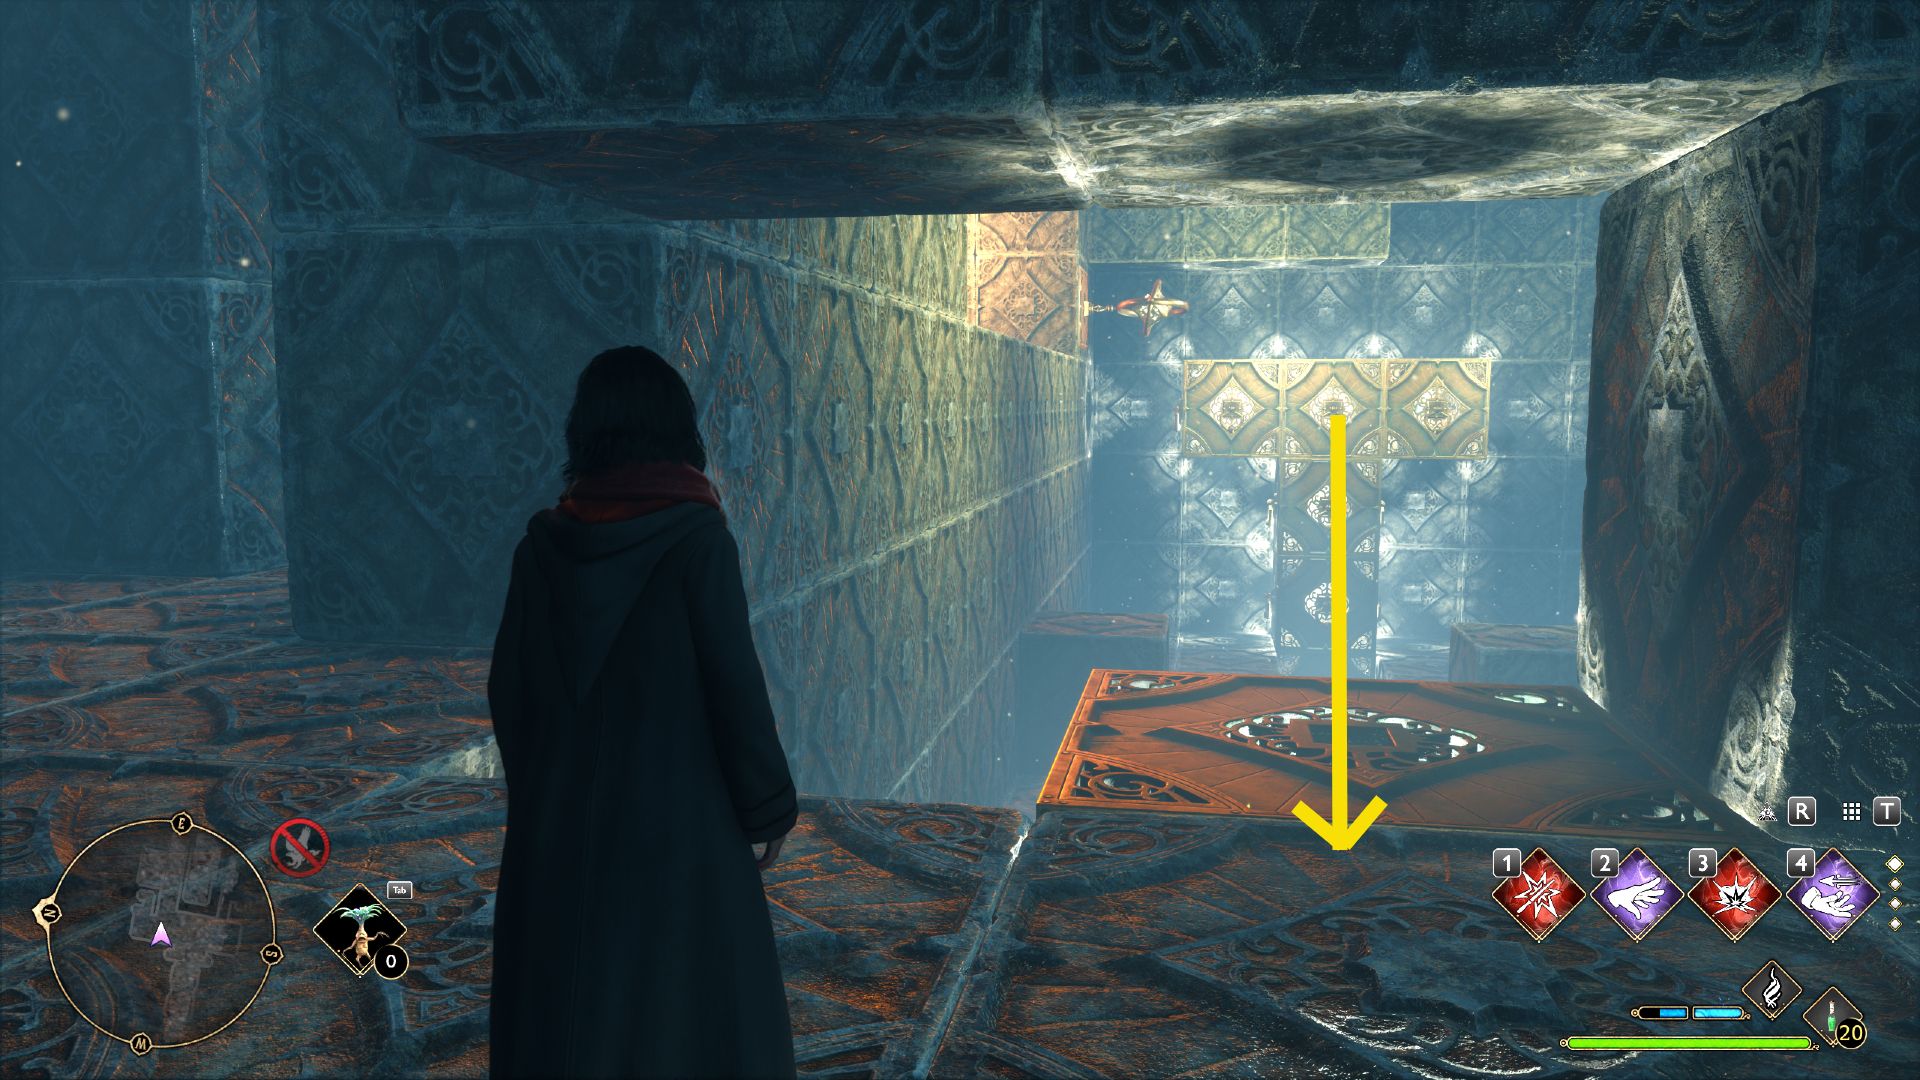
|
|
2 |
Drop down. There will be two blocks here. Use Accio on the bottom block to pull it towards the back wall. |
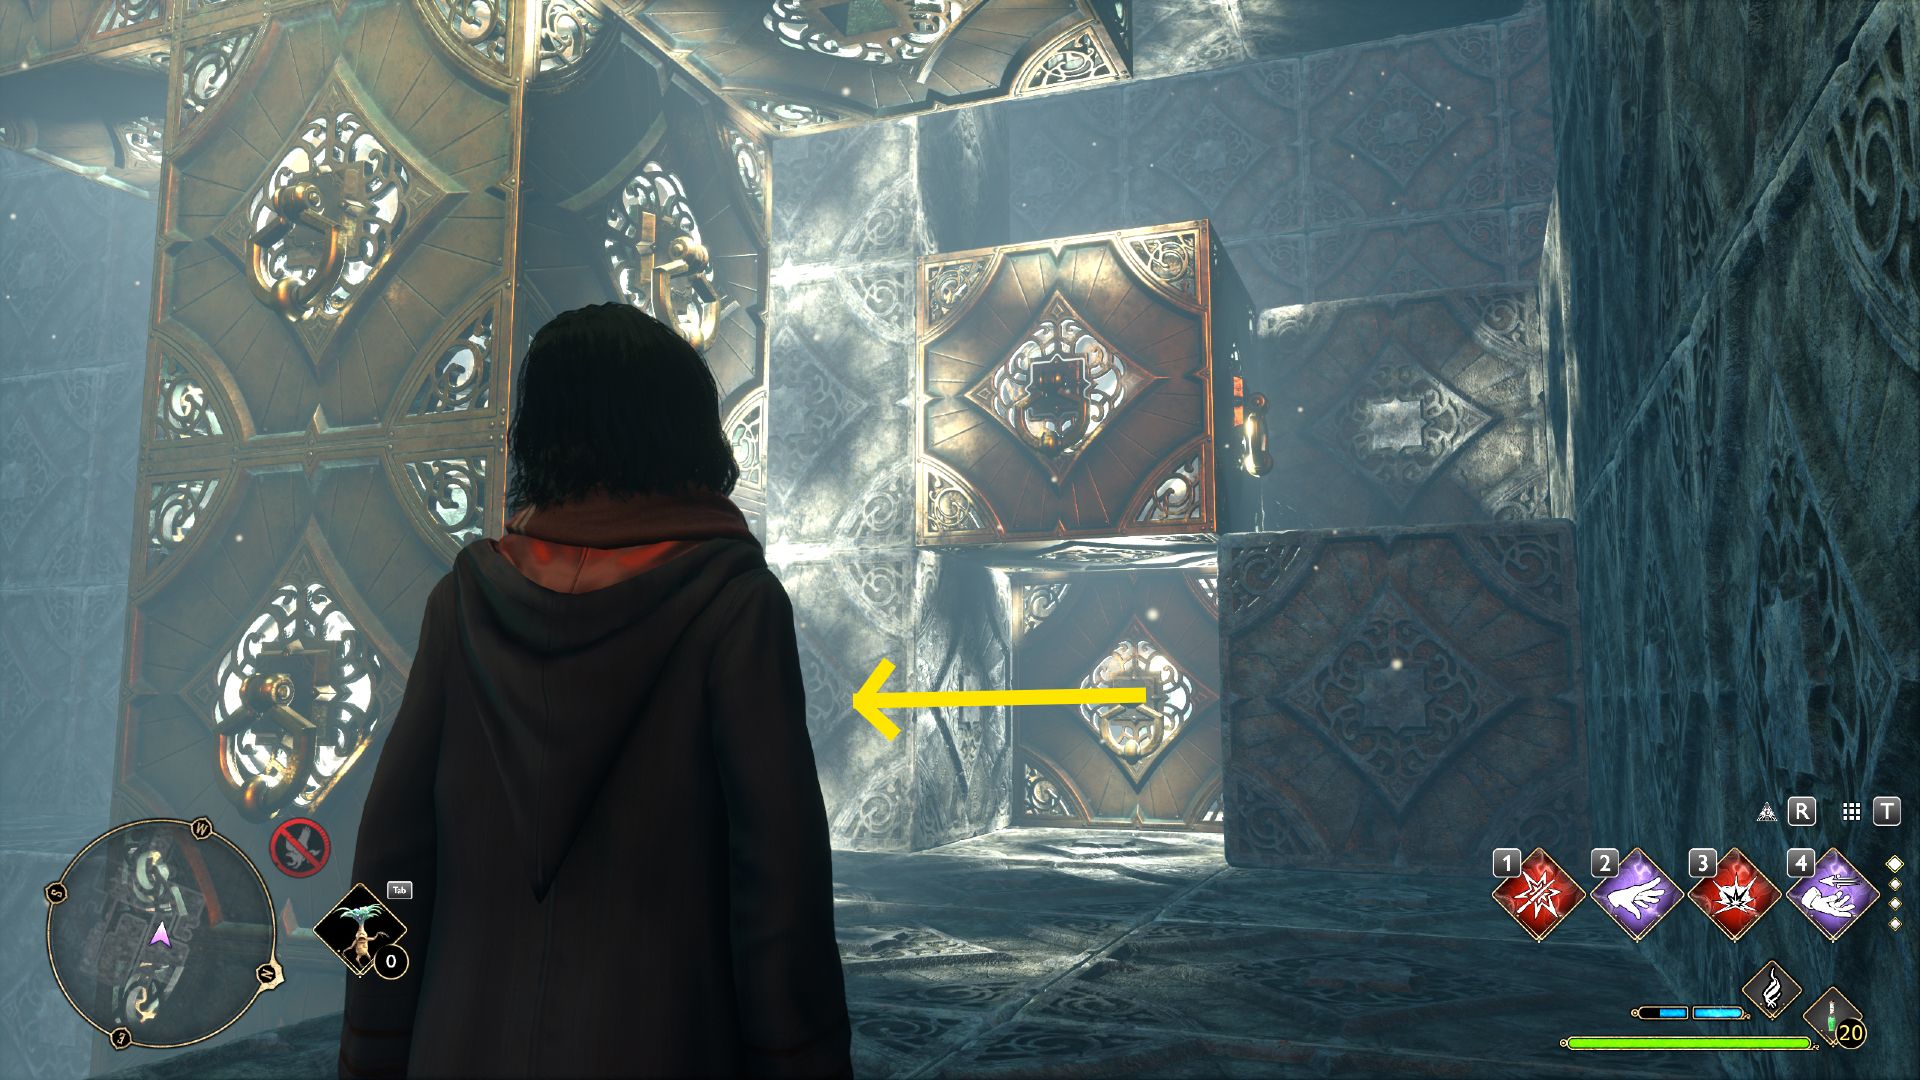
|
|
3 |
Use Accio on the top block to move it to the right. |
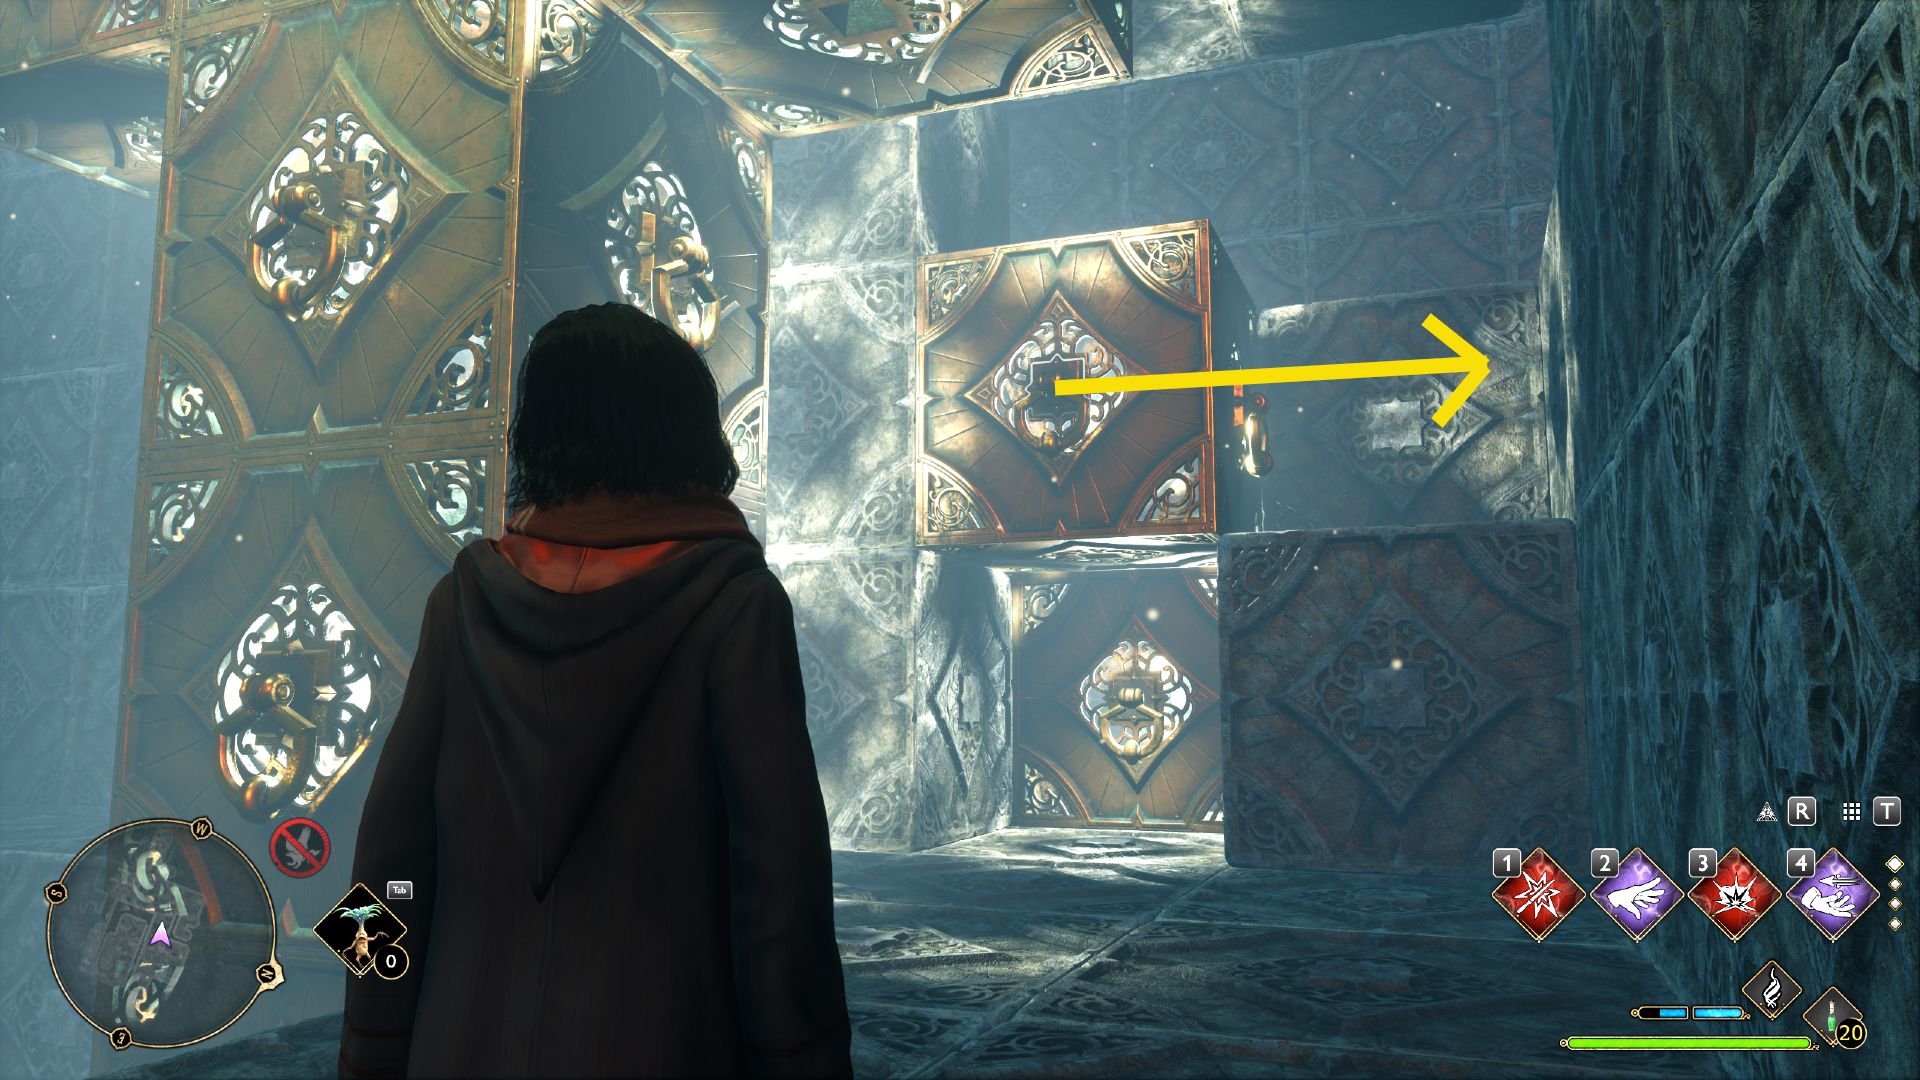
|
|
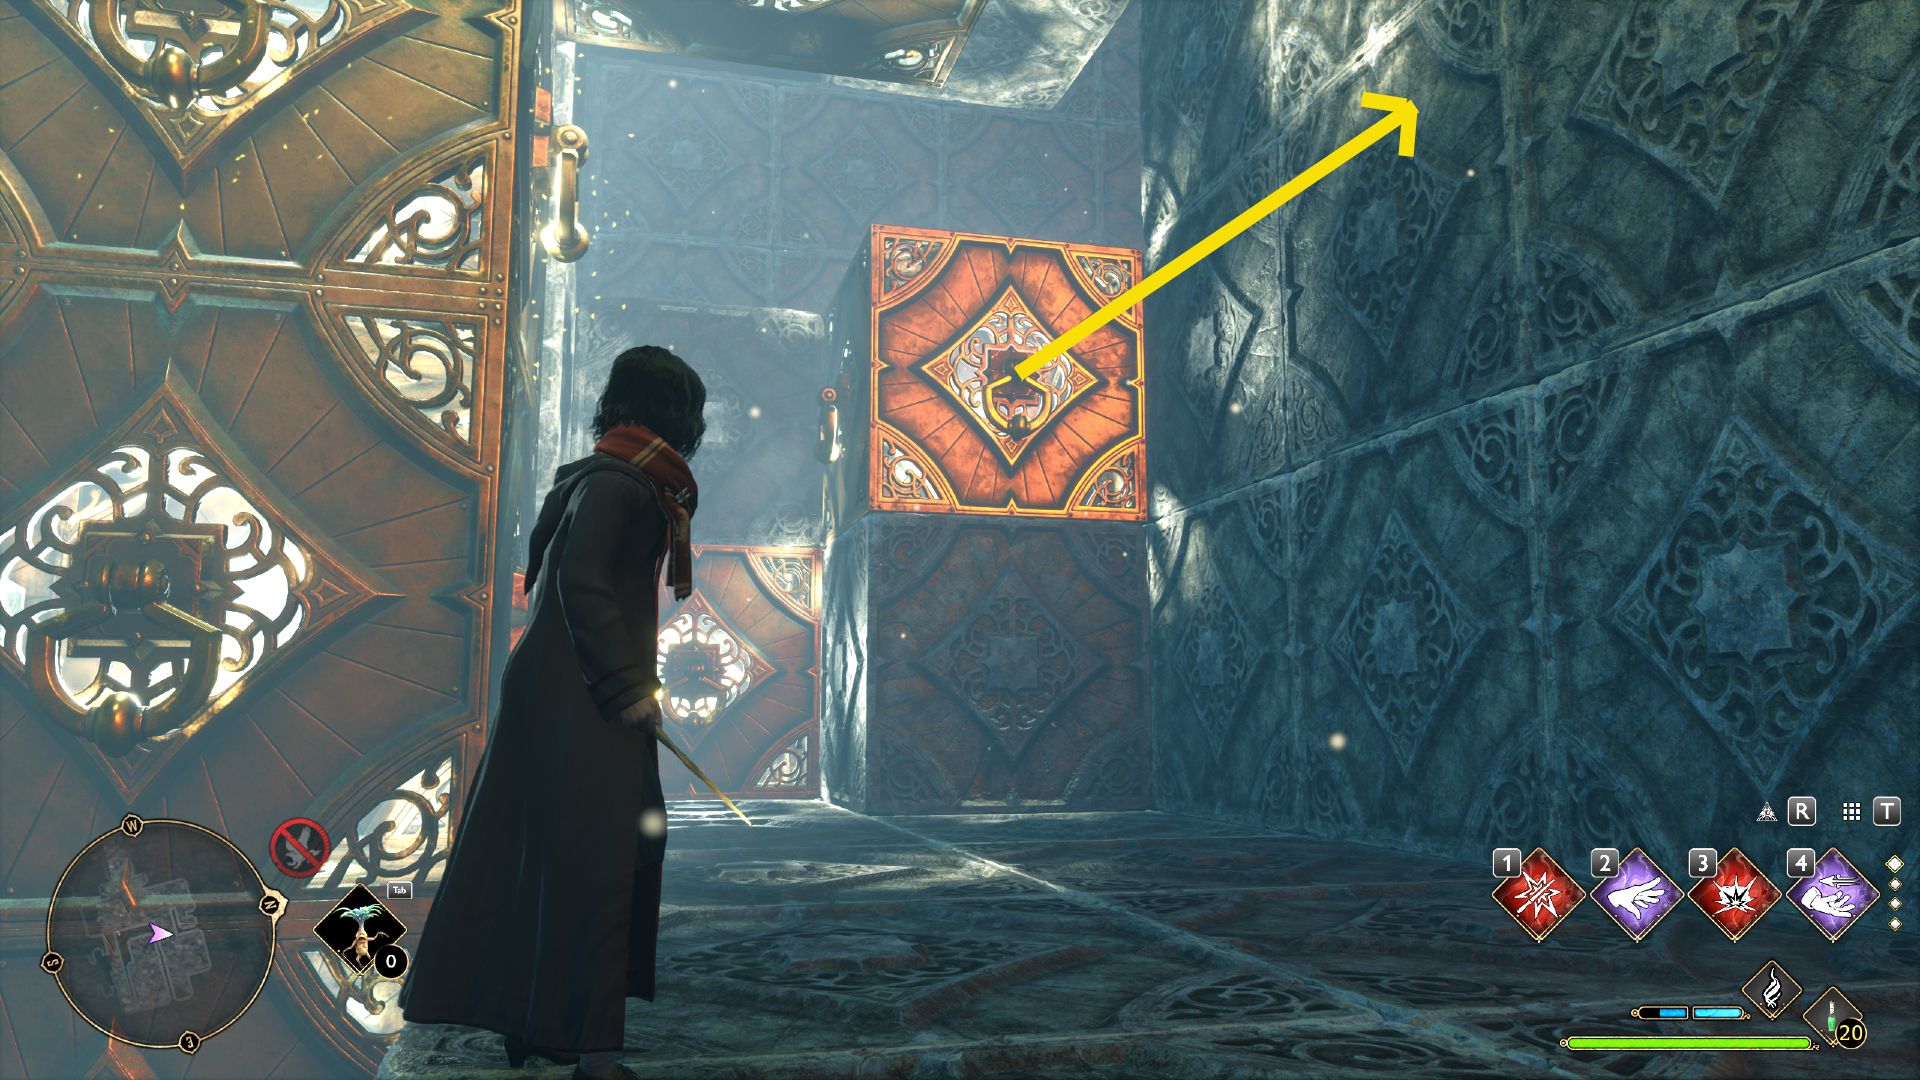
4 |
Use Accio on the same block to pull it toward the back wall. |
|
|
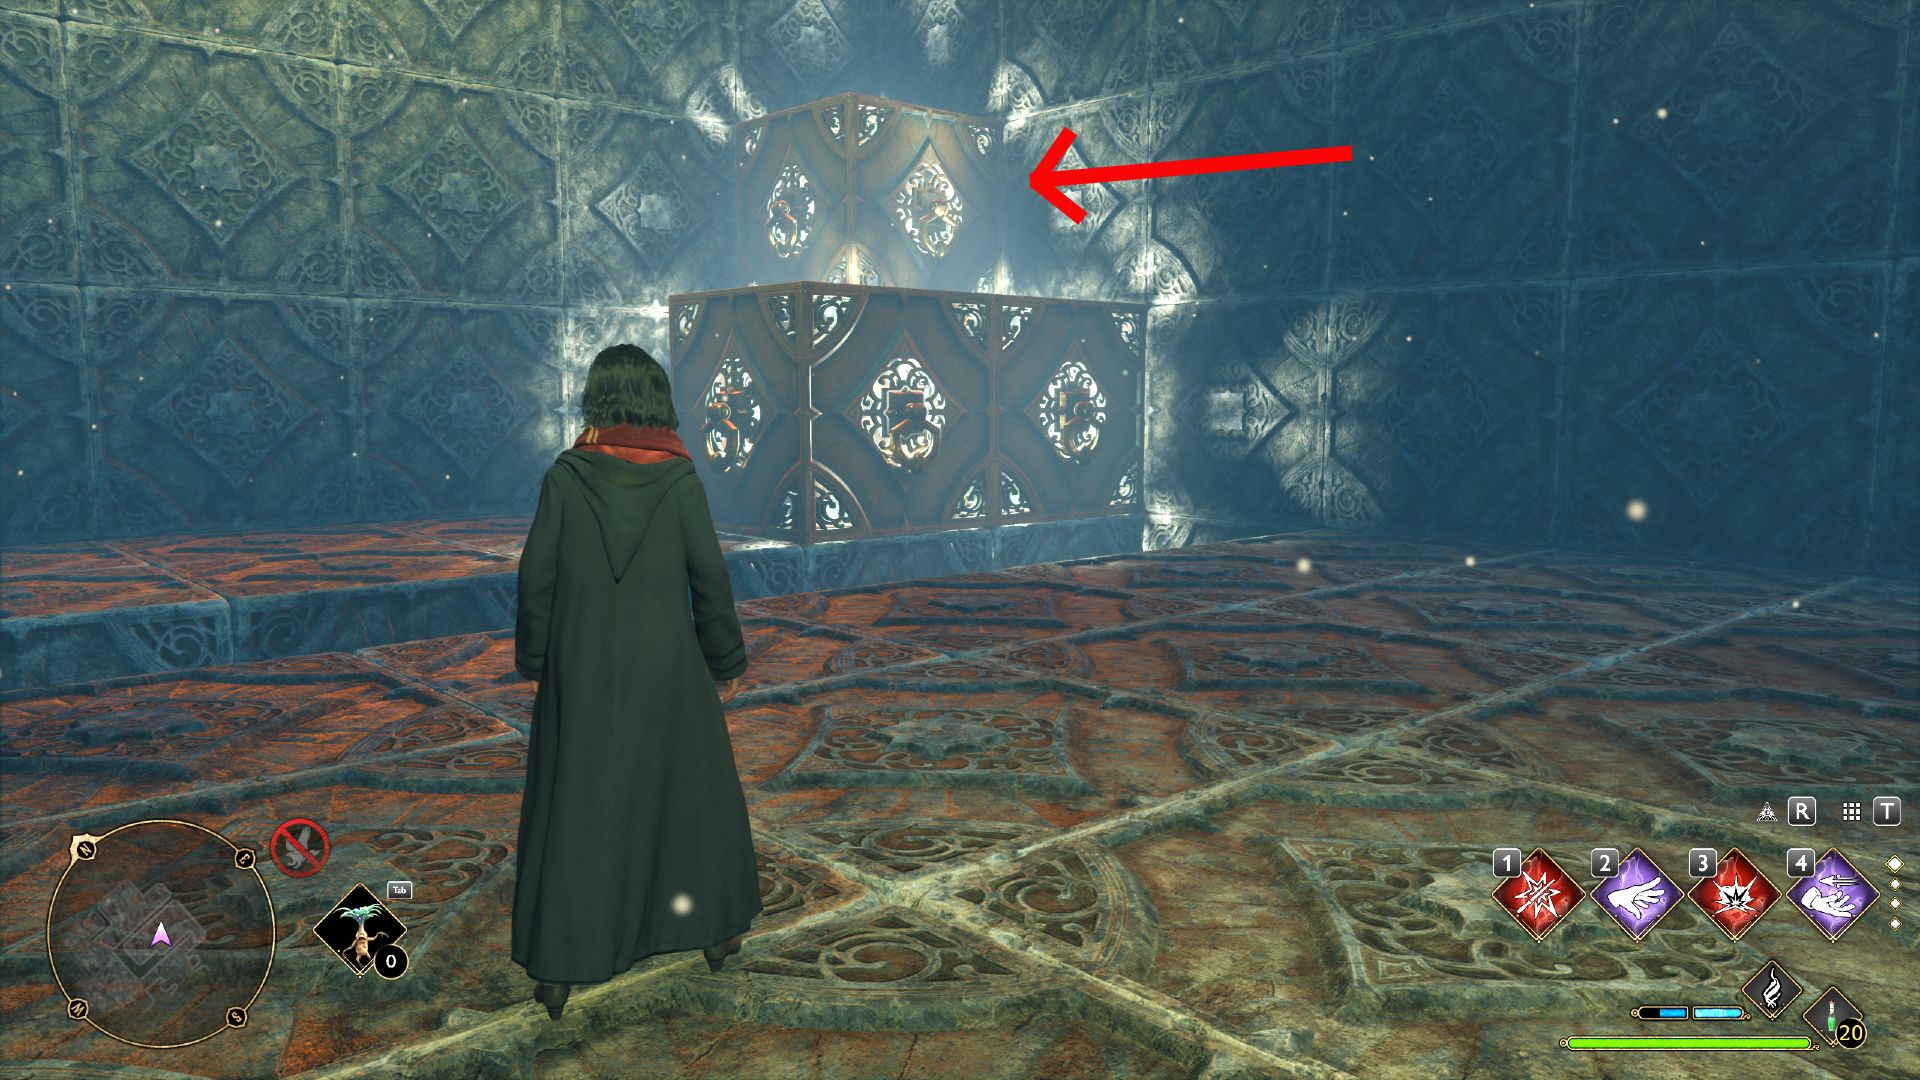
5 |
Depulso the two blocks at the back of the room into the corner. This connects it with the other block. |
|
|
6 |
Use Accio on the blocks on the right wall to pull them into the middle of the room. |

|
|
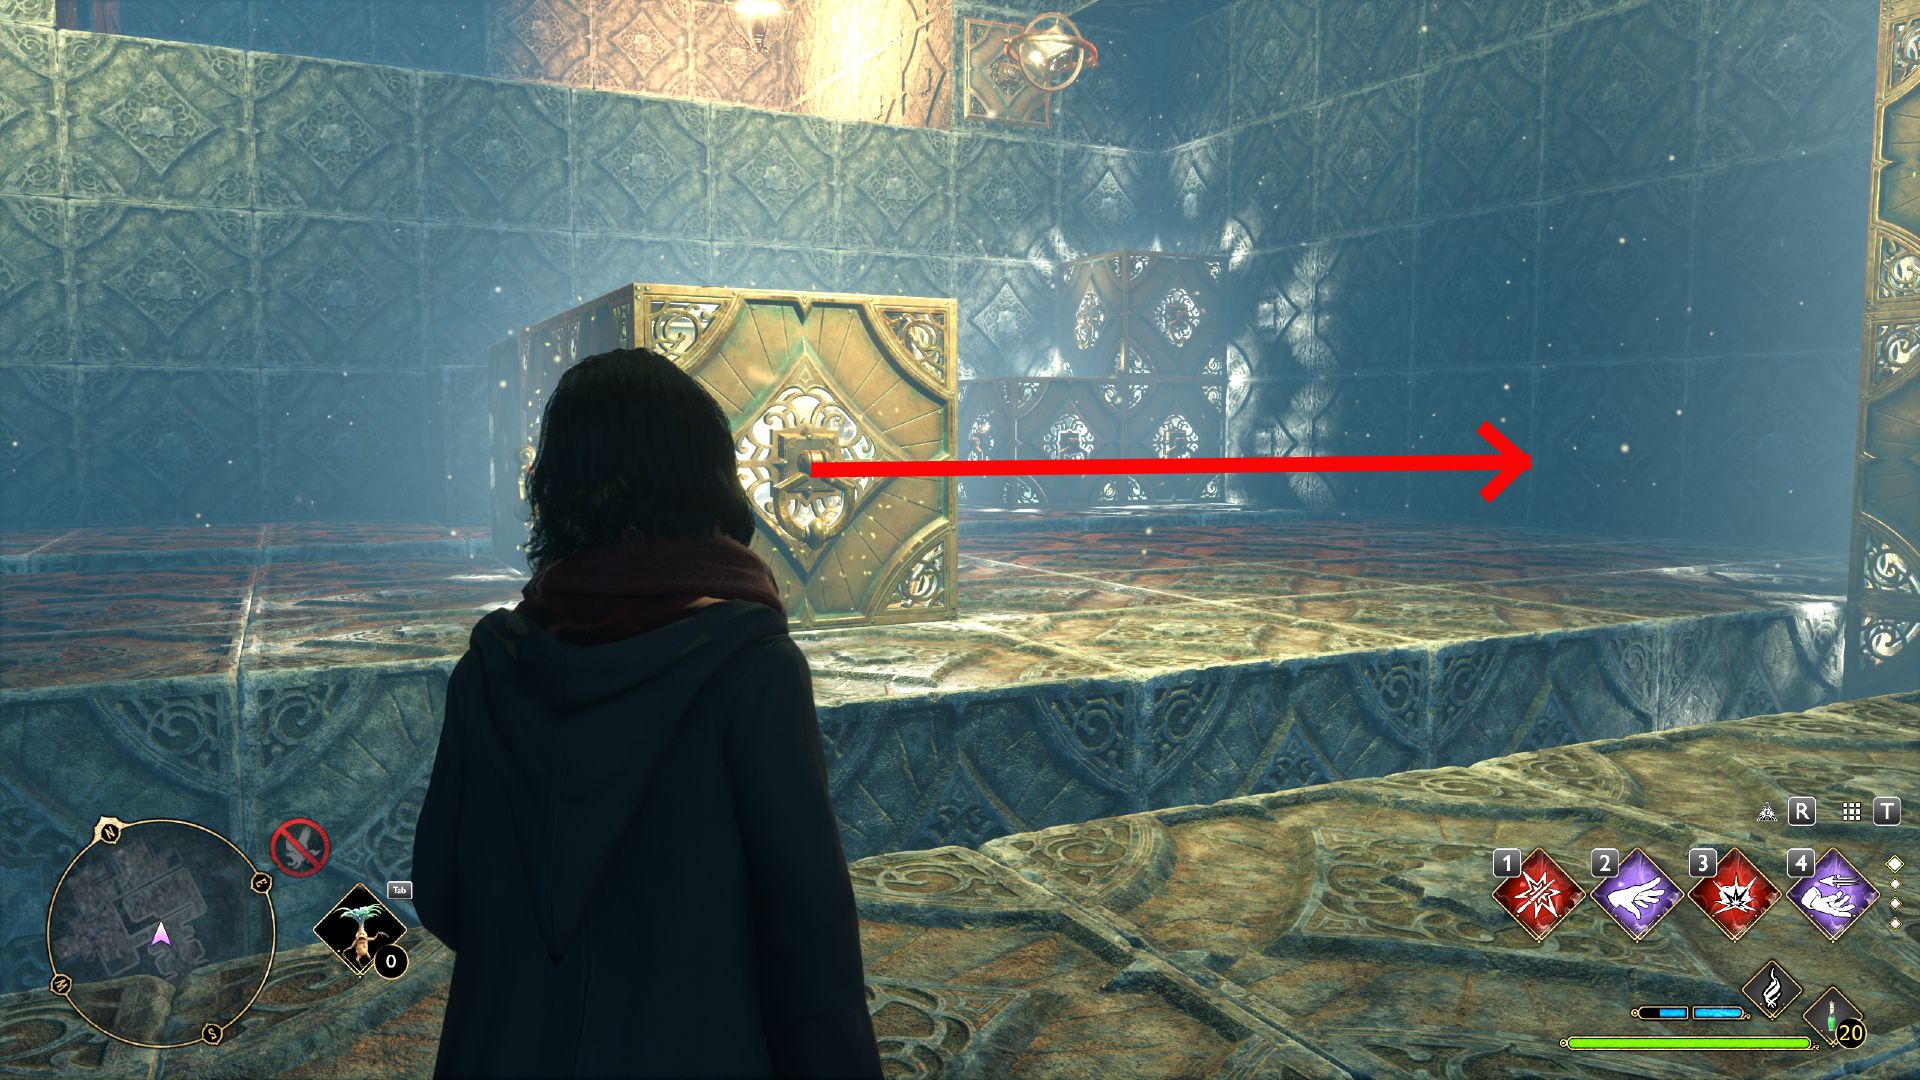
7 |
Use Depulso on the same blocks to push them into the back wall. |
|
|
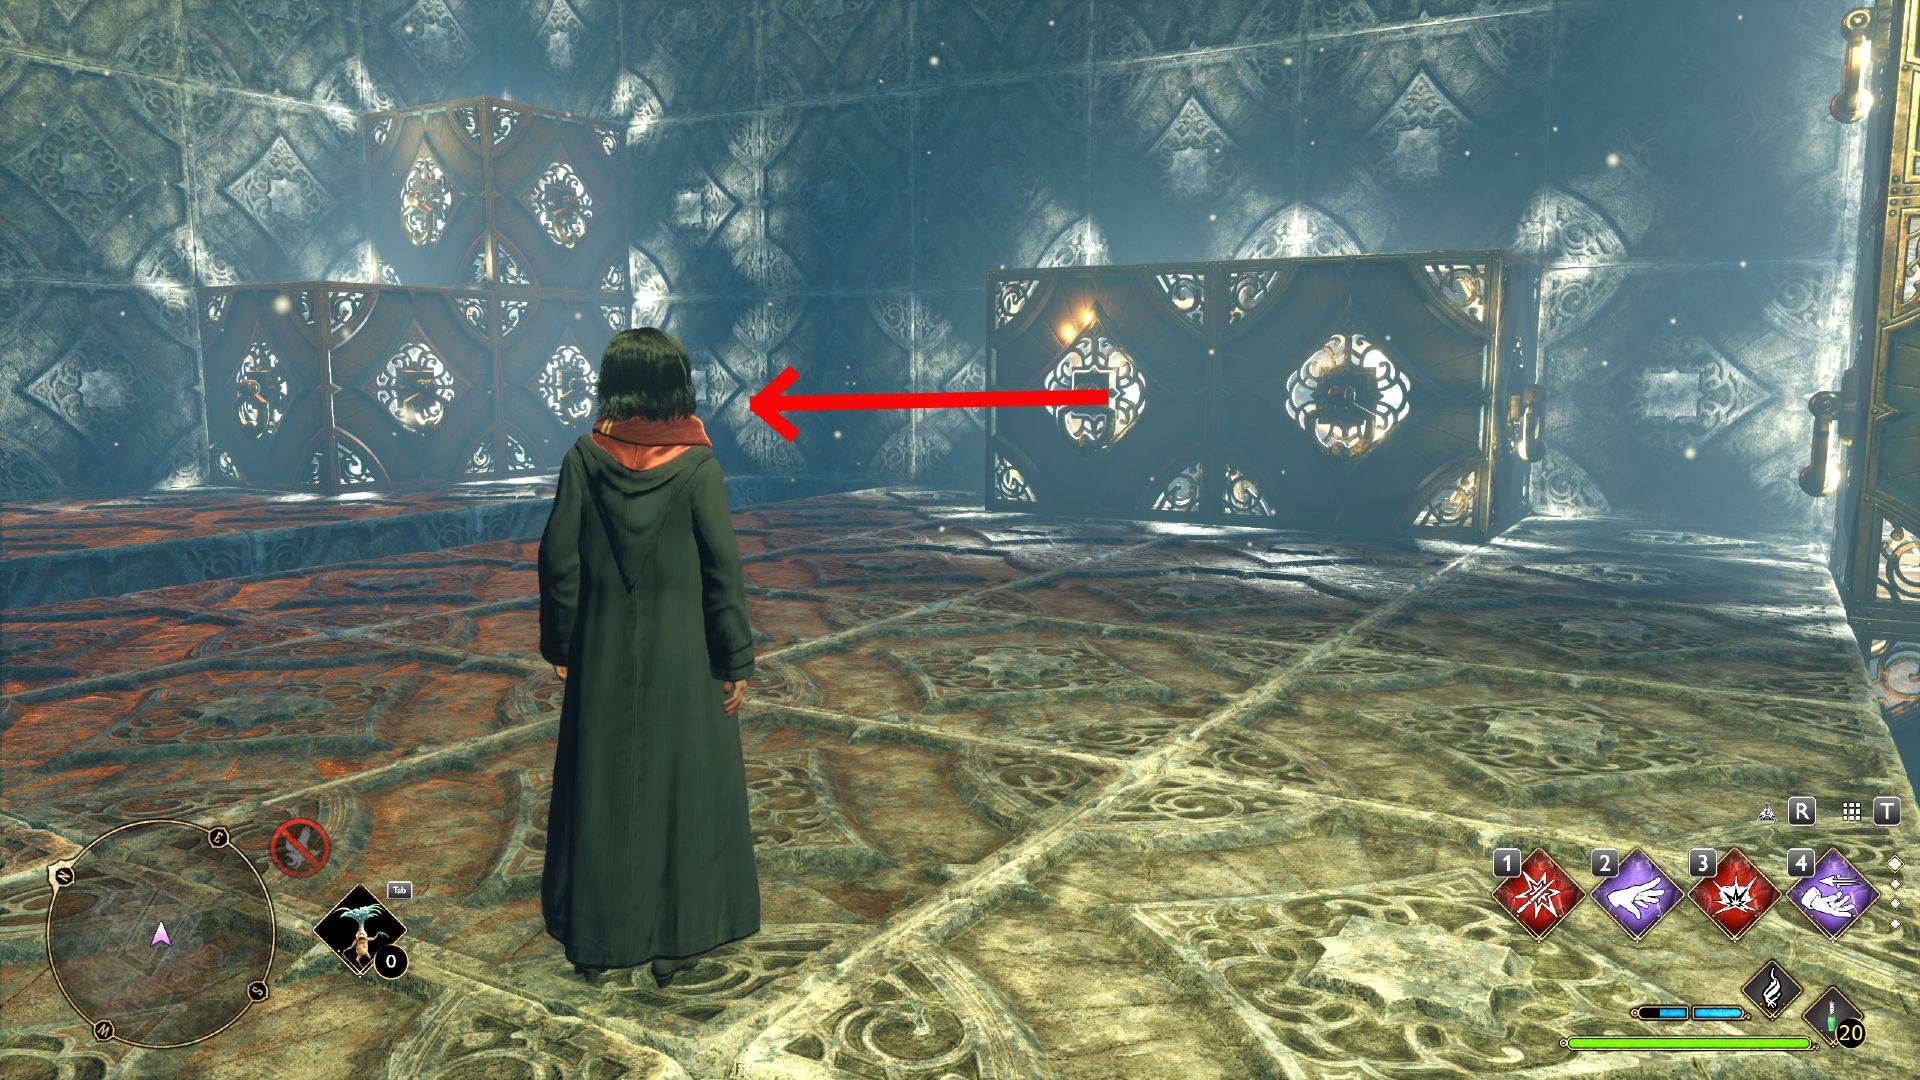
8 |
Use Depulso on the same blocks to push them into the other blocks in the corner. |
|
|
9 |
Use Accio to pull the five blocks toward the entrance. |
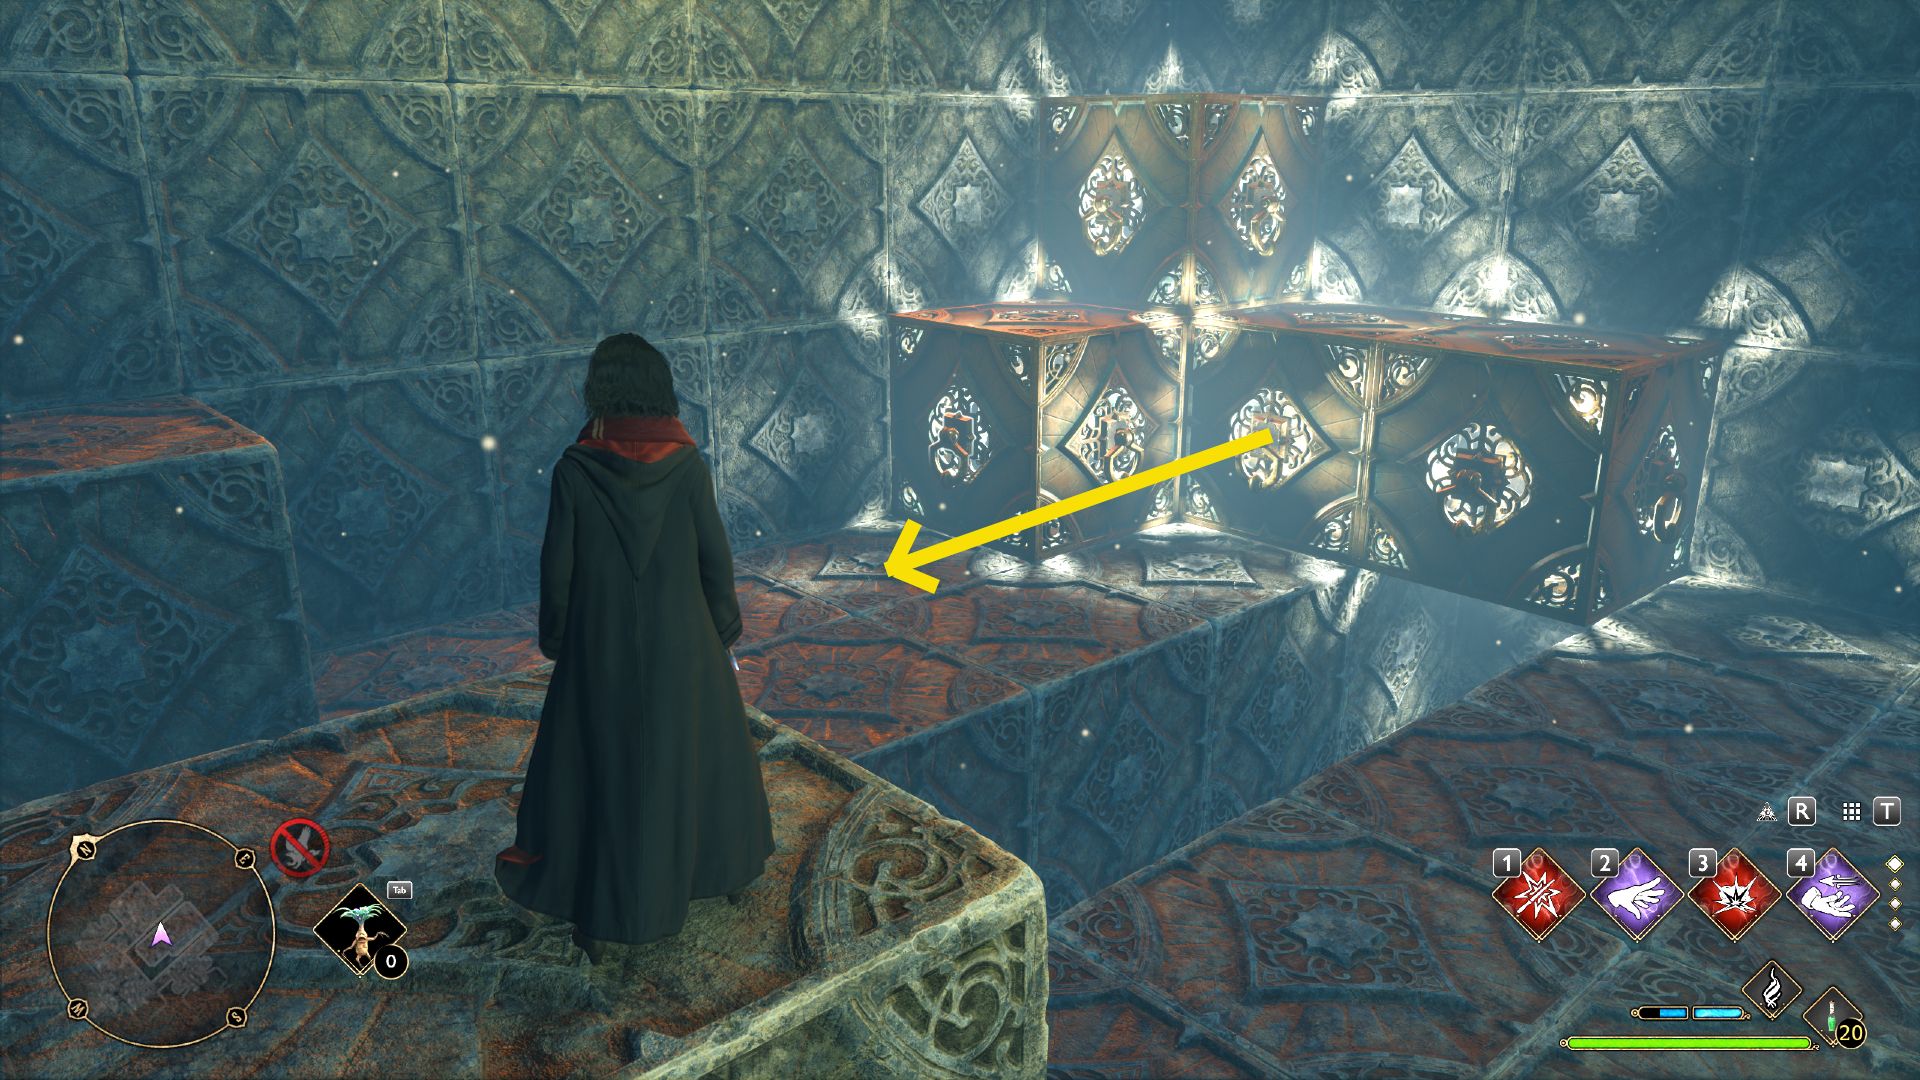
|
|
10 |
Use Accio to pull the five blocks toward the right wall. |
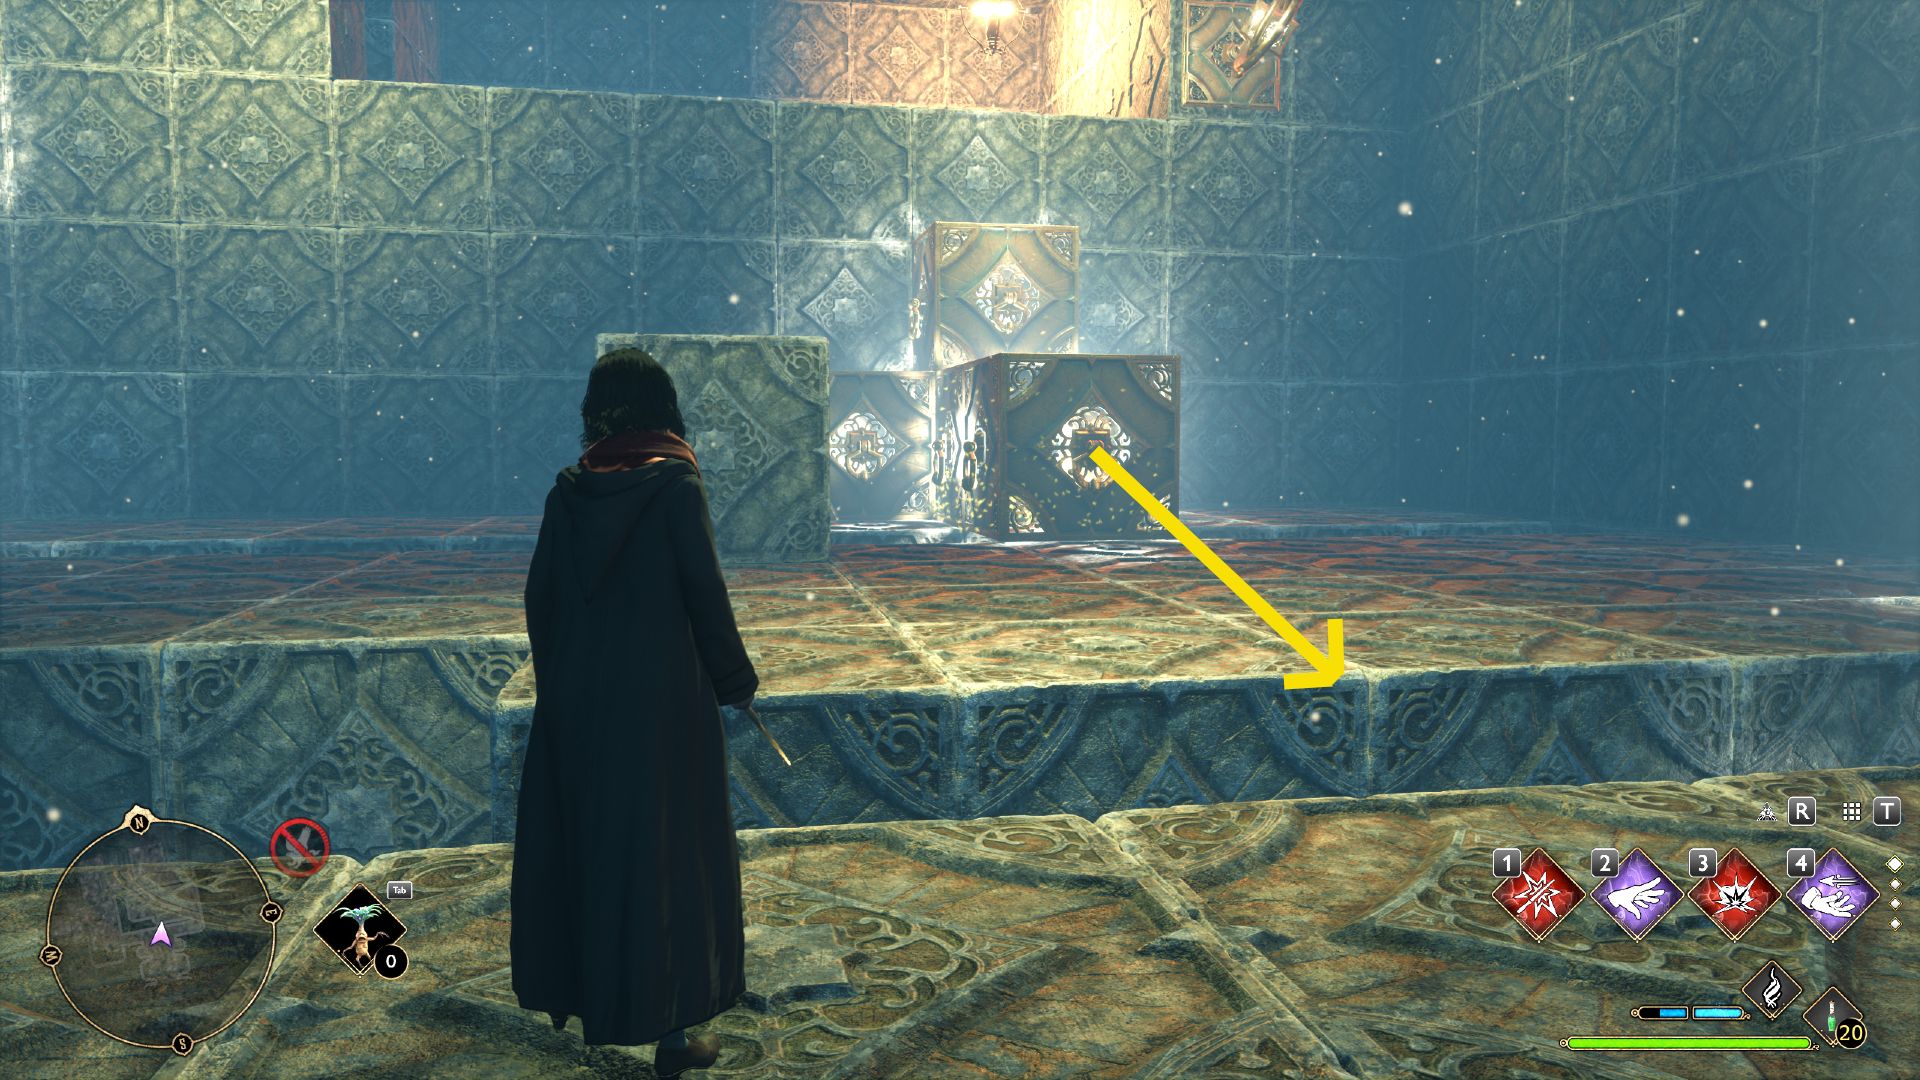
|
|
11 |
Use Accio on the T-shaped stack of blocks to pull it to the left. |
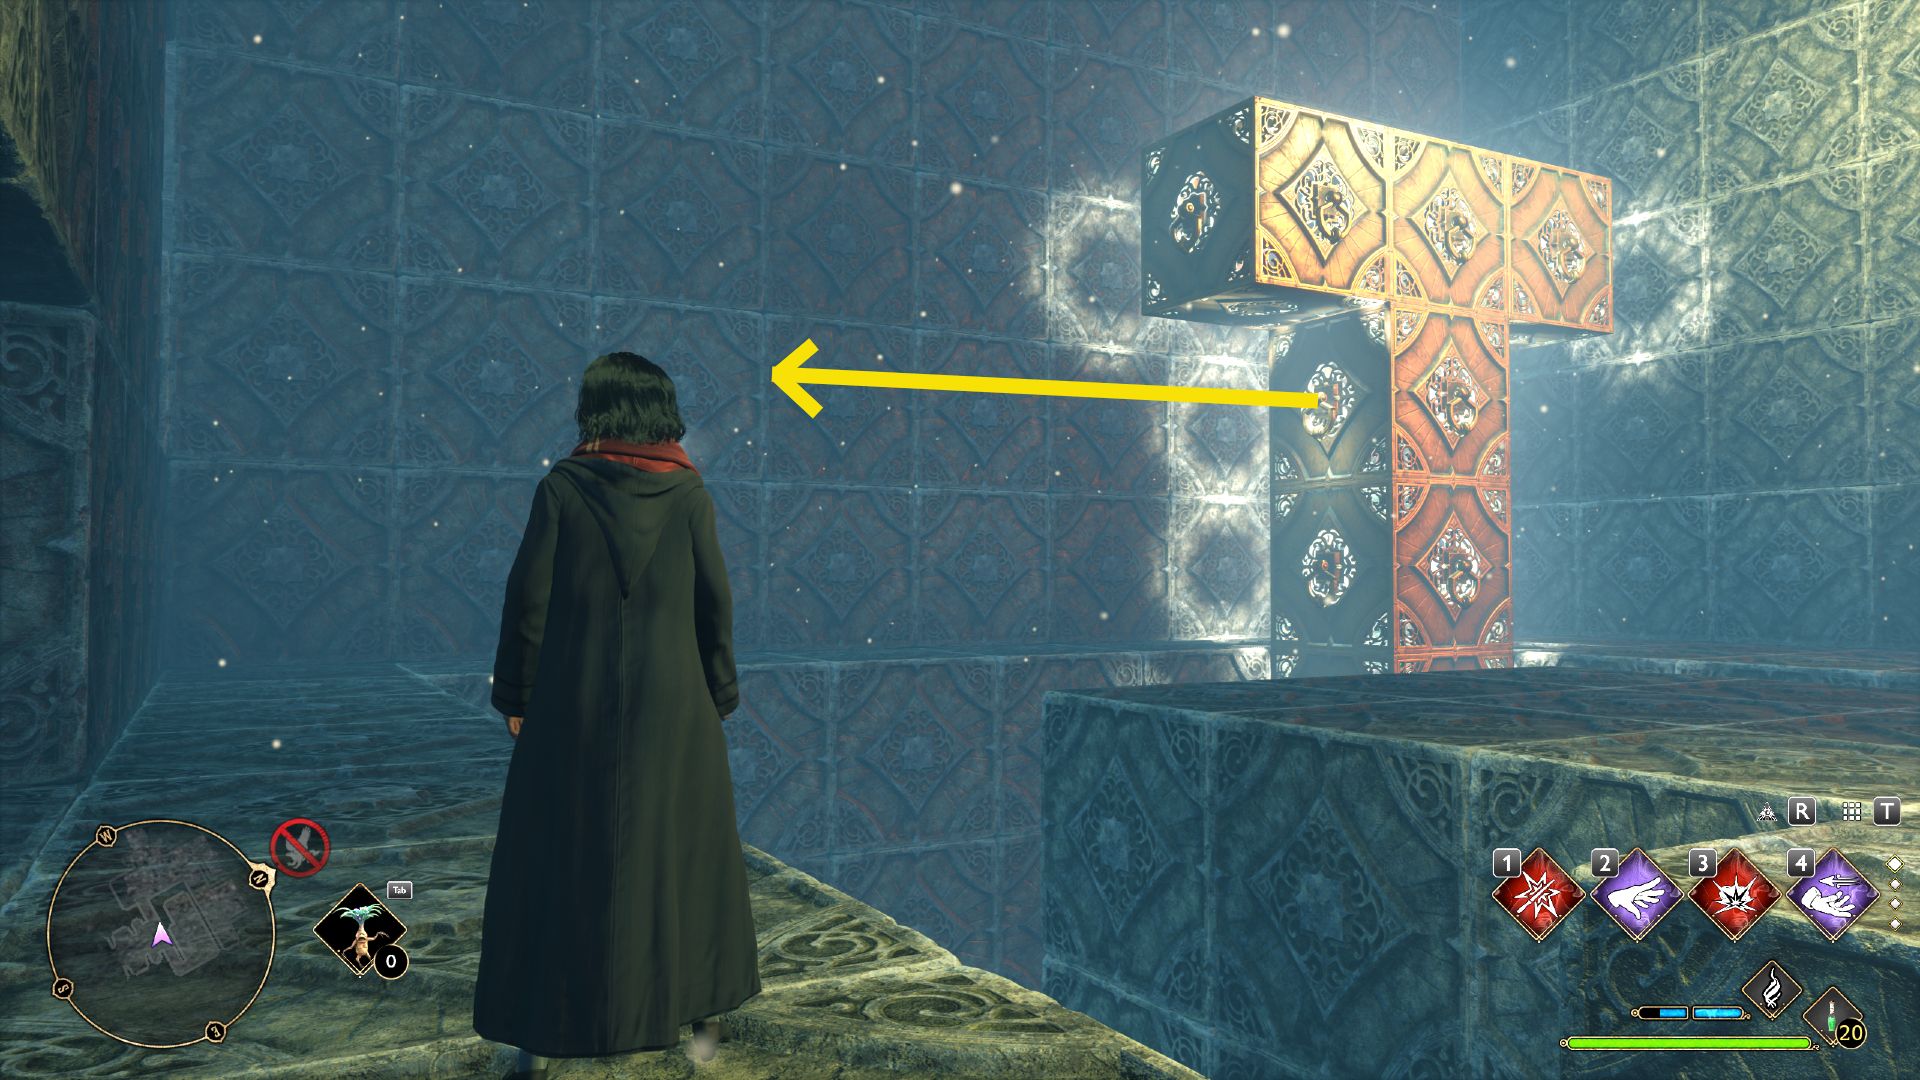
|
|
12 |
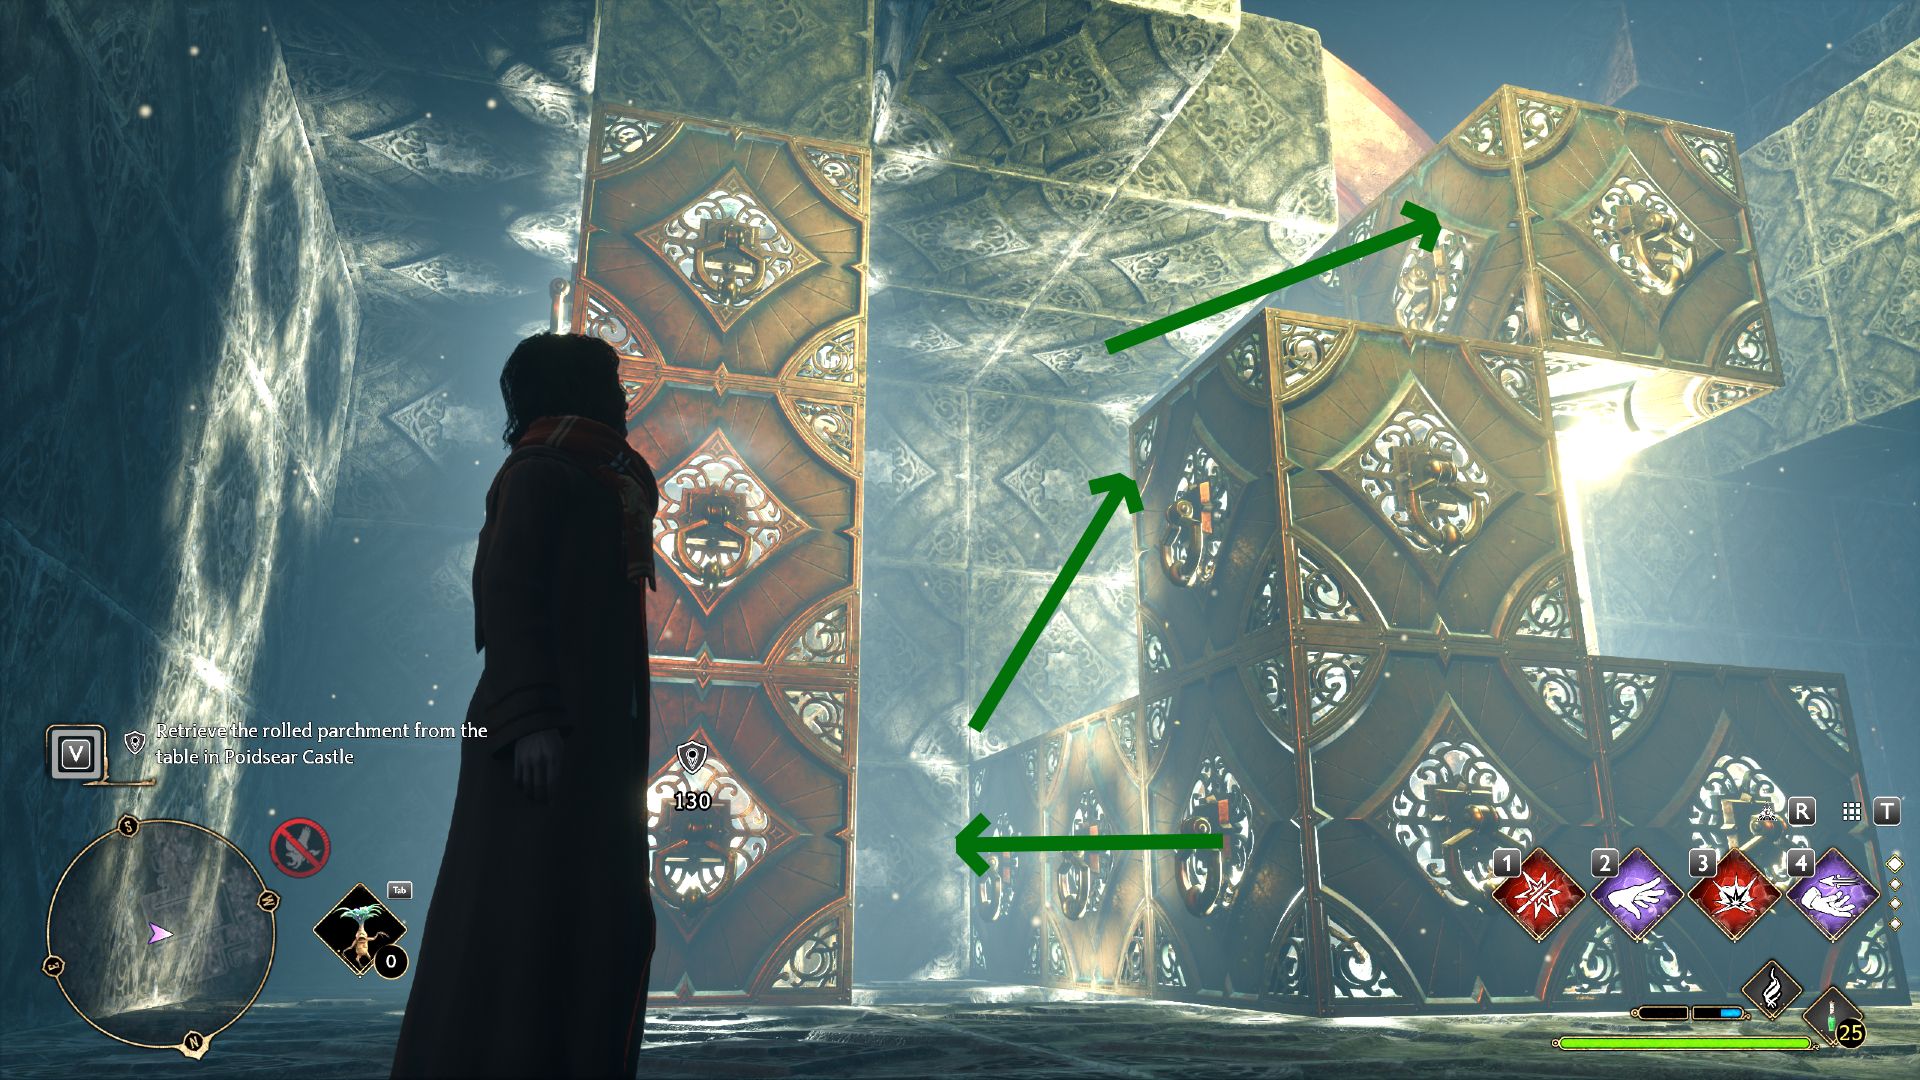
Use Accio on the T-shaped stack of blocks to pull it towards you. This forms a big structure of blocks. |
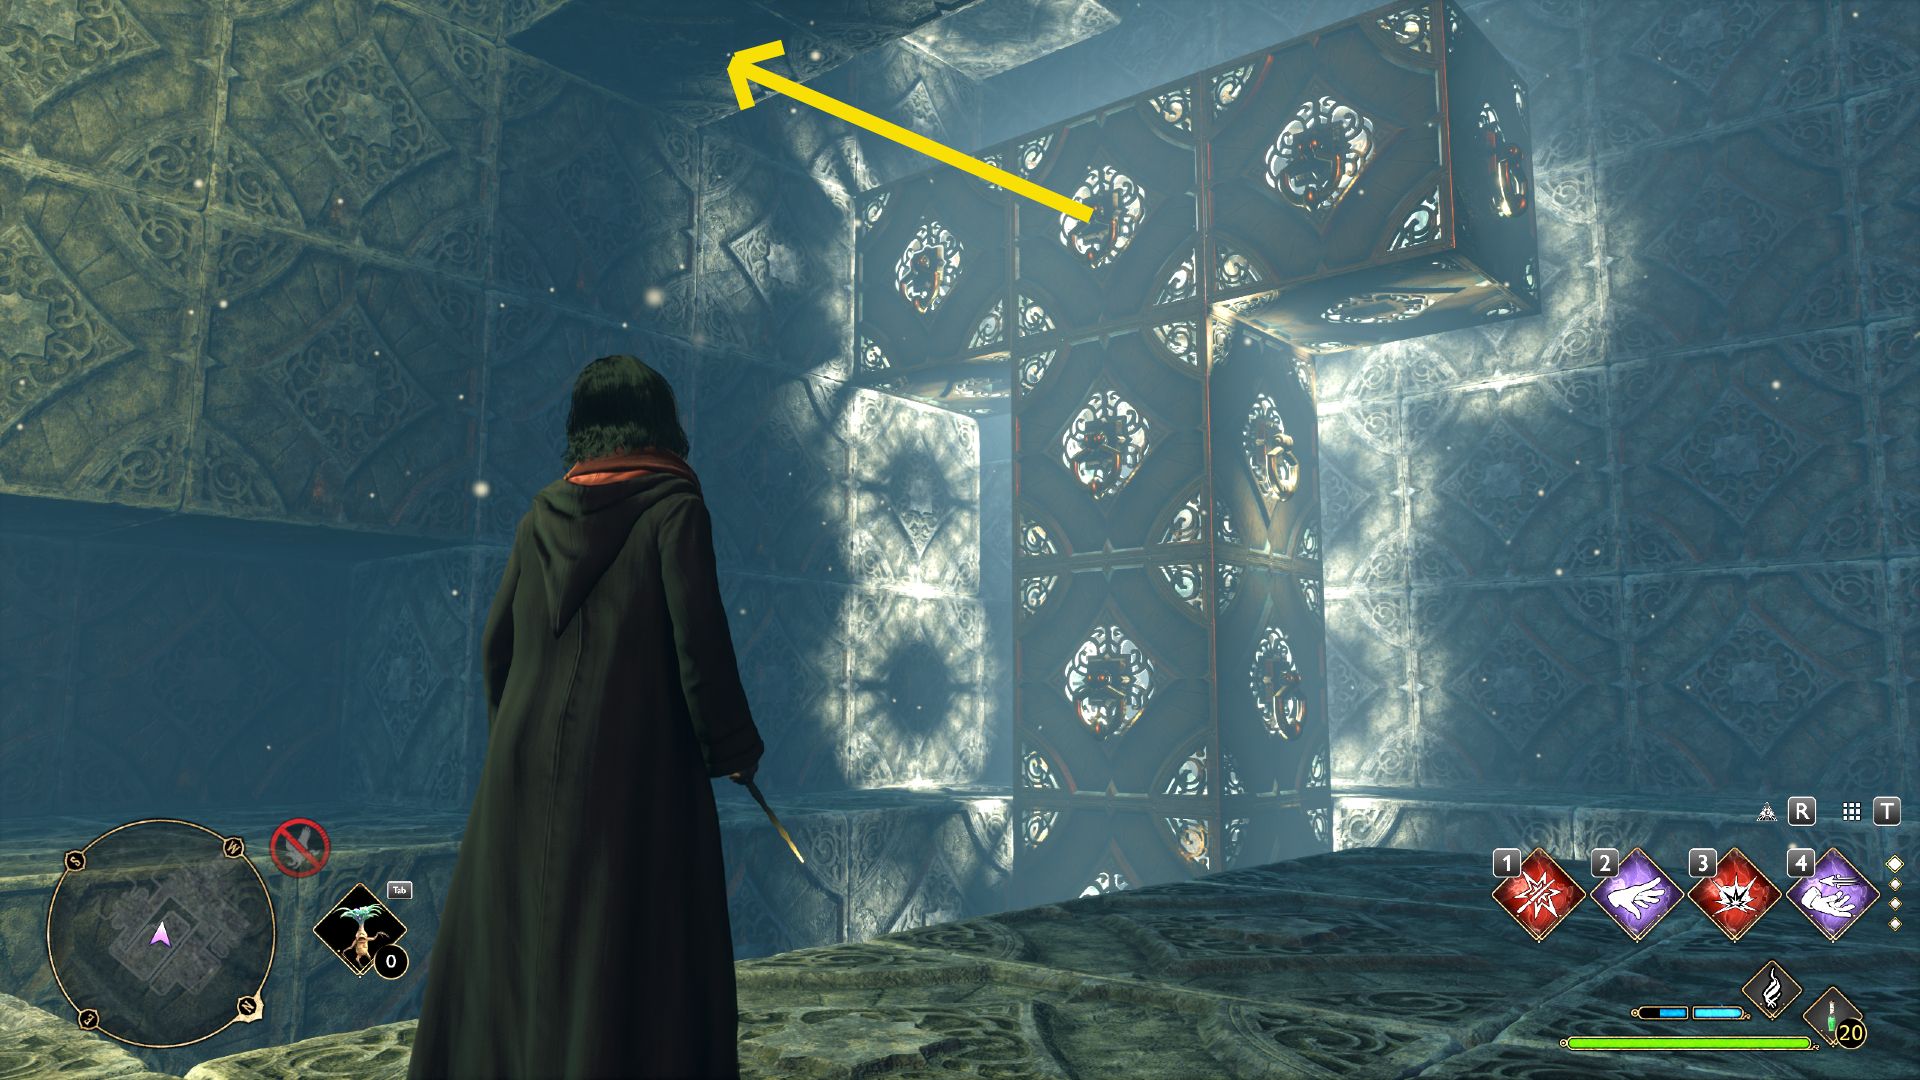
|
|
13 |
Climb up the blocks to reach the exit. |
|
How To Complete The Second Set Of Puzzles In Depulso Puzzle Room 2
You have to do some platforming to get all three chests and reach the exit in the second part of Depulso Puzzle Room 2. However, this can be a little trickier than some of Hogwarts Legacy’s platforming Merlin Trials, so you should always do a running jump.
|
Step |
Description |
Image |
|---|---|---|
|
1 |
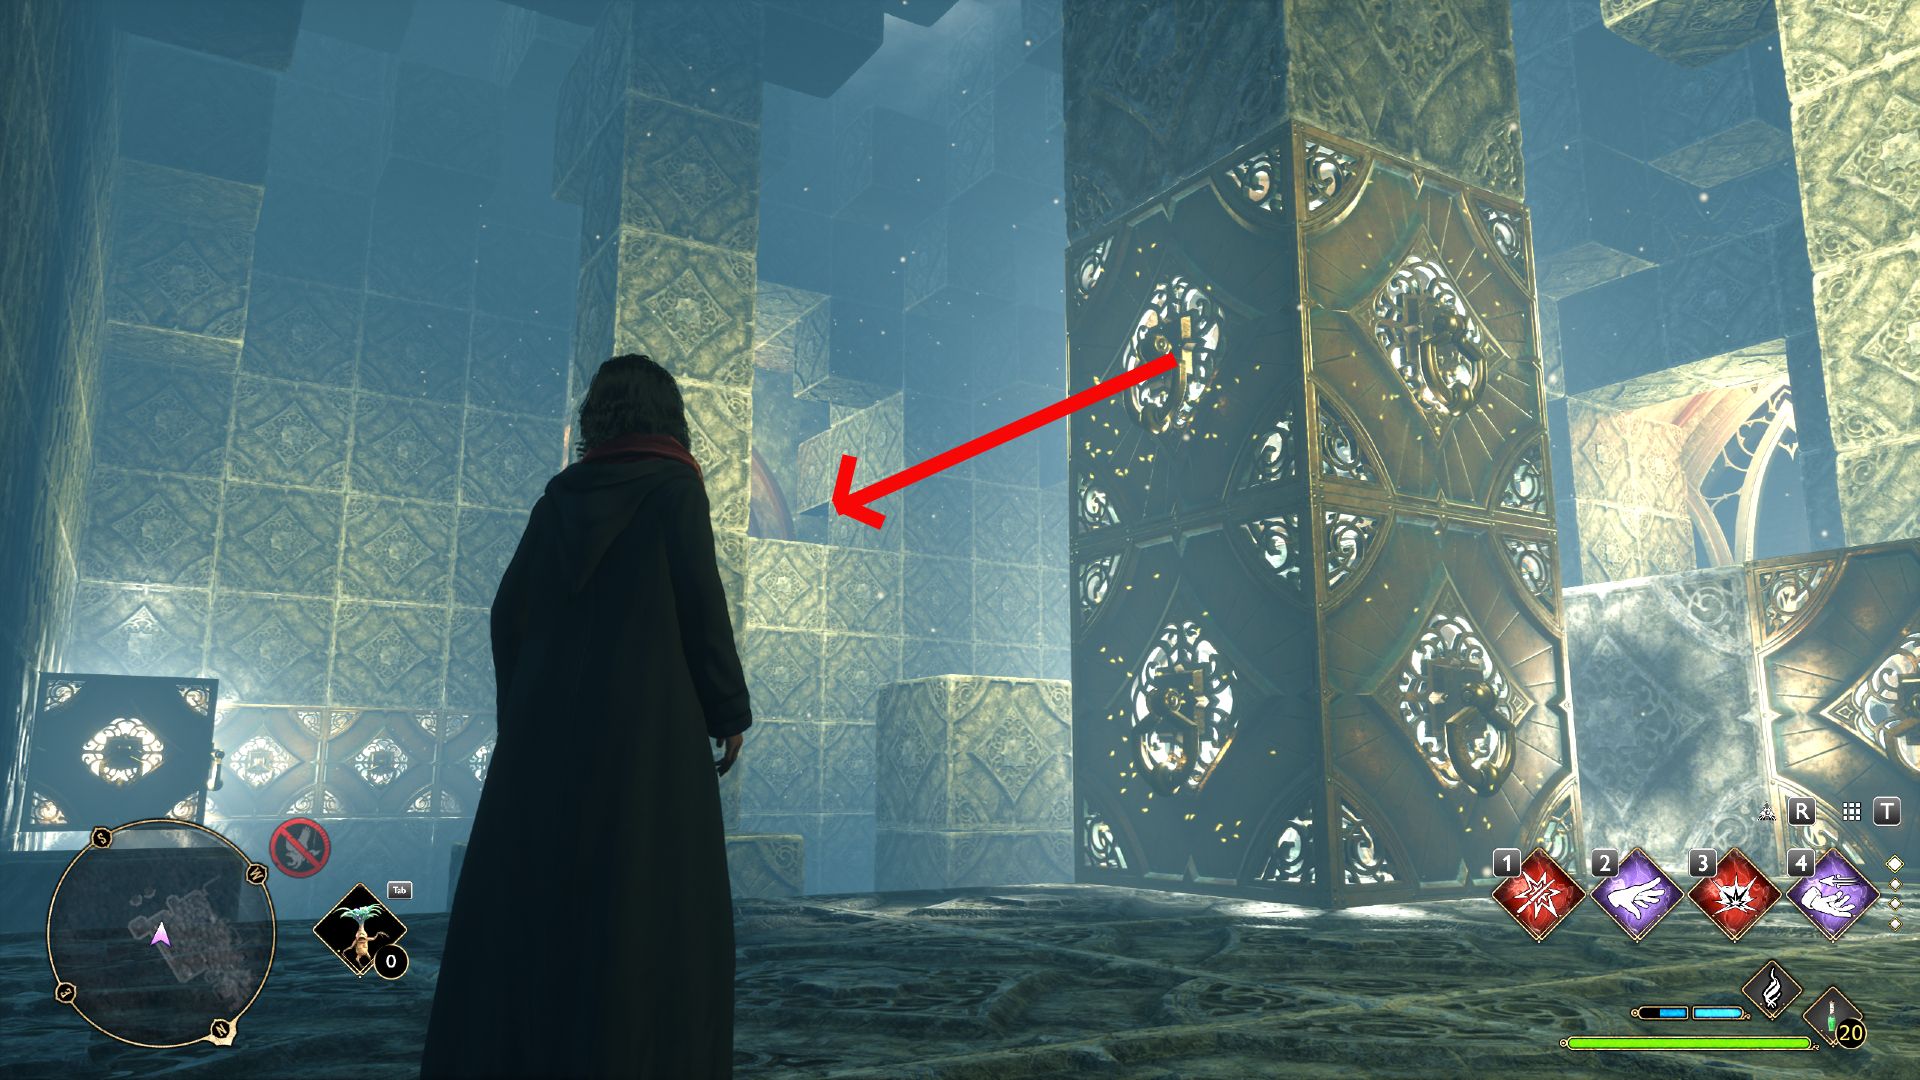
Use Depulso on the three blocks on the left to push them toward the back wall. |
|
|
2 |
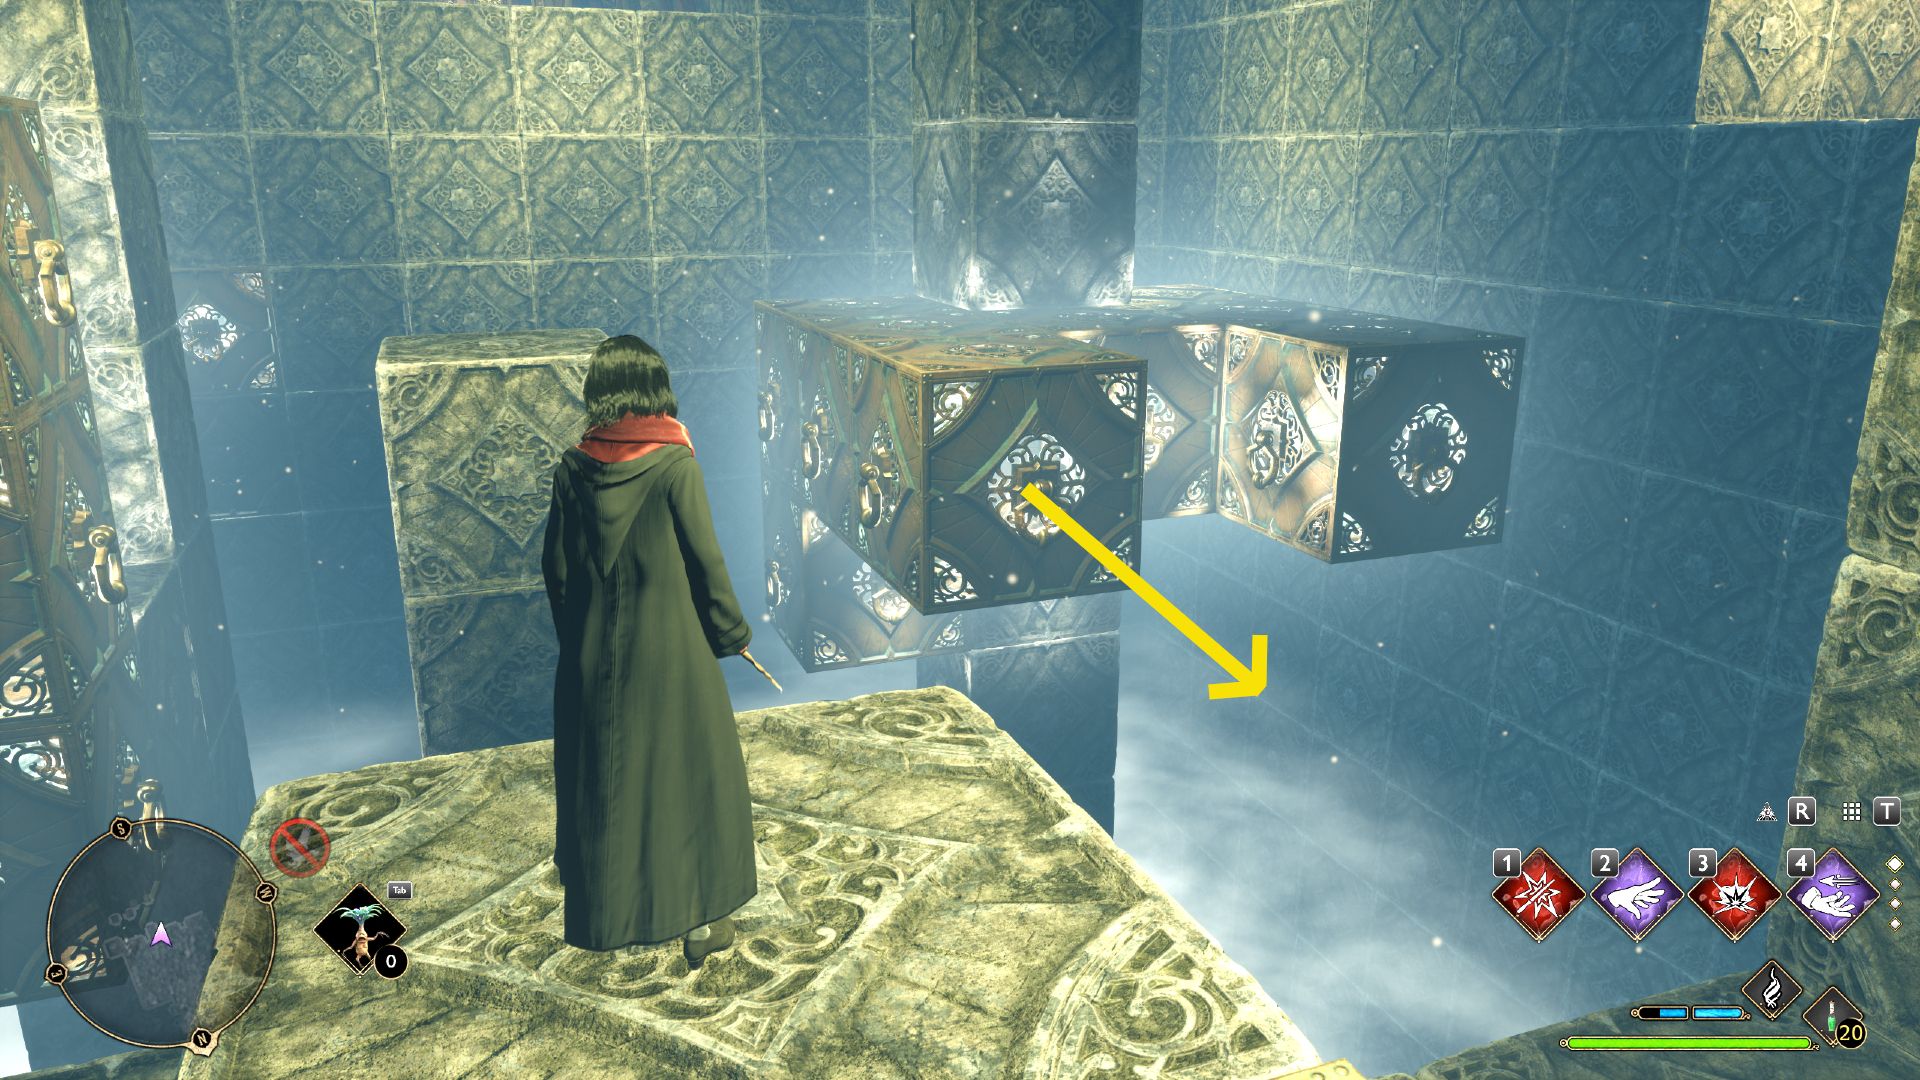
Climb up the middle block and use Accio to pull the blocks in front of you. |
|
|
3 |
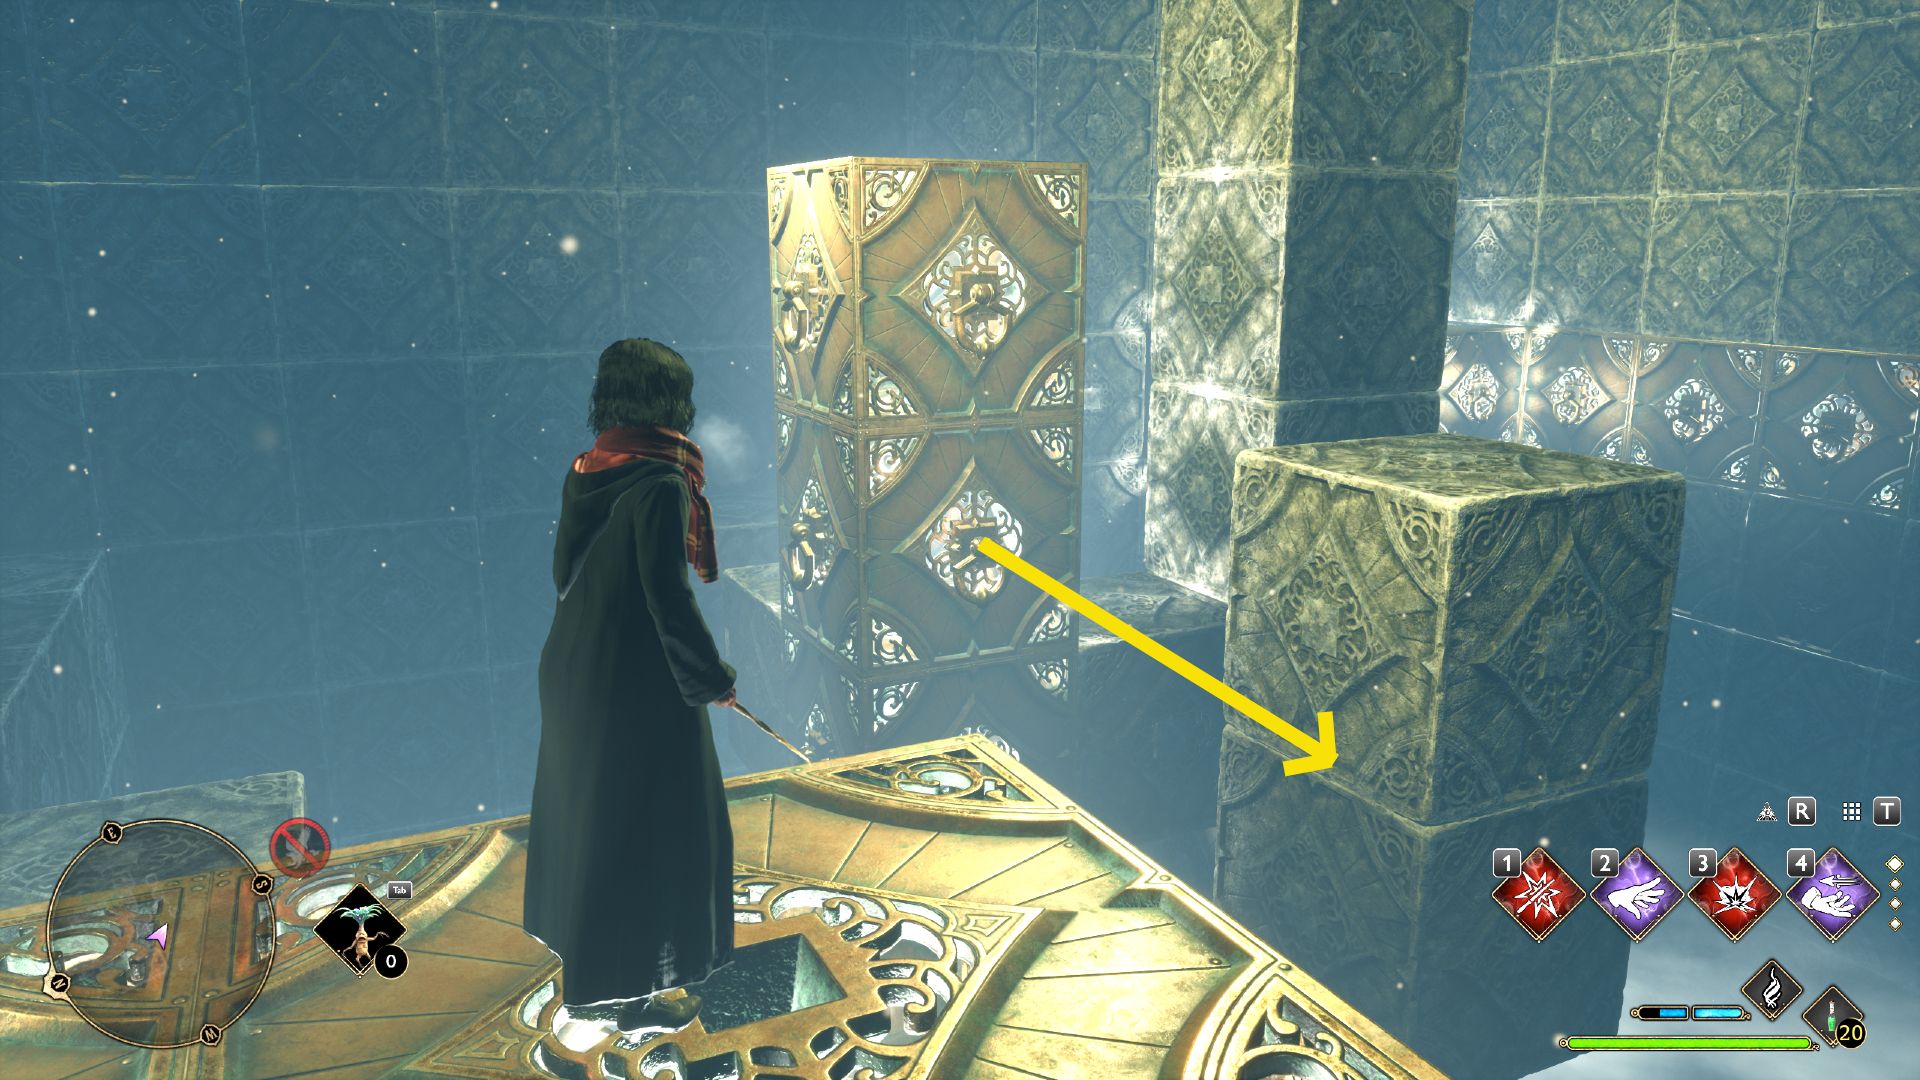
Jump across the gap and turn to look at the three blocks. Use Accio to pull them towards the right wall. |
|
|
4 |
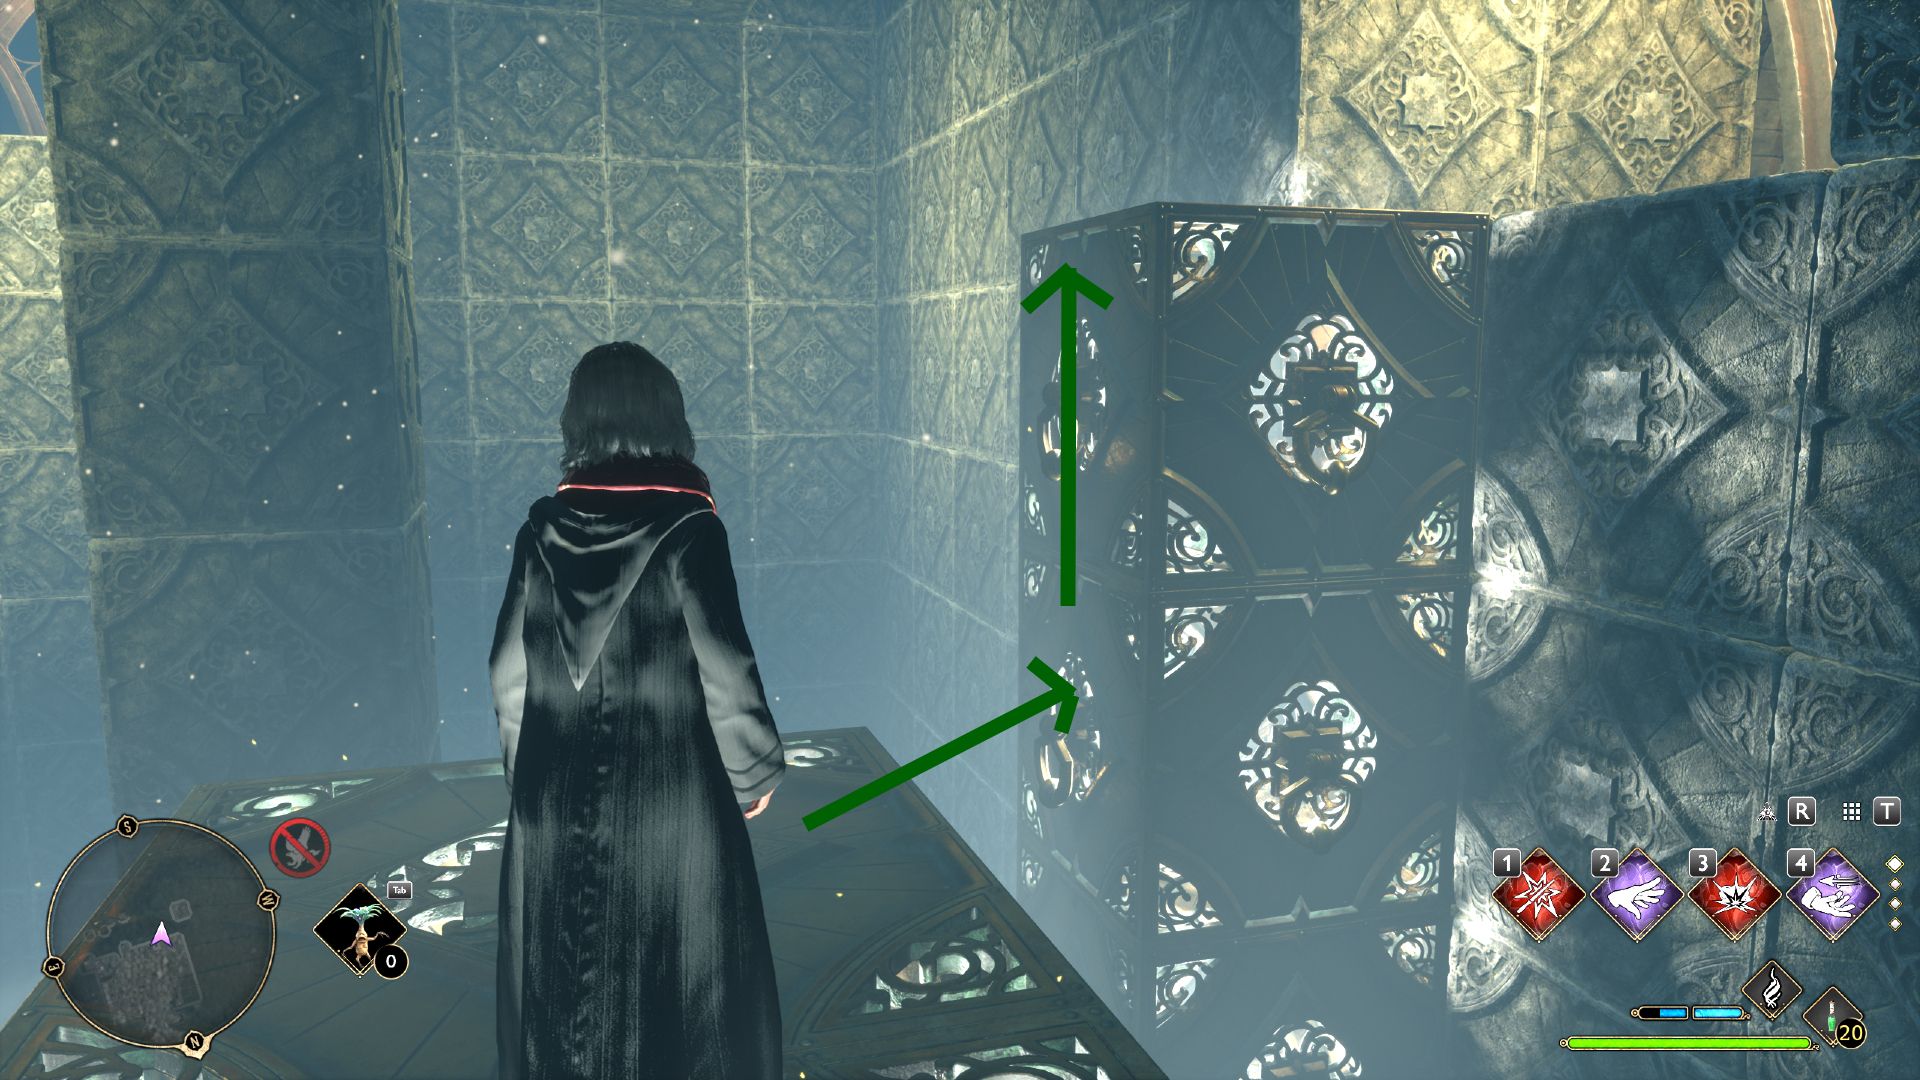
Jump onto the three blocks and climb up to reach the first chest. This can be a tricky jump, so you should try and jump at an angle. |
|
|
5 |
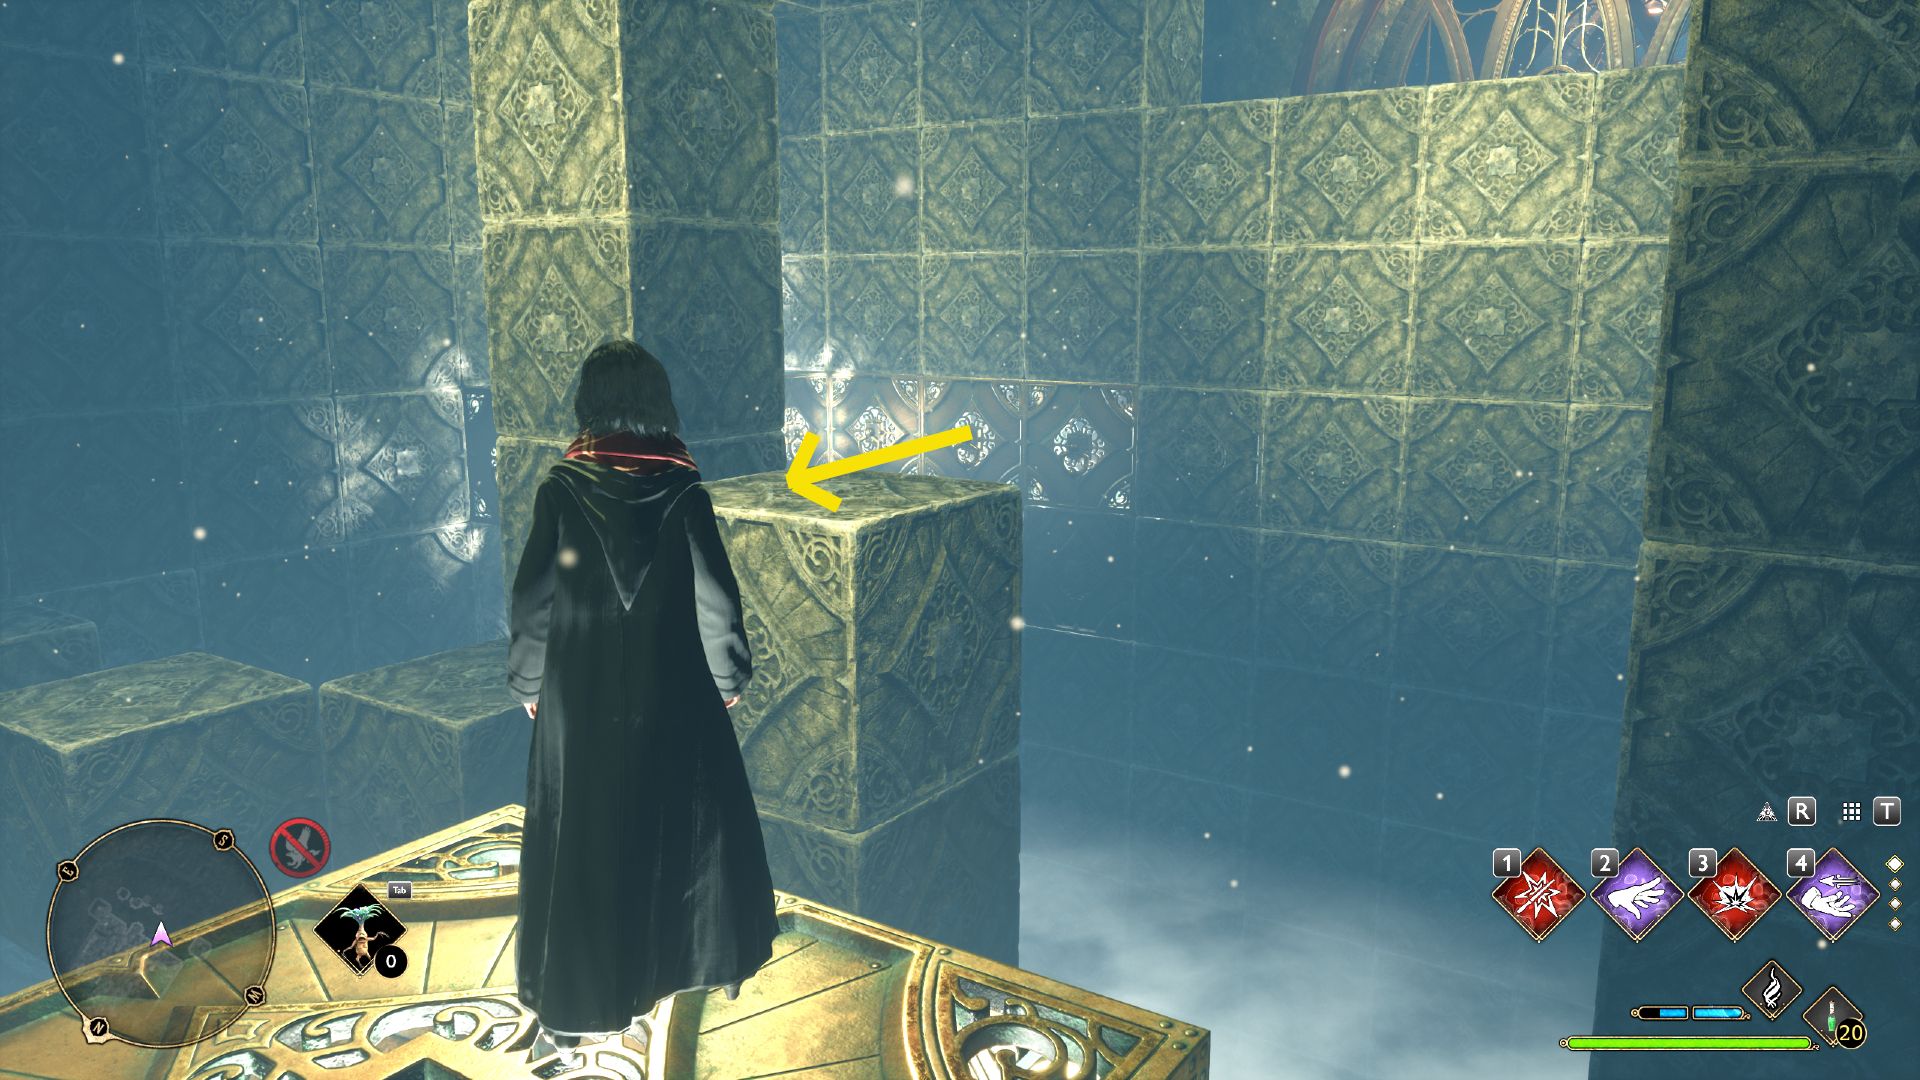
Jump back across and look towards the back wall. Use Accio on the blocks in the left corner to pull them toward the entrance. |
|
|
6 |
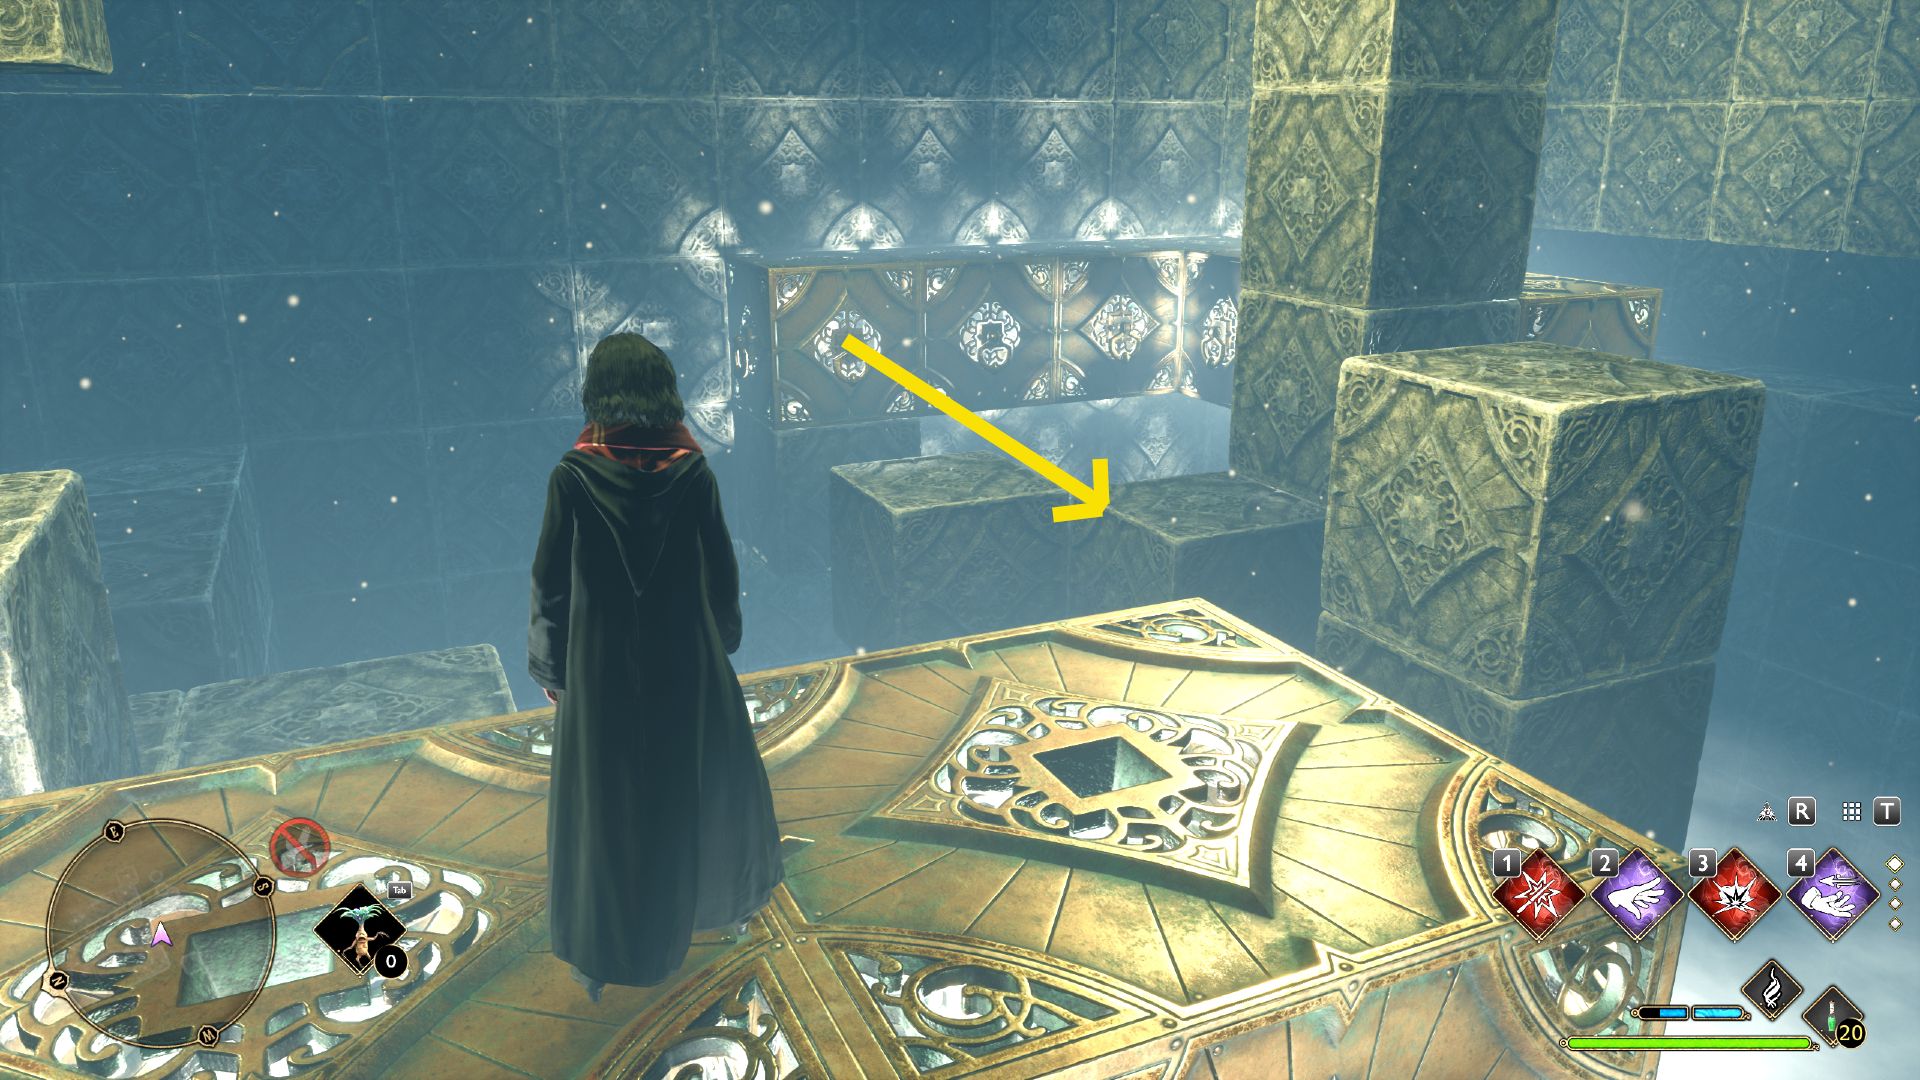
Use Accio on the same blocks to pull them towards you. |
|
|
7 |
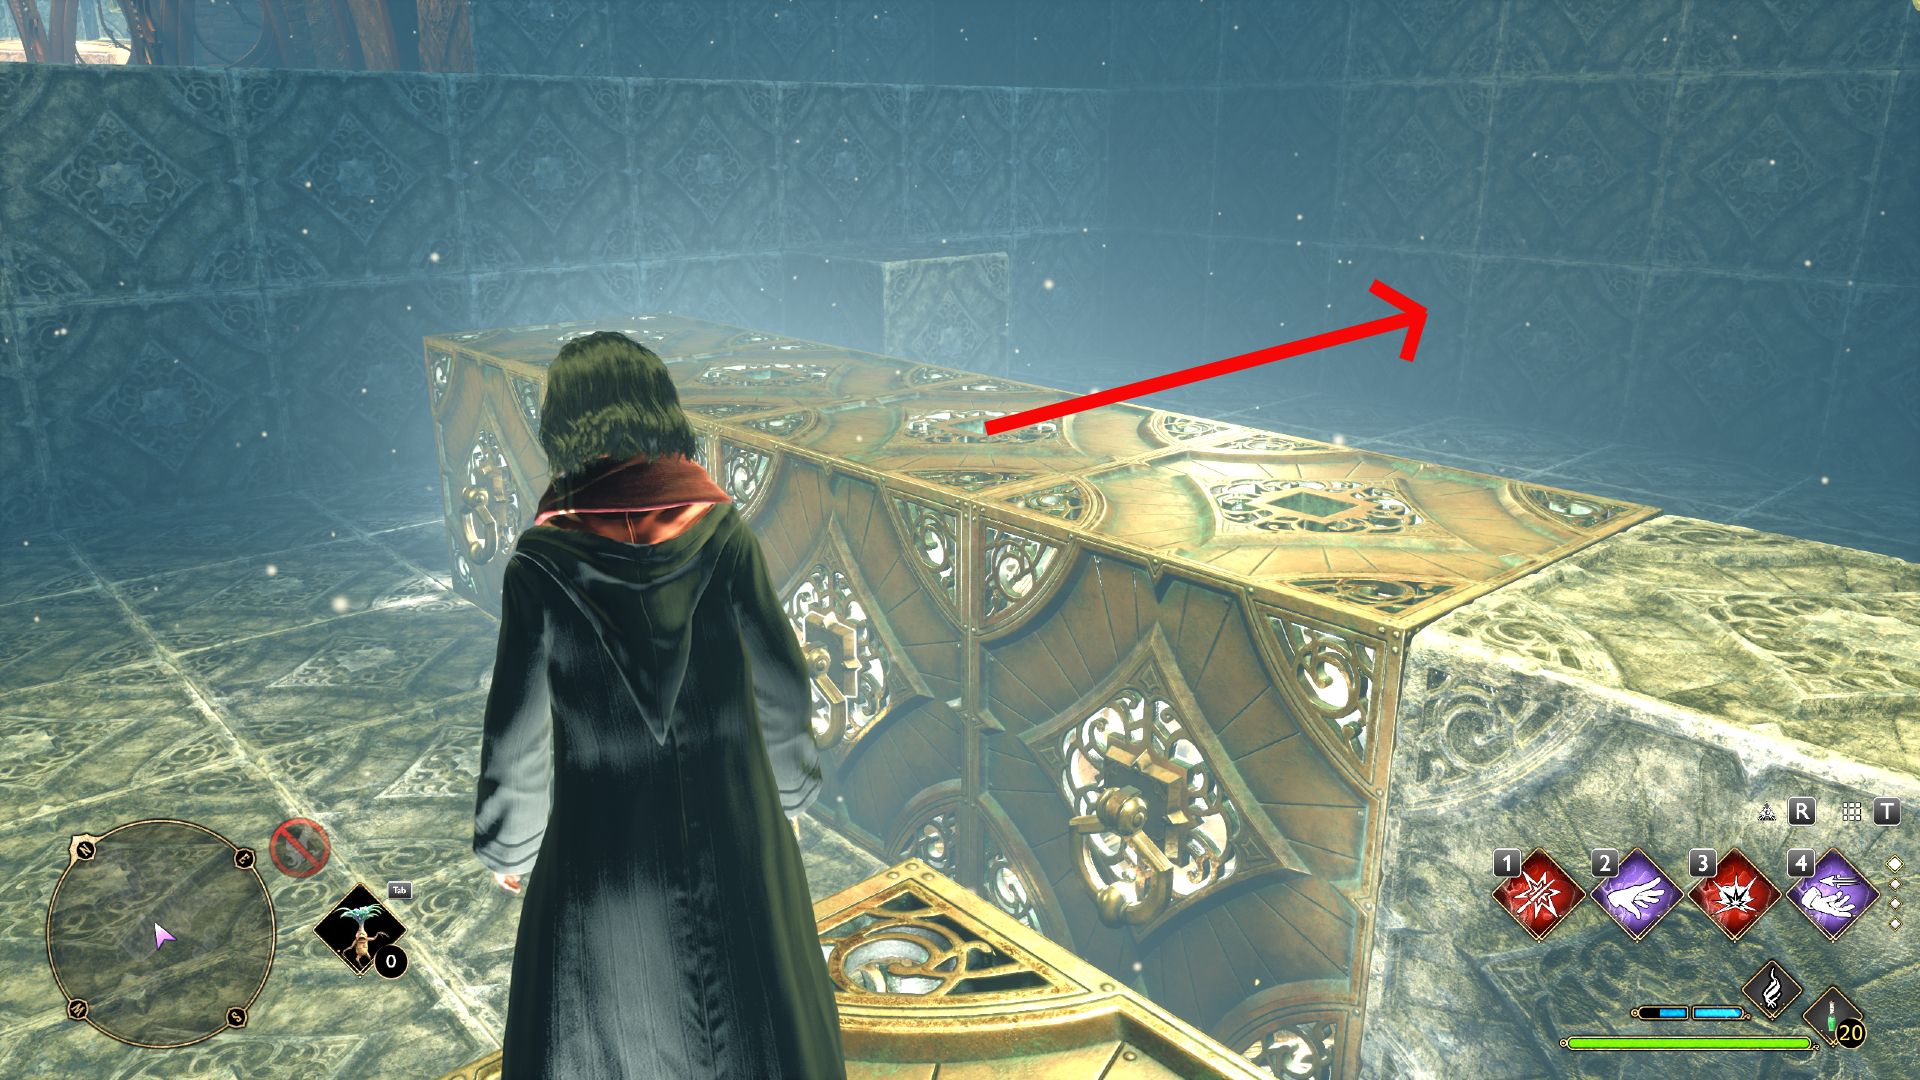
Turn around. Depulso the four blocks behind you to the right. |
|
|
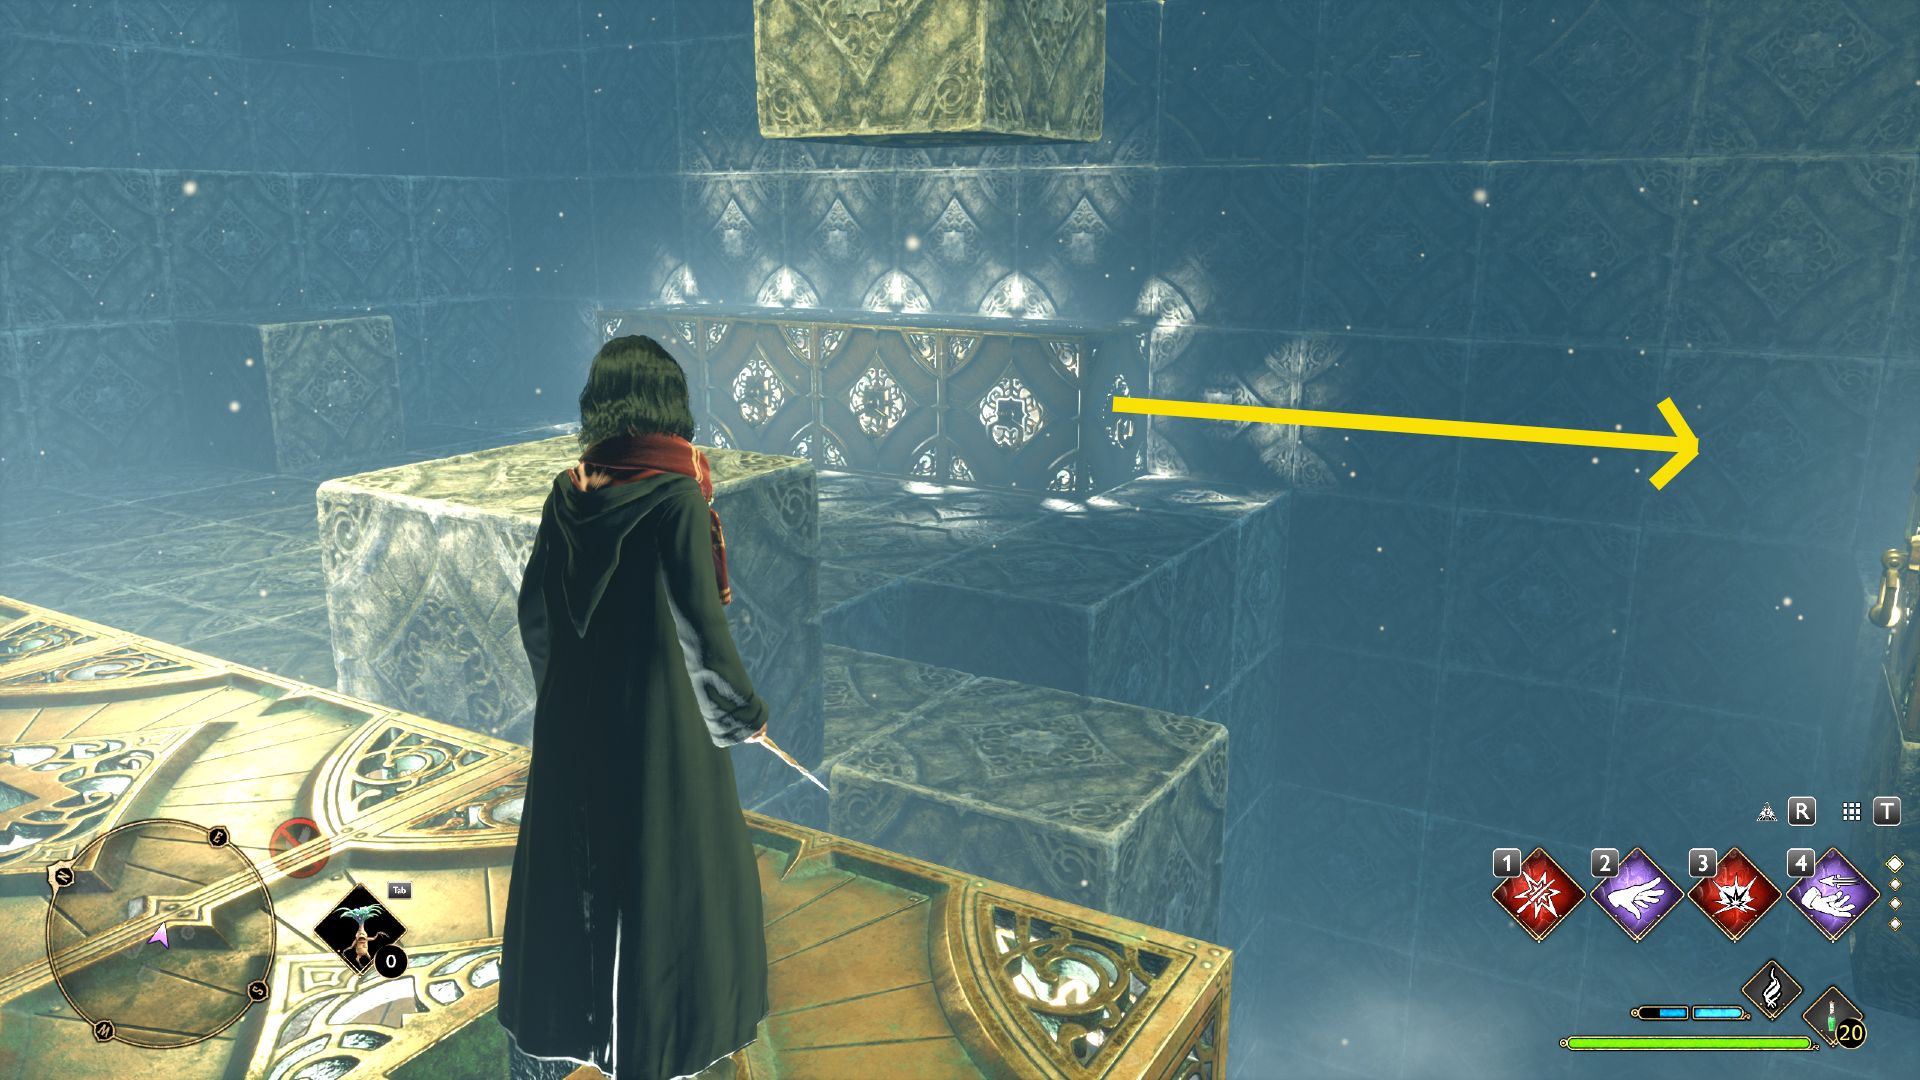
8 |
Use Accio to pull those blocks toward the back wall. |
|
|
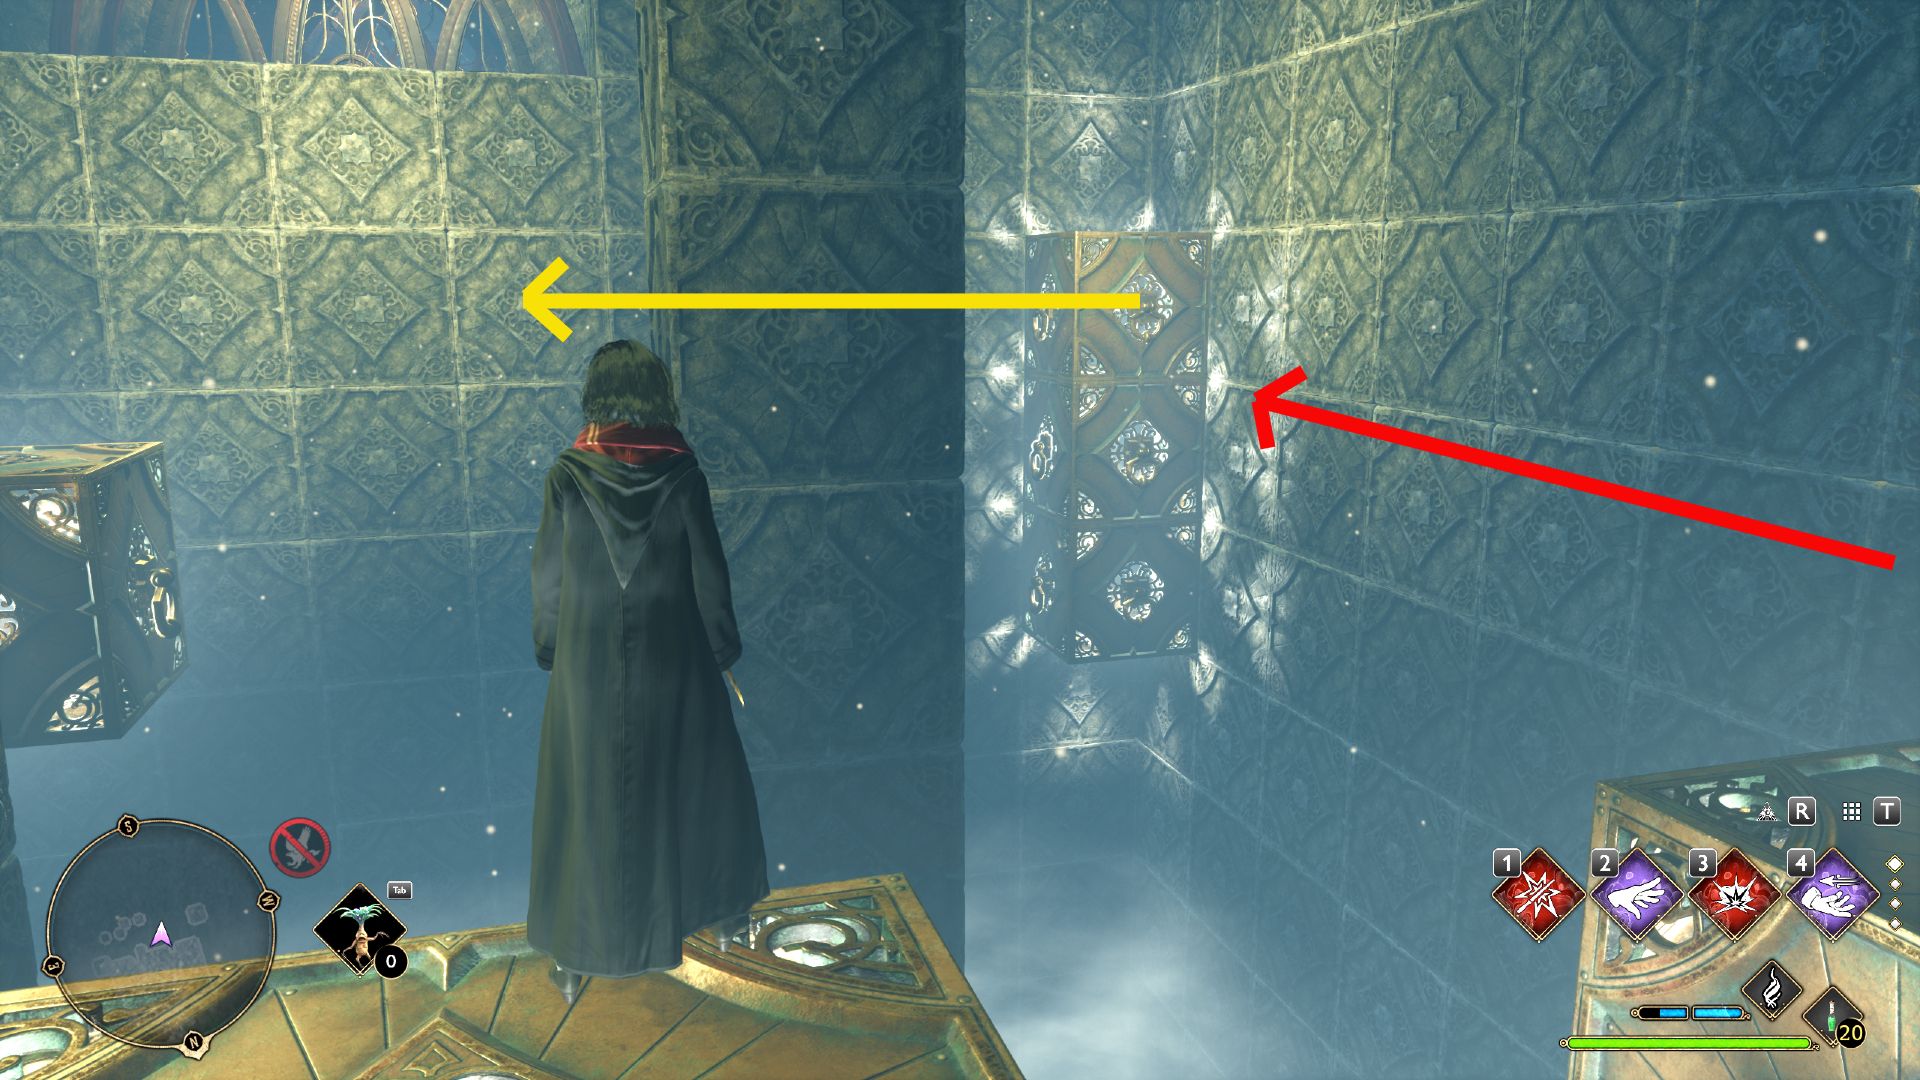
9 |
Turn around and use Depulso on the blocks you climbed to reach the first chest to push them into the back wall. Use Accio to pull them towards the left corner. |
|
|
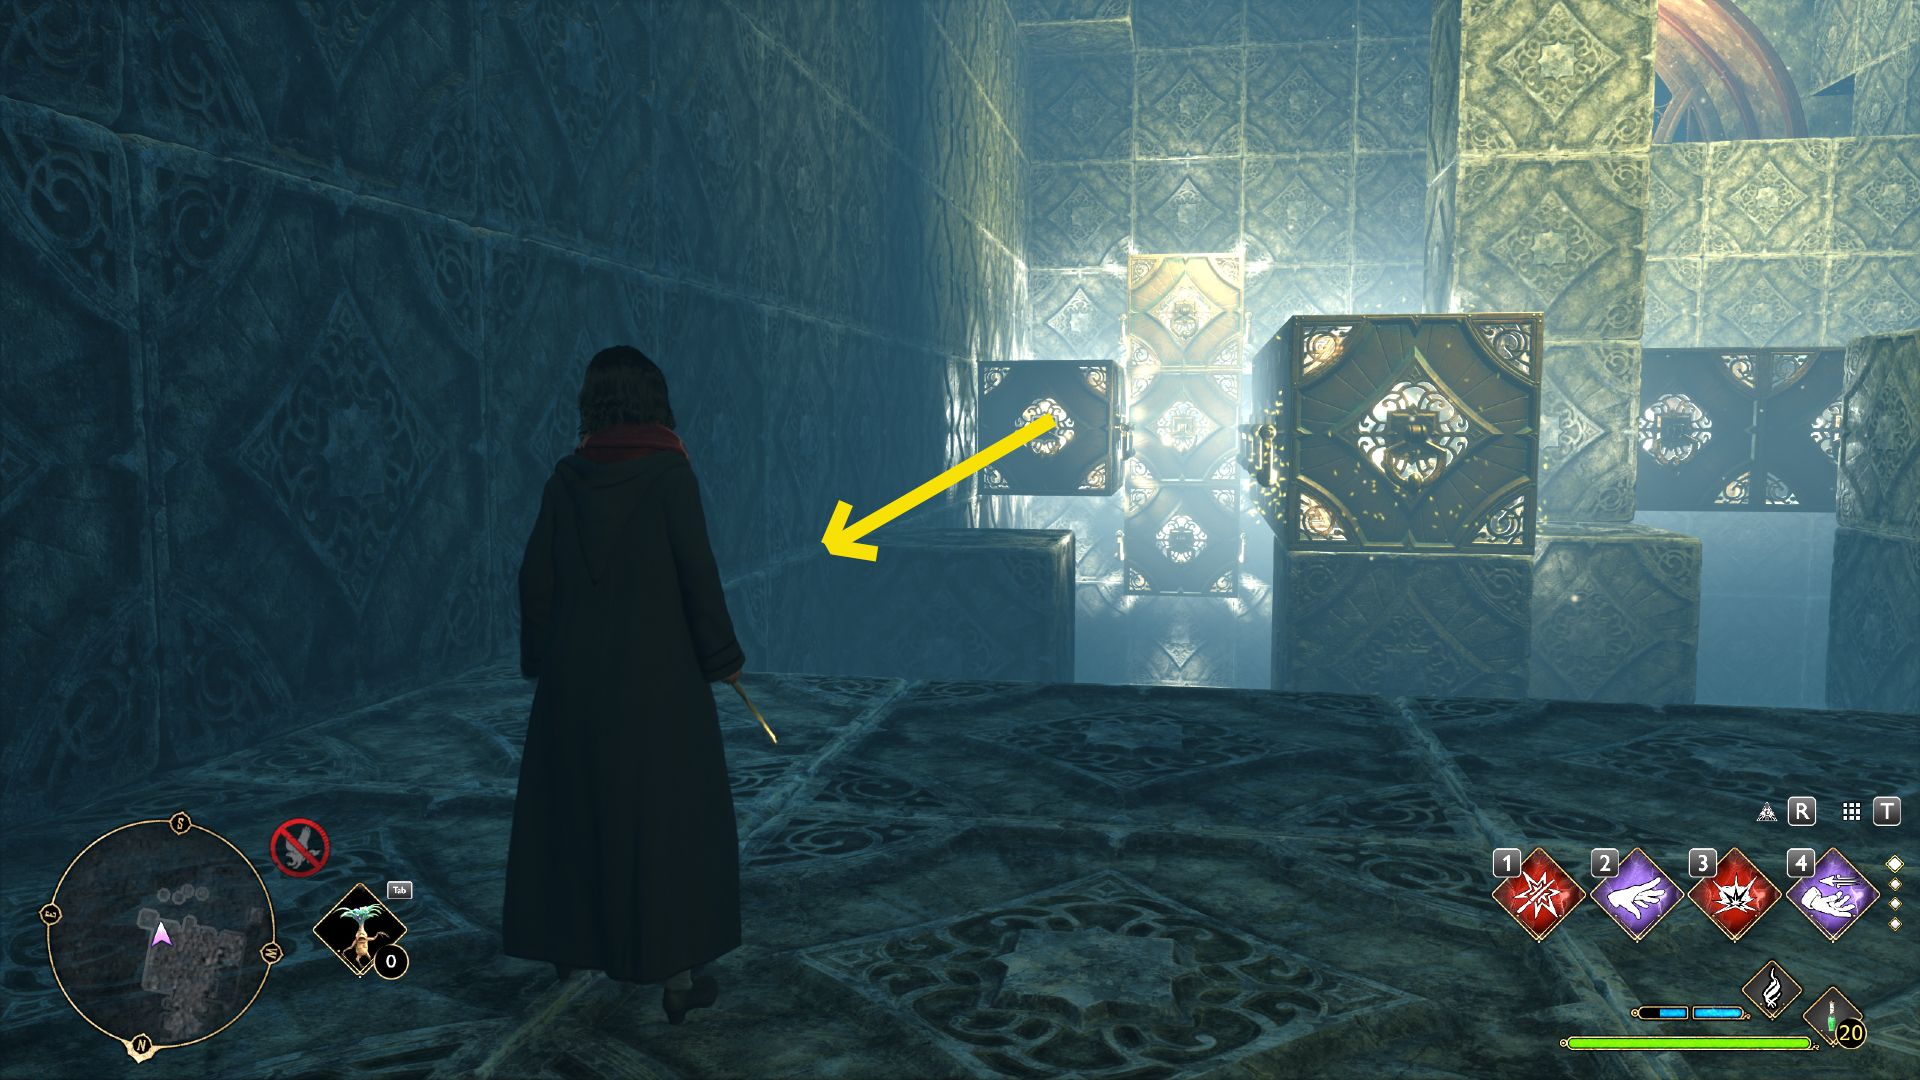
10 |
Head towards the left wall. Use Accio to pull all the blocks in the left corner towards you. Climb up and grab the second chest. |
|
|
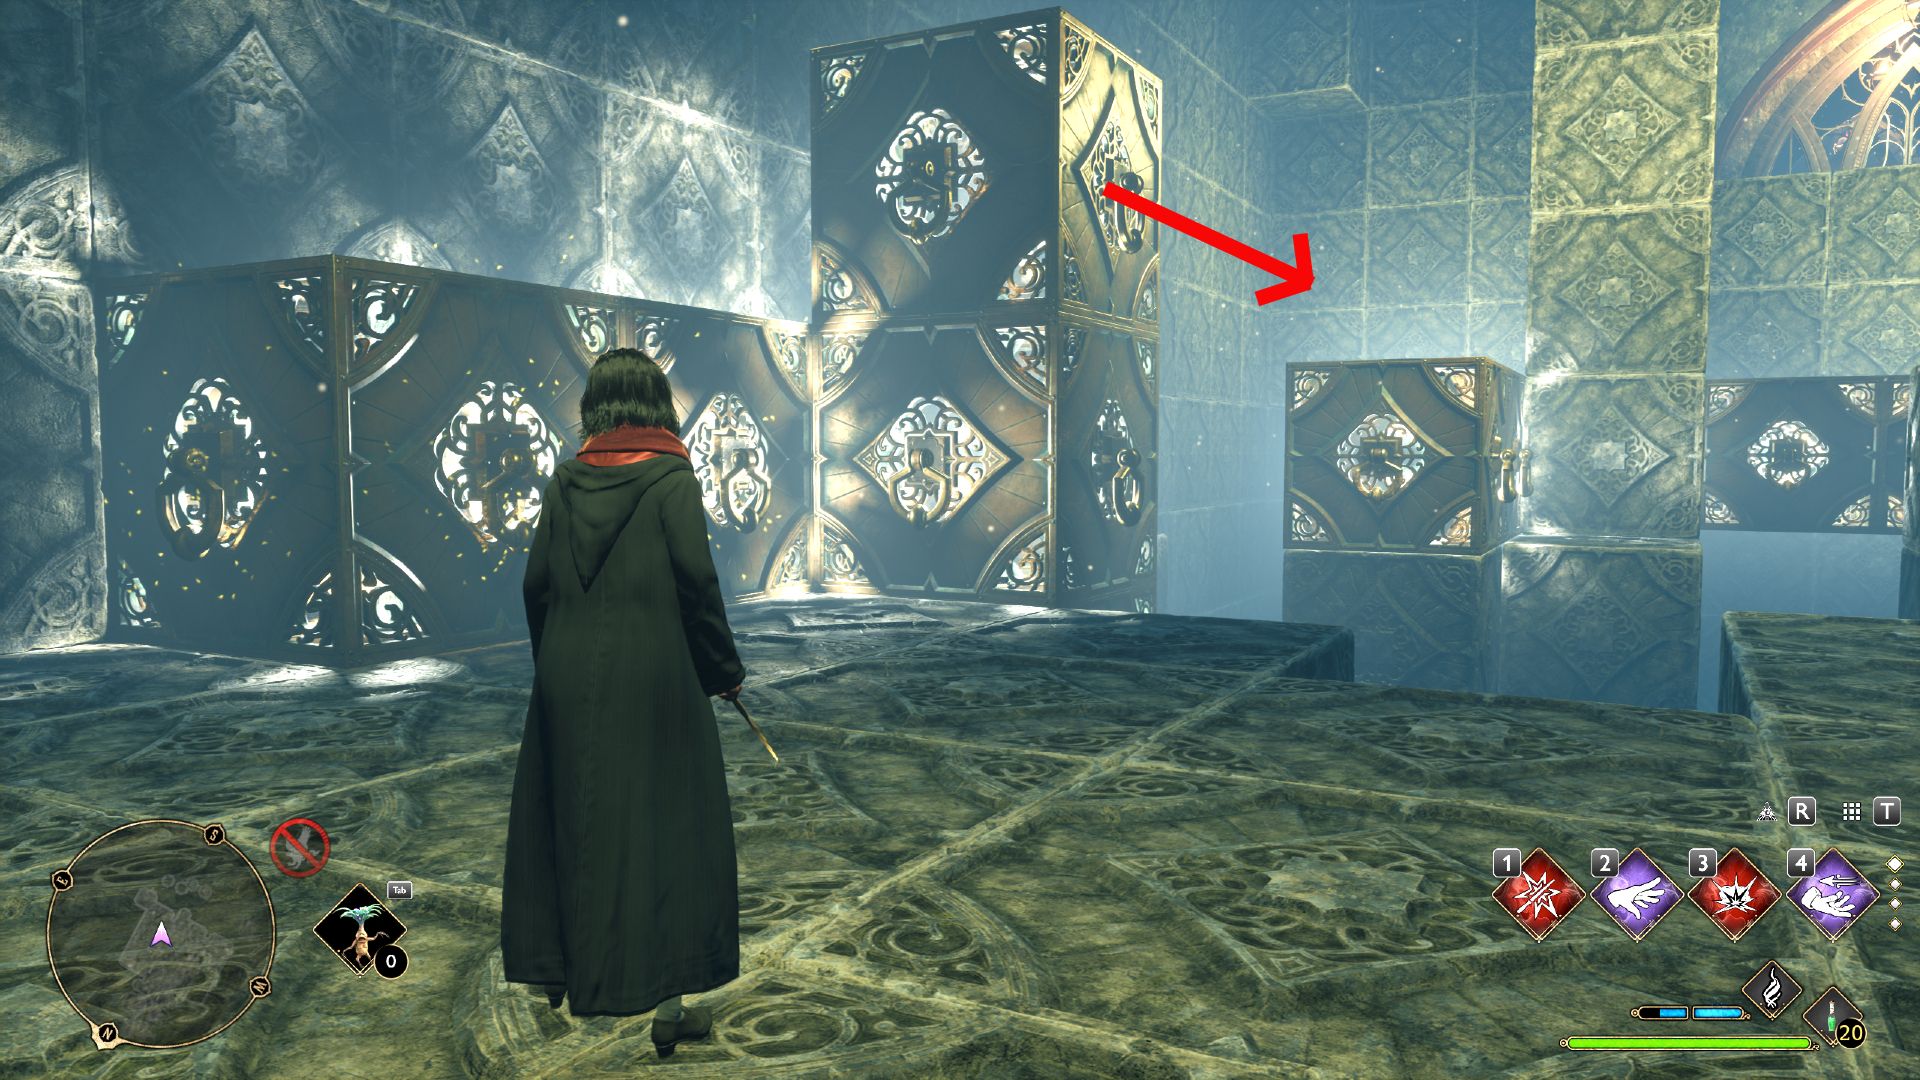
11 |
Use Depulso to push the cubes back into the left corner. Head back to the blocks in the middle of the room. |
|
|
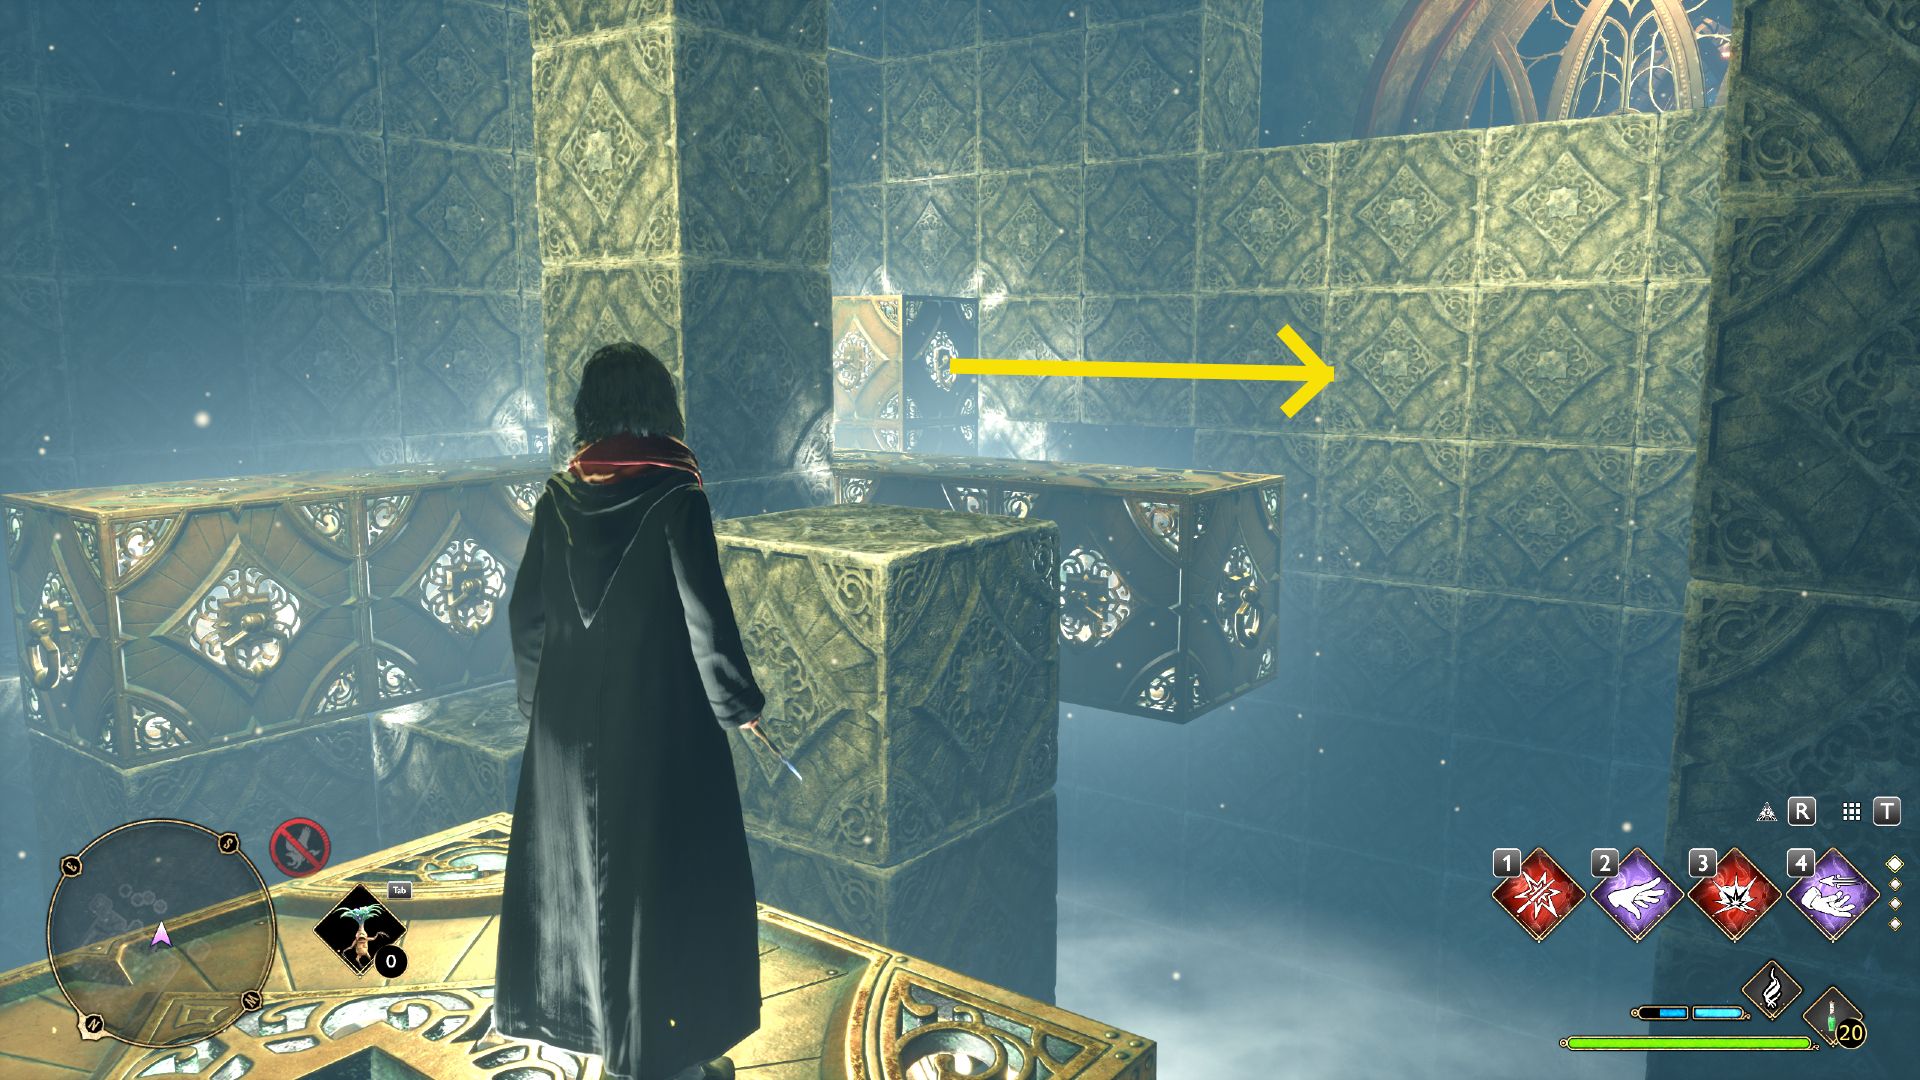
12 |
Use Accio on the blocks in the left corner to pull them to the right. Jump across to the middle stone block and jump across to the blocks. |
|
|
13 |
Climb up to the exit. |

|
After climbing up, you will find a chest containing a Conjuration you can use to decorate the Room of Requirement in Hogwarts Legacy. Depulso Puzzle Room 2 contains the most challenging puzzles in Hogwarts Legacy, but with a bit of help, you should be able to claim all the rewards it offers.
Editor’s Note: Harry Potter creator J.K. Rowling has been accused of transphobia by those in the LGBTQ+ community. Although not directly involved in the development of Hogwarts Legacy, Rowling does stand to earn royalties from the game. We would like to reiterate our support for trans rights and that trans identities are valid. Support services are listed below for trans people impacted by discussions of transphobia.
In the USA:
- Trans Lifeline: (877) 565-8860
- The Trevor Project: 1-866-488-7386
In Canada:
- Trans Lifeline: (877) 330-6366
- Youth Line: 1-800-268-9688
In the UK:
- Switchboard: 01273 204050
- Mermaids: 0808 801 0400

