Quick Links
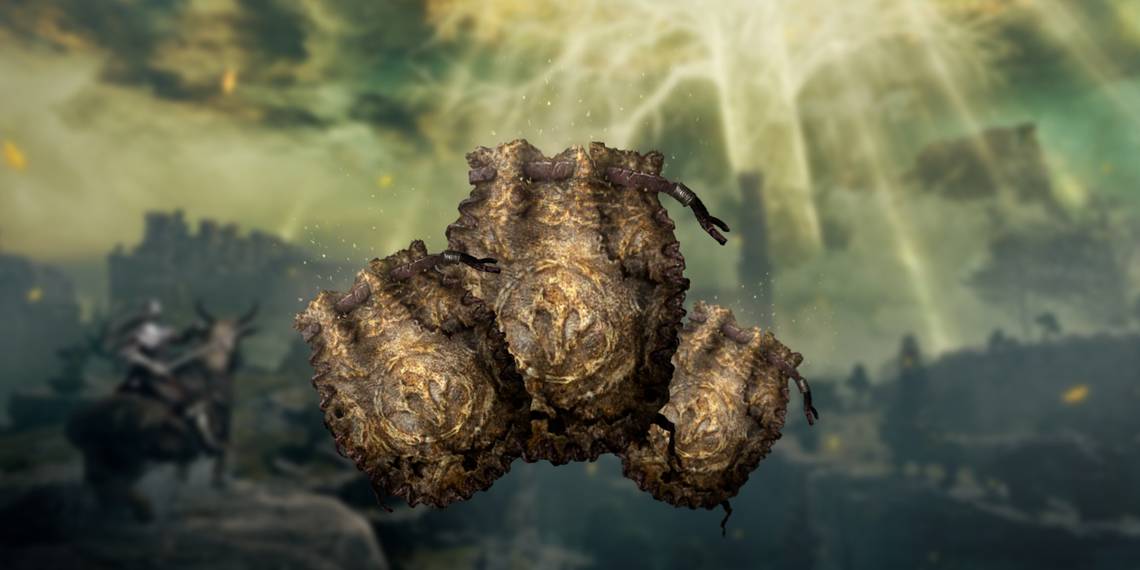
You can choose from over 80 Talismans in Elden Ring; however, at some point, you might need more slots if you want to equip multiple of them. Initially, you can only equip one Talisman; however, you can increase the number of slots as you progress through the game. Finding Talisman pouches can be extremely challenging, even though you can get Talismans for doing just about anything. However, to use multiple Talismans and give your character more buffs, you will have to go through an arduous journey.
You can increase the number of slots by finding Talisman Pouches. Two can be acquired by defeating Elden Ring's non-optional bosses, but others can be easily missed. One of the Talisman Pouches can easily be missed since it requires players to speak to an NPC, who will disappear if players progress too far into the game.
Extra Talisman Slot #1

The first Talisman Pouch that unlocks an additional slot can be acquired by beating Margit, the Fell Omen. She can be encountered in Stormhill as they make their way to Stormveil Castle. Margit will be your first major challenge, as she can be quite challenging to beat. However, if you summon Sorcerer Rogier just before the fog gate, you will have a better chance of defeating her. Additionally, you can acquire the Lone Wolf Ashes, which are quite powerful at this stage of the game, and buy Margit's Shackle from Patches, as it will ground Margit and allow you to get a few hits for free.
Want to find out how to get Margit's Shackle and get another talisman slot in Elden Ring fast? Check out the video from SwoleBenji on YouTube below:
Extra Talisman Slot #2

The third Talisman slot can be one of the easiest to miss as it requires talking to an NPC. However, if you beat Godfrey, the NPC will disappear, and you won't get a chance to get the Talisman Pouch later on. To avoid missing out on this Talisman Pouch, after beating Godrik the Grafted, choose one of the following bosses to beat instead of Godfrey:
- Malenia, Blade of Miquella
- Mohg, Lord of Blood
- Morgott, the Omen King
- Rennala Queen of the Full Moon
- Rykard, Lord of Blasphemy
- Starscourge Radahn
One of these bosses needs to be defeated because you will need one additional Great Rune in addition to Godrick's. Once two have been acquired, travel to the Roundtable Hold and head right and up the stairs to find Finger Reader Enia in the corner of the room. Speak to her at this point to receive the second Talisman Pouch and increase the number of slots to three.
Extra Talisman Slot #3

The final way to get more talisman slots in Elden Ring is obtained near the end of the game after you beat Godfrey, the First Elden Lord. Much like Margit, this boss will severely test your skills and will require you to be adequately prepared as well as leveled up. Players will encounter this boss in Leyndell, the Capital of Ash, after completing "Crumbling Farum Azula."
After defeating Godfrey, you will acquire the final Talisman Pouch, raising the total number of talismans that can be equipped in Elden Ring to four.
Having trouble beating Godfrey and his second, much more brutal form to get the third talisman slot increase? Watch this boss fight guide video from Tyrannicon on YouTube for some helpful tips!
Every Talisman & What They Do

There are over 100 Talismans in Elden Ring (counting the enhanced +1 and +2 versions), but even with all the upgrades above players can only use a max of four at one time. Below is a list of every single Talisman, Charm, and Medallion players can find in the Lands Between (via PushSquare), along with a description about what they do. Players interested in locating these talismans for themselves can click any of the linked titles for more detailed information.
|
Ancestral Spirit's Horn |
Restores FP upon defeating enemies. |
|
Arrow's Reach Talisman |
Increases bow effective range. |
|
Arrow's Sting Talisman |
Raises attack power of arrows and bolts. |
|
Arsenal Charm |
Raises maximum equipment load. |
|
Arsenal Charm +1 |
Greatly raises maximum equip load. |
|
Assassin's Cerulean Dagger |
Critical hits restore FP. |
|
Assassin's Crimson Dagger |
Critical hits restore HP. |
|
Enhances charge attacks. |
|
|
Slowly restores HP. |
|
|
Blue Dancer Charm |
Raises attack power with lower equipment load. |
|
Blue-Feathered Branchsword |
Raises defense when HP is low. |
|
Boosts lightning damage negation. |
|
|
Boltdrake Talisman +1 |
Greatly boosts lightning damage negation. |
|
Boltdrake Talisman +2 |
Vastly boosts lightning damage negation. |
|
Bull-Goat's Talisman |
Raises poise. |
|
Carian Filigreed Crest |
Lowers FP consumed by skills. |
|
Cerulean Amber Medallion |
Raises maximum FP. |
|
Cerulean Amber Medallion +1 |
Greatly raises maximum FP. |
|
Cerulean Amber Medallion +2 |
Vastly raises maximum FP. |
|
Cerulean Seed Talisman |
Boosts FP restoration from Flask of Cerulean Tears. |
|
Clarifying Horn Charm |
Raises focus. |
|
Clarifying Horn Charm +1 |
Greatly raises focus. |
|
Enhances jump attacks. |
|
|
Companion Jar |
Raises potency of throwing pots. |
|
Concealing Veil |
Conceals wearer while crouching away from foes. |
|
Crepus's Vial |
Eliminates all sound made by the wearer during movement. |
|
Crimson Amber Medallion |
Raises maximum HP. |
|
Crimson Amber Medallion +1 |
Greatly raises maximum HP. |
|
Crimson Amber Medallion +2 |
Vastly raises maximum HP. |
|
Crimson Seed Talisman |
Boosts HP restoration from Flask of Crimson Tears. |
|
Improves dodge rolling but increases damage taken. |
|
|
Crucible Knot Talisman |
Reduces damage and impact of headshots. |
|
Crucible Scale Talisman |
Reduces damage taken from critical hits. |
|
Curved Sword Talisman |
Enhances guard counters. |
|
Daedicar's Woe |
Increases damage taken. |
|
Dagger Talisman |
Enhances critical hits. |
|
Enormously boosts physical damage negation. |
|
|
Boosts physical damage negation. |
|
|
Dragoncrest Shield Talisman +1 |
Greatly boosts physical damage negation. |
|
Dragoncrest Shield Talisman +2 |
Vastly boosts physical damage negation. |
|
Raises maximum HP, stamina and equip load. |
|
|
Erdtree's Favor +1 |
Raises maximum HP, stamina and equip load. |
|
Erdtree's Favor +2 |
Raises maximum HP, stamina and equip load. |
|
Faithful's Canvas Talisman |
Raises potency of incantations. |
|
Fire Scorpion Charm |
Raises fire attack, but lowers damage negation. |
|
Boosts fire damage negation. |
|
|
Flamedrake Talisman +1 |
Greatly boosts fire damage negation. |
|
Flamedrake Talisman +2 |
Vastly boosts fire damage negation. |
|
Greatly raises potency of incantations. |
|
|
Furled Finger's Trick-Mirror |
Take on appearance of a Host of Fingers. |
|
Enhances charged spells and skills. |
|
|
Godskin Swaddling Cloth |
Successive attacks restore HP. |
|
Increases runes obtained from defeated enemies. |
|
|
Raises potency of sorceries. |
|
|
Greatly raises potency of sorceries. |
|
|
Vastly raises maximum equip load. |
|
|
Greatshield Talisman |
Boosts guarding ability. |
|
Raises stamina recovery speed. |
|
|
Boosts holy damage negation. |
|
|
Haligdrake Talisman +1 |
Greatly boosts holy damage negation. |
|
Haligdrake Talisman +2 |
Vastly boosts holy damage negation. |
|
Hammer Talisman |
Enhances stamina-reducing attacks against blockers. |
|
Host's Trick-Mirror |
Take on appearance of a cooperator. |
|
Immunizing Horn Charm |
Raises immunity. |
|
Immunizing Horn Charm +1 |
Greatly raises immunity. |
|
Kindred of Rot's Exultation |
Poisoning or rot in vicinity increases attack power. |
|
Lance Talisman |
Enhances attacks on horseback. |
|
Lightning Scorpion Charm |
Raises lightning attack, but lowers damage negation. |
|
Renders the wearer immune to fall damage. |
|
|
Lord of Blood's Exultation |
Blood loss in vicinity increases attack power. |
|
Magic Scorpion Charm |
Raises magic attack, but lowers damage negation. |
|
Marika's Scarseal |
Raises attributes, but also increases damage taken. |
|
Marika's Soreseal |
Greatly raises attributes, but also increases damage taken. |
|
Millicent's Prosthesis |
Boosts dexterity, raises attack power with successive attacks. |
|
Mottled Necklace |
Raises robustness, immunity, and focus. |
|
Mottled Necklace +1 |
Greatly raises robustness, immunity, and focus. |
|
Increases memory slots. |
|
|
Extends spell effect duration. |
|
|
Boosts non-physical damage negation. |
|
|
Pearldrake Talisman +1 |
Greatly boosts non-physical damage negation. |
|
Pearldrake Talisman +2 |
Vastly boosts non-physical damage negation. |
|
Raises potency of perfume items. |
|
|
Primal Glintstone Blade |
Spells consume less FP, but maximum HP is reduced. |
|
Prince of Death's Pustule |
Raises Vitality. |
|
Prosthesis-Wearer Heirloom |
Raises Dexterity. |
|
Shortens spell casting time. |
|
|
Radagon's Scarseal |
Raises attributes, but also increases damage taken. |
|
Radagon's Soreseal |
Greatly raises attributes, but also increases damage taken. |
|
Red-Feathered Branchsword |
Raises attack power when HP is low. |
|
Ritual Shield Talisman |
Raises defense when HP is at maximum. |
|
Raises attack power when HP is at maximum. |
|
|
Roar Medallion |
Enhances roars and breath attacks. |
|
Rotten Winged Sword Insignia |
Greatly raises attack power with successive attacks. |
|
Sacred Scorpion Charm |
Raises holy attack, but lowers damage negation. |
|
Sacrificial Twig |
Will be lost on death in place of runes. |
|
Shabriri's Woe |
Constantly attracts enemies' aggression. |
|
Shard of Alexander |
Greatly boosts the attack power of skills. |
|
Raises item discovery. |
|
|
Spear Talisman |
Enhances counterattacks unique to thrusting weapons. |
|
Boosts magical damage negation. |
|
|
Spelldrake Talisman +1 |
Greatly boosts magical damage negation. |
|
Spelldrake Talisman +2 |
Vastly boosts magical damage negation. |
|
Stalwart Horn Charm |
Raises robustness. |
|
Stalwart Horn Charm +1 |
Greatly raises robustness. |
|
Stargazer Heirloom |
Raises intelligence. |
|
Starscourge Heirloom |
Raises strength. |
|
Taker's Cameo |
Restores HP upon defeating enemies. |
|
Enhances final hit of chain attacks. |
|
|
Two Fingers Heirloom |
Raises faith. |
|
Viridian Amber Medallion |
Raises maximum stamina. |
|
Viridian Amber Medallion +1 |
Greatly raises maximum stamina. |
|
Viridian Amber Medallion +2 |
Vastly raises maximum stamina. |
|
Warrior Jar Shard |
Boosts the attack power of skills. |
|
Winged Sword Insignia |
Raises attack power with successive attacks. |
Sources: PushSquare, Tyrannicon/YouTube, SwoleBenji/YouTube
-
Elden Ring
- Released:
- 2022-02-25
- Developer(s):
- FromSoftware
- Genre(s):
- Action, RPG
- Platform(s):
- PlayStation 4, Xbox One, PlayStation 5, Xbox Series X/S, PC
- Publisher(s):
- Bandai Namco Entertainment
- ESRB:
- M
- Expansion Packs :
- The Colosseum
- How Long To Beat:
- 56 Hours
