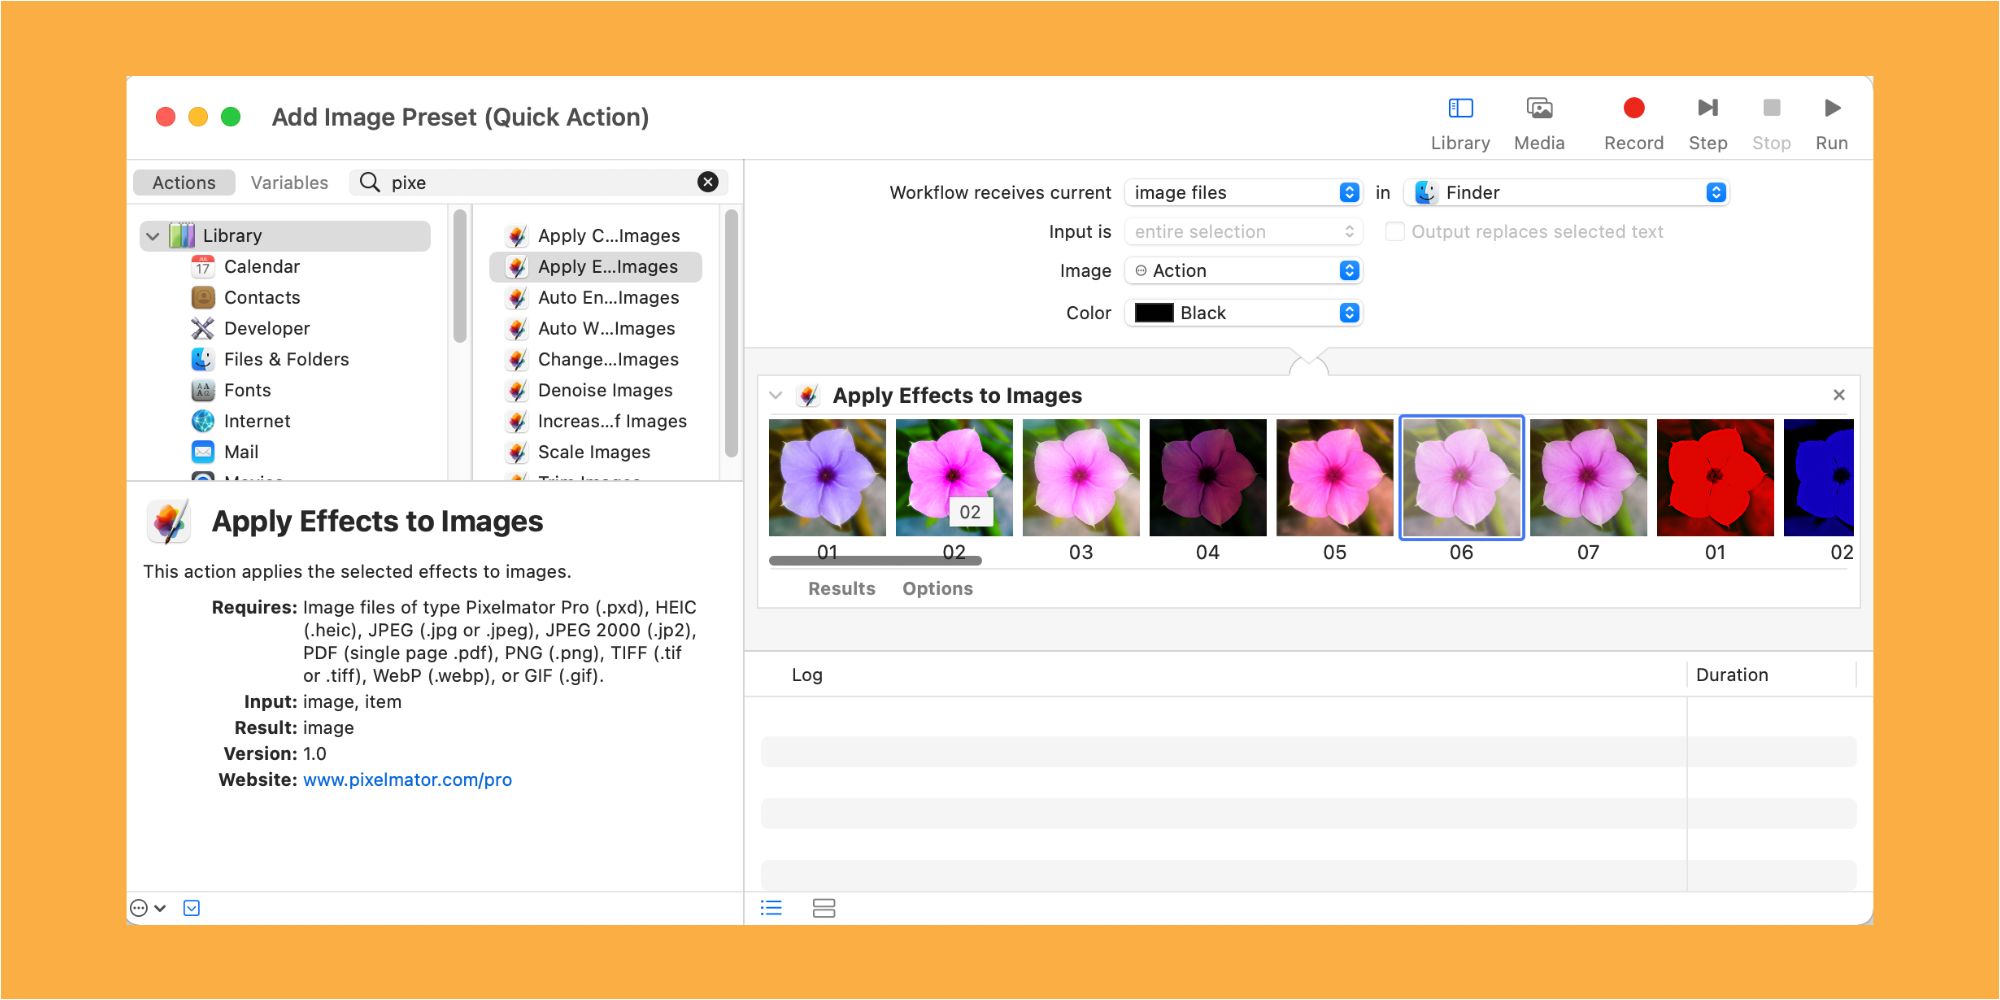
There are many options for editing photos on a Mac, but one of the most convenient methods is to make adjustments without opening any apps. All macOS products come with Automator built-in, a legacy software feature that lets users create custom automation to run on their Mac. In many ways, the tool is similar to Apple’s Shortcuts, except that with Automator, actions apply to files and folders.
Pixelmator Pro is a powerful image editing app for macOS, iOS and iPadOS. Pixelmator features all the usual settings and adjustments one might expect, but it also has multiple one-click solutions for looks and styles. Additionally, the software includes several machine learning-based adjustments, which can trigger with the press of a button. Once a look is baked in, it’s easy to save as a preset and apply to a batch of other stills.
Even with presets in place, editing photos can still be time-consuming Fortunately, by combining the power of Pixelmator Pro with the capabilities of Automator, it’s possible to make quick image edits directly from Finder without having to launch an app. The process involves a little setup at first, but adjustments are as simple as locating the file and making a couple of clicks once established.
Working With And Pixelmator Pro And Automator
To begin, download Pixelmator Pro from the macOS App Store. It’s important to note that the app is not free, but it does go on sale from time to time. Once Pixelmator Pro is installed, it’s worth experimenting with the various image presets to get a sense of how they change an image. The critical thing to remember when editing images from Finder is that adjustments are permanent and automatically overwrite the previous file version.
Next, launch Automator. (One quick method of finding the service is to search for it in Spotlight.) It displays a window asking which type of document the user would like to create when open. Select Quick Action. Within Quick Action, locate the “workflow receives current” dropdown tab in the upper center of the screen. By default, the option is set to “Automatic (text).” Next, change it by opening the dropdown and choosing “image files.” Then, click the neighboring “any applications” dropdown and set it to Finder.
In the Actions tab on the far left of the display, click on the search bar and type “Pixelmator.” This will show all the native Pixelmator actions that work with Automator. In addition, there’s an option to denoise an image, make color adjustments, and more. Select the desired action and drag it across to the main work area. Once in place, some steps allow additional adjustments, letting the user set a predetermined filter to a still. It’s also possible to include multiple actions, all of which will be applied simultaneously. When all the steps have been selected, save the Quick Action (File > Save) and give it a title. This should be an obvious name that explains what it does.
Once everything is in place, it’s easy to edit images on the Mac using Finder. Simply locate the file and right-click to bring up the actions menu. Scroll down to highlight Quick Actions and then choose the right one. A small cog will briefly display in the Menu Bar as the Quick Action runs in the background. When the animation disappears, the edit is complete.


